Transmission bittorrent is probably the most common bittorent client for Linux platforms. Transmission web interface is like a thin client yet feature-rich and aesthetically pleasing. Bittorrent client for Windows and Linux are both available. In this post, I will explain how to setup server running Ubuntu 12.04 with Transmission Apache proxy. Technically it is a reverse proxy, that allows you to access transmission web interface without the use of port numbers. I used deluge for 3 years before switching recently to Transmission and I should say that I am impressed. It can be run headless with a great looking transmission web interface. Please follow my previous post on how to install Transmission torrent client, prior to setting up Transmission Apache proxy. This method works on previous versions of Ubuntu as well (>10.04). While this post explains how to run Transmission web interface on a headless server, if you are running a desktop environment, installing a Gtk or Qt interface is just one step away.
Transmission Apache Proxy
 Transmission daemon by default works on port 9091. Transmission webui default username and password is
 transmission.
I usually like to not have anything work on its default port for security reasons. But anyway, to access the web interfaces using port numbers (eg. http://myserver.com:9091) is cumbersome. I like to create Transmission Apache proxy for easier access (eg. http://myserver.com/transmission). Below is a description of how to achieve this on Ubuntu Server.
Best Standalone Bittorrent Downloaders:
First enable the proxy modules in Apache:
sudo a2enmod proxy
sudo a2enmod proxy_http
sudo /etc/init.d/apache2 restart
Then you will have to edit /etc/apache2/mods-available/proxy.conf file. But before that backup your proxy.conf file:
cd /etc/apache2/mods-available
sudo mv proxy.conf proxy.conf.default
Now create a new file called proxy.conf using your favorite text editor and add the following lines to it:
<ifmodule mod_proxy.c>
  #turning ProxyRequests on and allowing proxying from all may allow
  #spammers to use your proxy to send email.

  ProxyRequests Off
  <proxy *>
    AddDefaultCharset off
    Order Allow,Deny
    Allow from all
  </proxy>

  ProxyPass /transmission http://localhost:9091/transmission
  ProxyPassReverse /transmission http://localhost:9091/transmission
  # Line below is optional
  Redirect permanent /transmission https://myserver.com/transmission/web/

  # Enable/disable the handling of HTTP/1.1 "Via:" headers.
  # ("Full" adds the server version; "Block" removes all outgoing Via: headers)
  # Set to one of: Off | On | Full | Block

  ProxyVia On
</ifmodule>
The ProxyPass and ReverseProxyPass lines create an Transmission Apache proxy (actually a reverse proxy). The redirect statement (optional) permanently redirects http connections to https connections for security. Then save the file, close it, and restart Apache:
sudo /etc/init.d/apache2 restart
Transmission Web Interface
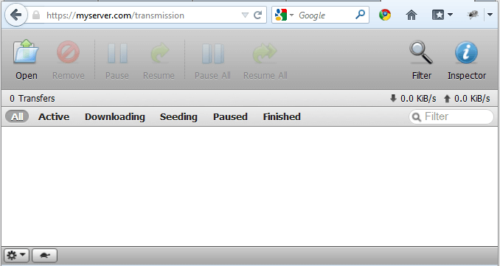
Now you should be able to access transmission web interface using http://myserver.com/transmission.
If you have DHCP server, you may have forwarded the port (9091) to the computer on which transmission daemon is running. You may now disable this cutting access to the transmission daemon using the port. However, there is a disadvantage to doing this. You will not be able to use transmission clients on other computers or phones (eg. transmission-remote-dotnet or Transdroid) to connect and control your transmission daemon. So the decision to forward the port is up to you.
Recommended For You:
There you have it. Setup Transmission Apache proxy and enjoy the easier access to the transmission web interface.


