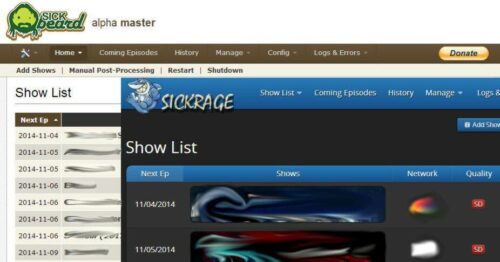
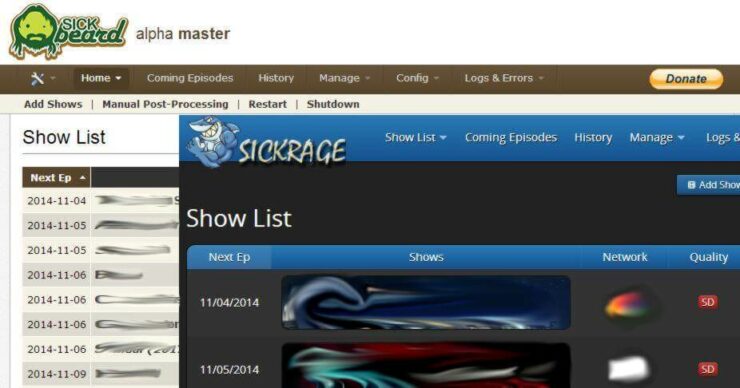
May be you read my SickBeard vs SickRage comparison or just stumbled upon SickRage and decided to migrate from SickBeard to SickRage. I have setup SickBeard, configured it to manage my Shows, and used it for 2 years now without any issues. I tried Sonarr but came back to SickBeard because it just works for me. When I learned about SickRage, I installed SickRage on my Ubuntu Server and gave it a try. I was so impressed that I decided to migrate from Shows library from SickBeard to SickRage. So in this guide I will show you how to replace SickBeard with SickRage for Shows management. [Read: What is Usenet and why is it better than Torrents?]
Table of Contents
Migrate from SickBeard to SickRage
Let me break your excitement here for a minute. SickBeard's database and settings (config.ini) are NOT compatible with SickRage. So you can just move everything from SickBeard to SickRage with a click. That said, replacing SickBeard with SickBeard TVRage is quite simple. After installation just allow SickRage to rescan your library and you should be good. While scanning can take some time depending on the size of your library it is not a tedious job in any way.
The method I am describing will allow you to ensure that SickRage is working as it should before removing SickBeard. If you encounter any issues you can always fall back to your working SickBeard installation. So you won't have much downtime :-). [Read: 5 Best Usenet Search providers for Sick Beard and CouchPotato]
Before proceeding, one recommendation to avoid compatibility issues and smooth transfer/importing of shows is to enable "Show Info" under XBMC 12+ in the Meta data section. Then run a full update on all shows using the mass update function of Sickbeard. This ensures that all metadata are present for SickRage to recognize and import shows.
1. Stop SickBeard
If your installed SickBeard using our guide and it is installed in your home folder under .sickbeard then this method should work flawlessly. Otherwise, you might have to make some minor changes to correct paths where ever needed. First stop SickBeard:
sudo service sickbeard stop
Ensure that SickBeard is stopped by visiting the web interface (it should not open). Then stop existing SickBeard from autostarting using the following command:
sudo update-rc.d -f sickbeard remove
2. Install SickRage
Follow our SickRage installation guide for Ubuntu to setup from SickRage Git. SickRage by default uses the same installation parameters (folders, filenames, etc.) as SickBeard. This can cause conflicts. With our method, SickRage is installed in a folder different than SickBeard and its init scripts are also stored with unique filename.
| Provider | Rating | Features | Monthly | Yearly |
|---|---|---|---|---|
| Newshosting | >3000 days, unlimited, SSL, VPN | $9.99 | $99.99 ($8.33 / month) | |
| UsenetServer | >3000 days, unlimited, SSL, VPN | $9.99 | $99.99 ($8.33 / month) | |
| Eweka | >3000 days, unlimited, SSL, EU Servers | €7,50 (Special!!!) | ||
| For more plans that may fit your needs please read our Usenet plan selection guide. | ||||
There are ways to run both SickBeard and SickRage simultaneously but that is out of the scope for this post. But by following our method to install SickRage, you can switch between SickBeard and SickRage any time.
3. Move Shows from SickBeard to SickRage
After SickRage installation it should already be running. If not use the following command to start SickRage:
sudo service sickrage start
Then visit SickRage web interface by going to http://localhost:8081 (or whichever IP, Domain, or port you use in your case). Once in SickRage webui, click on "Add Show" and then "Add Existing Shows".
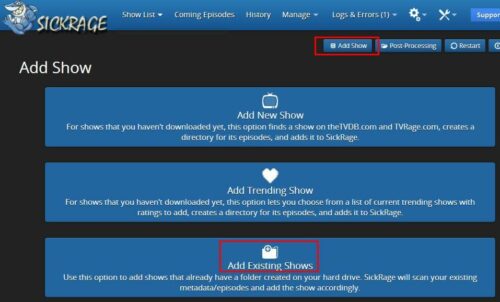
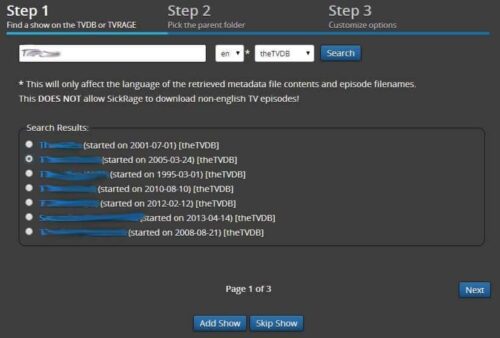
Then browse and select all the folders in which your existing root Shows are stored. In the example below, all Shows in separate folders within the "Shows" folder. SickRage should automatically detect and list all individual Shows folders. If you want to customize each show before adding, check that option. Then click "Submit" at the bottom of the page. [Read: 5 Must have Android apps for HTPC or Home Server control]

SickRage should then ask you to review each show before adding. In my case some shows were ("The Office" in US vs UK) wrongly identified. So review each show and add them all.
Give SickRage few minutes (or hours) to scan your TV Show library and import them. Once everything is imported, go ahead and configure SickRage as you would configure SickBeard. Let SickRage run for couple of days to ensure that everything works fine and all the downloads are happening successfully.
Best Standalone Bittorrent Downloaders:
4. Switch between SickBeard and SickRage
If something goes wrong or if SickRage is not working or if you just don't like it then you can always switchback from SickRage to SickBeard. First uninstall and remove SickRage using the following commands one-by-one:
sudo service stop sickrage
sudo update-rc.d -f sickrage remove
sudo rm /etc/default/sickrage
sudo rm /etc/init.d/sickrage
cd ~
sudo rm -r .sickrage
That should completely remove SickRage. If you want to reinstall SickRage again you may do so. Or, to reactivate your SickBeard to autostart issue the following command:
sudo update-rc.d sickbeard defaults
That's it you are back in business. If your move from SickBeard to SickRage went successfully then you can completely remove SickBeard.
That is all there is to do. Move your Shows management from SickBeard to SickRage and enjoy all the new features that SickRage has to offer.




![Ultimate Docker Media Server: With 60+ Docker Compose Apps [2024] Ultimate Docker Media Server](https://www.smarthomebeginner.com/images/2024/01/Docker-Series-02-Docker-Stack.png)
