Looking for a lightweight home server OS for Raspberry Pi? Take a look at Diet Pi. This post shows how to setup Diet Pi on Raspberry Pi 3. Diet Pi is a truly optimized and lightweight operating system for Raspberry Pi. It is based on Debian, so even our famous AtoMiC ToolKit should work on it. In my opinion, it is a top choice to setup home server, media servers, file servers, download stations, etc. on Raspberry Pi. What's more, Diet Pi even comes with pre-configured packages for popular home server apps that can automate media management. Let's go ahead and see how to install Diet Pi on Raspberry Pi 3.
Table of Contents
Setup Diet Pi on Raspberry Pi 3
Diet Pi is made specifically for low powered devices like the Raspberry Pi and Odroid. It is compatible with a wide range of devices and it offers a stable base for the services you want to install. Besides that, the DietPi OS has optimized software installers compiled specifically for the Raspberry Pi 3 that automate the install process, making the setup a simple process. [Read: 7 Raspberry Pi accessories to build a Kodi media center]
1. Download DietPi Image for RPi3
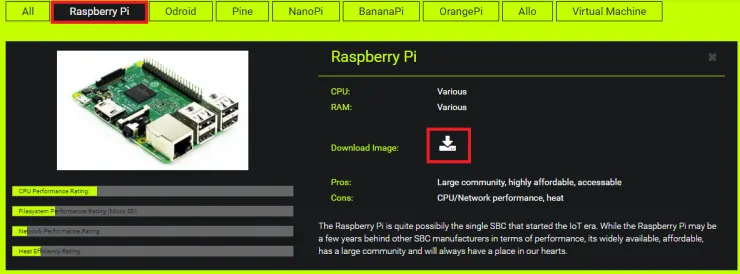
First, download the DietPi image for RaspberryPi by going on the DietPi Website. Click on the DOWNLOAD button, then select the Raspberry Pi and finally click on the download button.
2. Download Etcher - For writing DietPi image to SD card
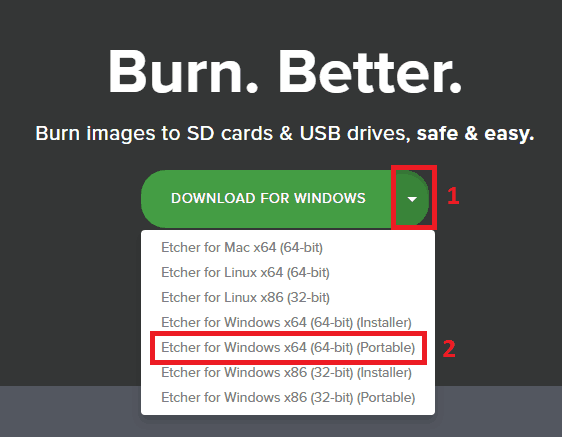
While the DietPi image is downloading, we need to download an app for writing the image to the SD Card. I am using Etcher because it also performs validation after writing the .img file and it has a really easy to use interface. In order to download it, just go on etcher.io site then click on the arrow next to the Download for Windows button, then select the portable version for Windows.
3. Install Diet Pi on Raspberry Pi 3
After downloading both archives make sure you extract them so you have the DietPi .img file and the folder for Etcher like in the screenshot below and proceed with the Raspberry Pi Diet Pi installation.

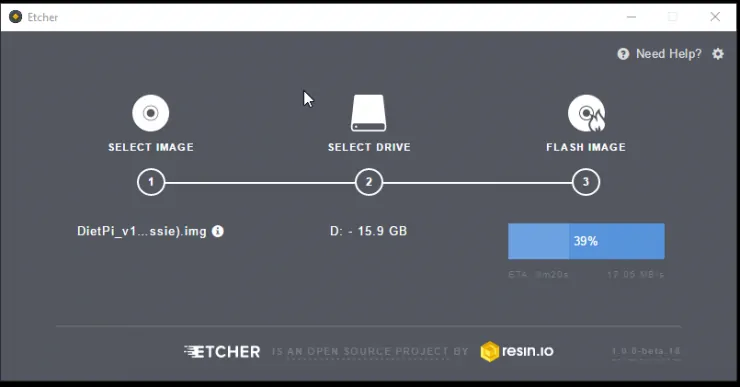
Next, plug in the SD Card in the computer, go to the extracted Etcher folder, and double click on Etcher.exe to open it. When Etcher is open, first, select the DietPi image, next select the SD Card you previously inserted, and click Finish to start writing the image, as shown in the picture below.
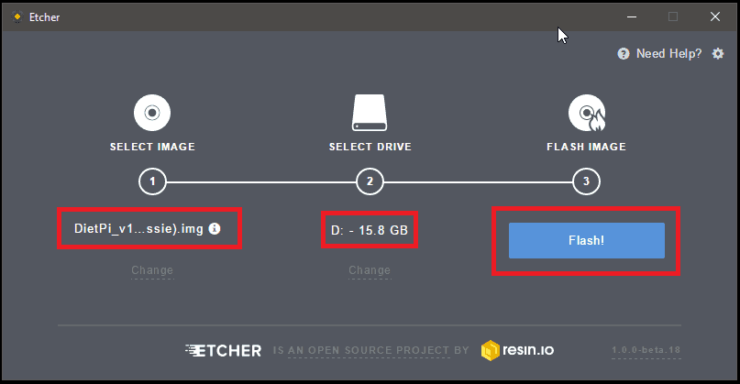
After clicking on the Flash! button, Etcher will start writing the .img file to the SD card.
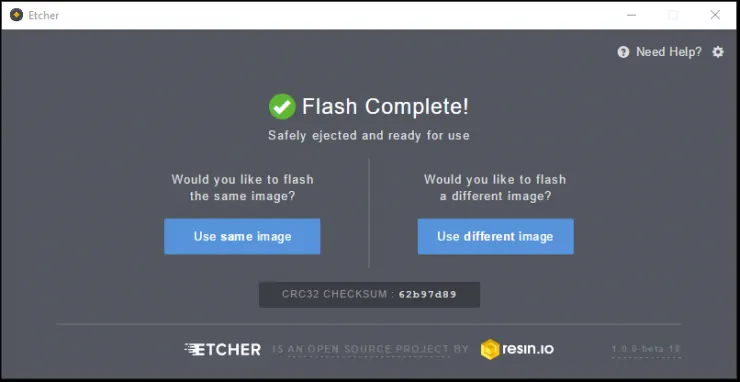
Wait until you get the "Flash Complete!" confirmation that the image has been flashed successfully then take your SD card out and plug it into your Raspberry Pi3.
Next, connect the power cable to the Raspberrry Pi and the DietPi boot process will begin which takes about 2 minutes. Now all you need to do is wait for DietPi to display the IP where you can connect via SSH. You are now ready to setup your Raspberry Pi home server.
Looking for an automated solution? Try our AtoMiC ToolKit, which makes installation and management of Home Server software such as SickBeard, CouchPotato, Torrent clients, etc. easy.
Connect to your Raspberry Pi 3 via SSH
Connecting to your Raspberry Pi 3 via SSH is really easy. You just need to use a SSH Client and enter the IP of the SSH device you want to connect to.
First, make sure you download Putty on your computer and open it. [Read: 10 best SSH Clients for Windows: free alternatives to PuTTY]
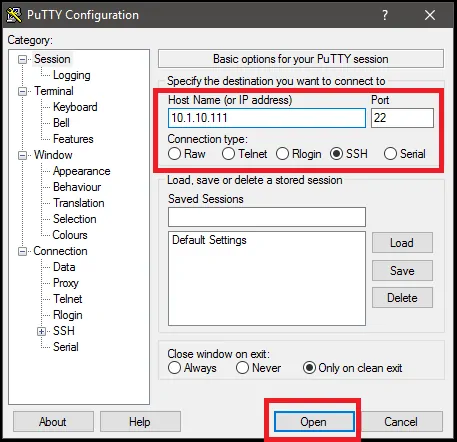
Next, type the IP for your device, the port (22 is the default port for SSH), and select SSH, then click on the Open button to start the connection.
A link to the Raspberry Pi will be made and the Login prompt will appear. For DietPi the default username is root and the password is dietpi.

If the credentials used are correct, DietPi will start it's automatic update process, to make sure you are using the latest version. This process usually takes about 5 minutes, so wait patiently until you get the confirmation that the update has been completed then press enter to reboot the device.
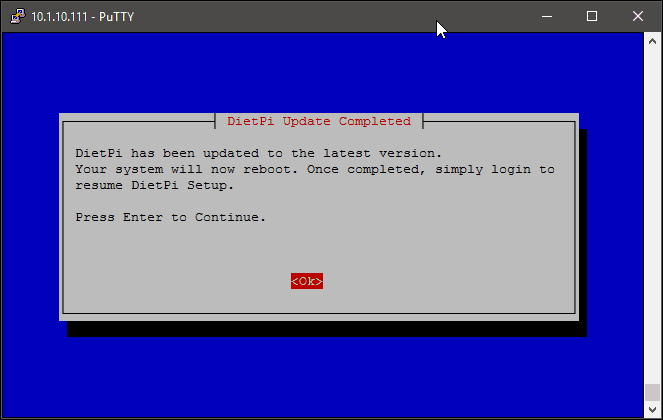
Once Raspberry Pi 3 with Diet Pi reboots, you can now connect through SSH and use DietPi-Software app to install several home server apps.
Diet Pi Installation on Raspberry Pi 3 is now complete. What do do next?
Congratulations! You managed to setup Diet Pi on Raspberry Pi 3 and you now have a dedicated Raspberry Pi Home Server for installing apps such as SickRage, Plex, Emby, etc. This home server setup will be one of the most lightweight lower-power setup you can build. It will cost you less than $10 to keep it running 24/7 for a year. It is hard to beat that. Sounds exciting? Go ahead setup Diet Pi on Raspberry Pi 3 and follow the upcoming guides to setup the server.

