Redis is a free and open source in-memory cache for databases that significantly speeds up data lookups and reduces load on database servers (e.g. MariaDB, MySQL, PostgreSQL, and more). It can also act as a high performance database (key value store) and message broker.
However, to take advantage of Redis's benefits, you need an application that is capable of using Redis.
Redis does a lot of things very well. But what is the significance of this to a server administrator and/or homelab user? We will cover that with some ways Redis can enhance your experience.
For me, it is part of my self-hosted multifactor authentication system with Authelia and an in-memory key value store to speedup my docker-based WordPress site.
But first, let us see look at a Redis Docker Compose example to add to our stack.
Table of Contents
Redis Docker Compose Example
When I first started out with my Docker server setup, I had no idea what redis was and how I could use it. If you are like me, do not worry. In addition to showing you how to setup Redis with Docker Compose, I will also share how I use it in my own humble way.
What is Redis docker-compose?
Redis Docker-Compose is a template or a set of instructions in YAML that will create a Redis server as a Docker service.
While Redis can also be installed using plain old Docker, Docker-compose makes it very easy to install.
Requirements for Redis Docker Compose
In order to successfully follow this docker-compose Redis tutorial, you will need Docker and Docker Compose installed and running.
While not required, I strongly recommend also reading and following my basic Docker server guide.
Redis with Docker Compose
With Docker and Docker Compose running, let us now move on to Redis Docker Compose setup.
There are several Redis images available on Docker Hub.
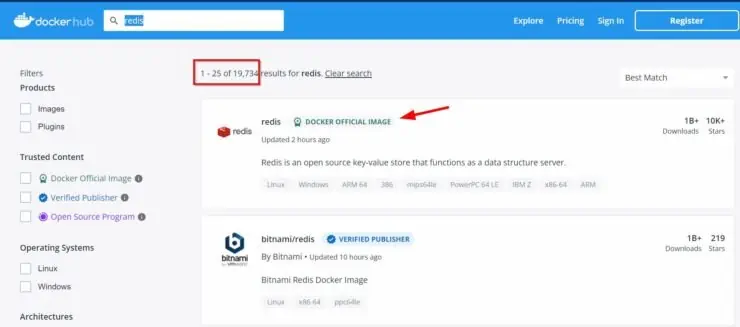
We are going to be using the offical Redis image, pictured above. But the Bitname Redis image is also a trustworthy and reliable image. [Read: 20 Docker Security Best Practices – Hardening Traefik Docker Stack]
Building a Docker Compose File for Redis
Unfortunately, the official Redis image does not provide a Redis docker compose file. Fear not, here the docker-compose for Redis.
First, if you are starting a new Redis Docker-Compose file, then add the following at the top:
version: "3.9"

networks:
  default:
    driver: bridge
We are defining the docker compose file version and a network named default, that Redis will use.
If you already have an existing Docker compose stack that you are adding Redis to, then just copy-paste the Redis Docker-Compose snippet below:
  # Redis - Key-value Store
  redis:
    container_name: redis
    image: redis:latest
    restart: always
    entrypoint: redis-server --appendonly yes --requirepass $REDIS_PASSWORD --maxmemory 512mb --maxmemory-policy allkeys-lru
    networks:
      - default
    ports:
      - "6379:6379"
    volumes:
      - $DOCKERDIR/appdata/redis/data:/data
      - /etc/timezone:/etc/timezone:ro
      - /etc/localtime:/etc/localtime:ro
Docker Compose Redis Configuration
- container_name - You can specify whatever you like.
- image - We are using the latest version of the official Redis image.
- restart - We are setting the Redis docker container to restart always (e.g. after boot or failure).
- entrypoint - We are setting some configuration parameters at the start of Redis service. Typically, you will only have to configure two things. You can replace $REDIS_PASSWORD with your password or set the password as an environmental variable. The second parameter is the maximum allowed RAM memory for Redis.
- networks - We are making redis docker container, a part of the default network. But you should change this to fit your needs. For example, in my WordPress stack, I put Redis on the same network as MariaDB so they can see each other.
- ports - The default Redis port is 6379. We are exposing port 6379 from inside the container to port 6379 of the Docker host. So you should be able to connect to Redis using DOCKER-HOST-IP:6379.
- volumes - We storing all Redis information in a persistent $DOCKERDIR/appdata/redis/data folder. You could use your own location on Docker host. But as I have explained previously in my Docker guide, I like to put everything in appdata folder. We are also passing timezone and local time info from the Docker host to Redis docker container.
Running Redis Using Docker-Compose
We are almost there. So, how do I start Redis in docker?
I strongly suggest you review the Docker and Docker Compose usage information published previously. But here is the command to start Redis Docker compose stack:
sudo docker-compose -f ~/docker/docker-compose.yml up -d
After starting, you can check the logs of Docker redis container using the following command:
sudo docker-compose logs redis
Your logs may look something like what is shown below.

In the above case, Redis server started successfully without any issues.
Enhancing Redis Experience
Now that you have Redis installed using Docker Compose, let us see how to use it.
Redis Use Cases
There are numerous use cases for Redis. But I use Redis only for two purposes.
1. WordPress Performance
I use Redis to speedup the performance of this site by caching database lookups in memory using Redis. I do this using Redis Object Cache plugin.
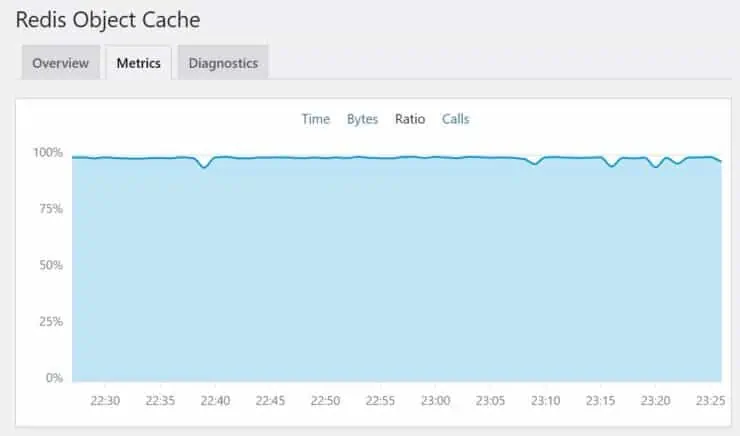
As you can see, I have almost 100% hit ratio for database calls that would otherwise be sent to MariaDB.
2. Authelia Authentication
I also use Redis to speed up Authelia authentication - a self-hosted multifactor authentication system. This is explained in detail in my Authelia guide.
How to Make Docker Compose Wait for Redis?
Your services or other docker containers may depend on Redis for starting successfully. If this is the case, you can add the following snippet to docker-compose snippets of those services so they all wait for Redis container to be started first.
    depends_on:
      - redis
That is a copy-paste from my Nginx service on my Docker WordPress stack, which will need Redis to be started before starting.
How do I interact with Redis docker?
You can interact with Redis in multiple ways.
Redis Container Shell
If you want to access the shell of your Redis server, then use:
sudo docker exec -ti redis /bin/bash
From here, you can use Redis commands to explore Redis's contents.
Redis GUI Client
Sometimes, GUI clients are a lot more easier to use. For this there are several tools available. But here are 3 I have used in the past.
- Redis Desktop Manager - Free Redis GUI for Windows, MacOS, and Linux.
- Redis Commander - A Docker based web UI for Redis server. Check my obsolete Docker compose example in my GitHub for an example.
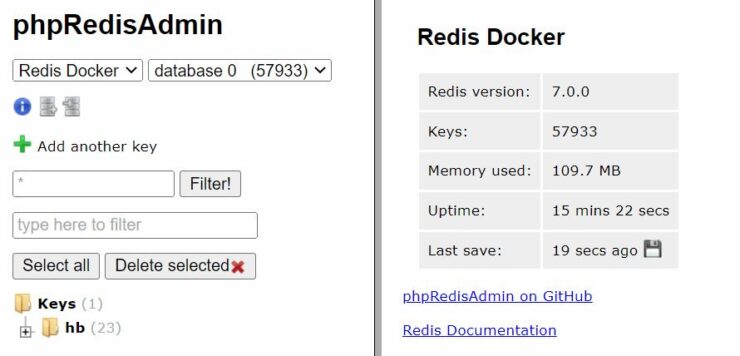
- phpRedisAdmin - I replaced Redis Commander with this one for that rare occasion that I have to check Redis's contents.

Phpredisadmin
Concluding Remarks for Redis Docker Compose
At one point of time, setting up Redis was a lot more difficult. But with Docker it became simpler.
But installing Redis using Docker Compose takes the ease of setup to a whole new level.
I could see a noticeable performance improvement in Authelia authentications and WordPress speed with the use of Redis. It is also known to have similar performance improvements for Node.js or Express.js REST API applications.
While Redis is optional in many cases, I strongly recommend it. So if you have been thinking about it, then go ahead and use the Redis docker compose example from this guide and try it out for yourself.



![Authelia Docker Compose Guide: Secure 2-Factor Authentication [2024] Authelia Docker Compose Guide](https://www.smarthomebeginner.com/images/2024/02/Docker-Series-06-Authelia.png)
![5 Best NAS with SSD Cache for Home and Office [2023] A feature image that shows all 5 of the best NAS that supports SSD caching for home and office](https://www.smarthomebeginner.com/images/2023/10/best-nas-with-ssd-cache-feature-image.png)