If you have been following me, I recently moved my home server to Proxmox and I couldn't be happier. I snagged the server option described in the bonus section.
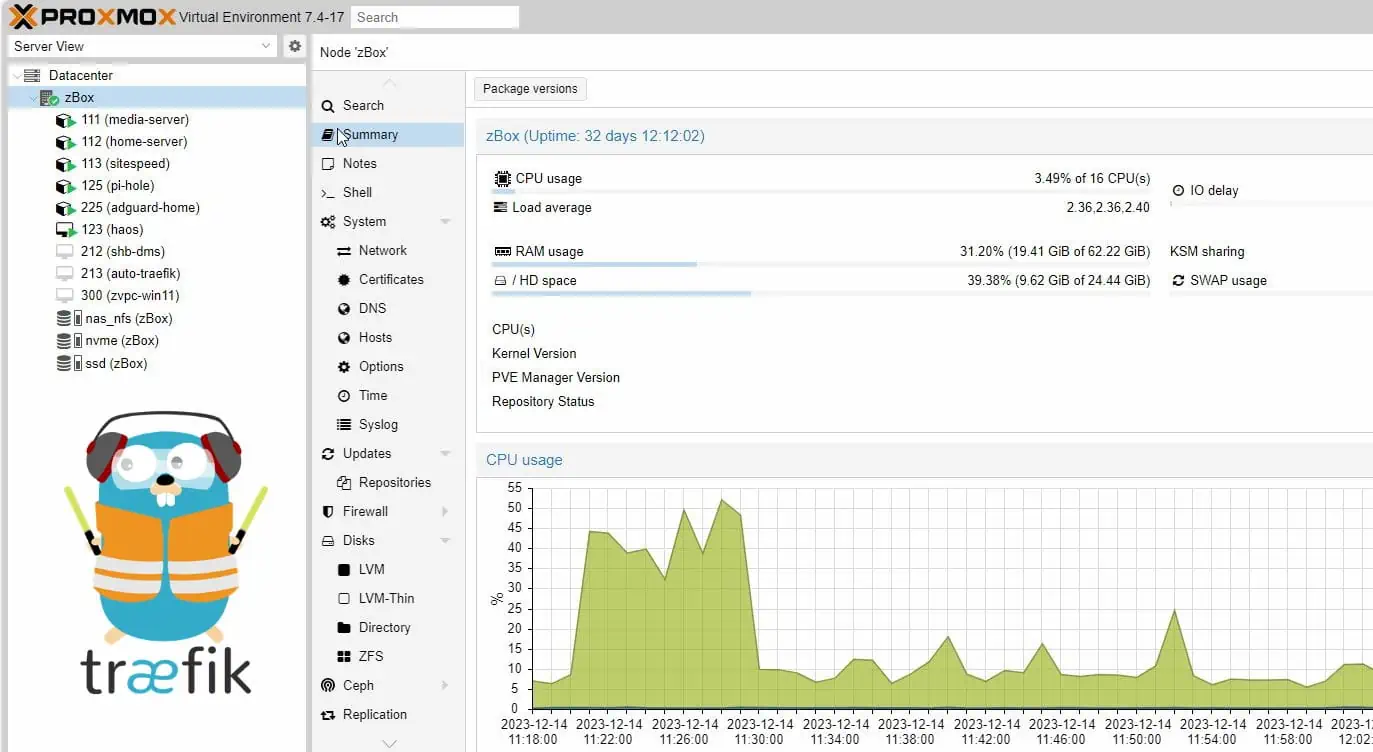
I installed proxmox and started running several virtual machines and LXC containers, including the Docker Traefik WordPress stack that runs this website and the Docker Traefik Media Server.
It is wonderful that Proxmox comes with a default self-signed SSL certificate to give you security right from the start.
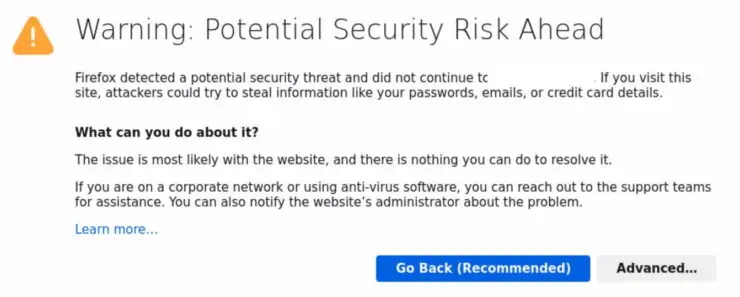
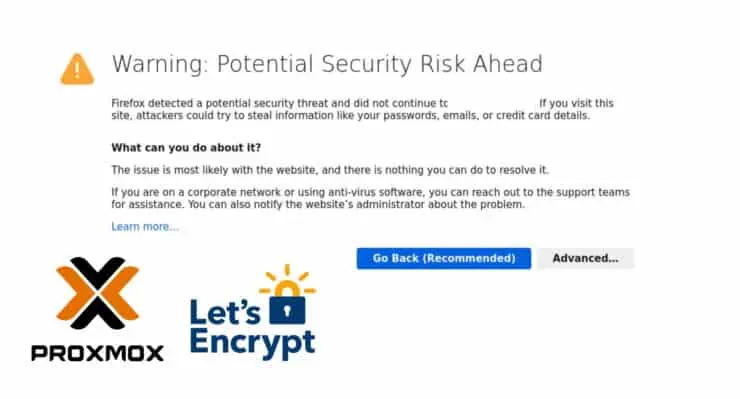
However, it can be a bit annoying to see the SSL security warning in the browser when we try to login into Proxmox web interface.
In this guide, let us look at how to easily install a valid LetsEncrypt SSL Certificate on Proxmox, with less than 5 minutes of work.
Table of Contents
- Proxmox SSL Certificate with LetsEncrypt
- Do you really a need properly signed SSL certificate for Proxmox?
- 1. Requirements for Proxmox SSL
- 2. Create a DNS A Record
- 3. Get Cloudflare Account ID
- 3. Create Cloudflare API Tokens
- 4. Create Proxmox Let's Encrypt Accounts
- 5. Add ACME Challenge Plugin for Cloudflare
- 6. Add Domain Name for ACME Challenge
- 7. Order Let's Encrypt SSL Certificate Proxmox
- Concluding Remarks on Proxmox VE SSL Certificates
Proxmox SSL Certificate with LetsEncrypt
So let us begin to install LetsEncrypt SSL certificate on Proxmox using ACME protocol.
Of course, as with almost everything in Linux, this can be done with commandline. But it is a lot more easier and intuitive to do this via the Proxmox web interface. So let's do that.
Do you really a need properly signed SSL certificate for Proxmox?
The answer is no from the security perspective. Even with a self-signed certificate, you will have encrypted connection and so the password is not transmitted in plain text over the internet. However, a valid Proxmox SSL certificate adds an element of trust and getting rid of the annoying security warning is definitely a plus.
1. Requirements for Proxmox SSL
Before proceeding with getting Proxmox ACME SSL certificates, ensure that you have the following:
- Domain Name
- A DNS Provider - I highly recommend Cloudflare (its free).
Obviously, you will also need a working Proxmox server. [Read: Proxmox vs ESXi: 9 Compelling reasons why my choice was clear]
In this Proxmox LetsEncrypt guide, we will use Cloudflare as the DNS provider. But almost any provider that supports ACME DNS challenge validation for LetsEcrypt should work.
2. Create a DNS A Record
Assuming that you now have Cloudflare as your DNS name server, first, we will need to create a DNS A record that points to your Proxmox server's public IP address.
To do this, login to your Cloudflare dashboard and under DNS tab, create a new DNS Type A record as follows:

In the above example, my Proxmox server will be available at pve.example.com, which points to the IP address 123.123.123.123. My Proxmox host is called cbox and you might see this instead in the screenshots below.
Usually, Cloudflare DNS records propagate very fast (<5 min in my experience). But it can take some time (up to 24 hours) for DNS servers around the world to get the updated information. This is why we are starting with this step first.
3. Get Cloudflare Account ID
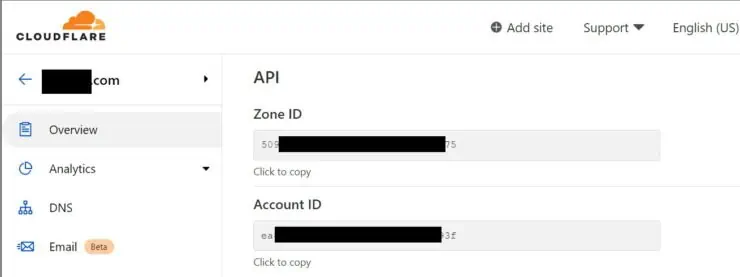
Proxmox SSL certificate creation needs your Cloudflare Account ID. To get this, go to the Profile under any domain and scroll down to find the Account ID as shown below.
Note it down - we will need it later.
3. Create Cloudflare API Tokens
Next, we will need to allow the Proxmox ACME protocol to create required DNS validation texts in your DNS records. For this, you will need to create an API token on Cloudflare that Proxmox can use during domain validation.
Right below where you found the Account ID from the Overview tab, you will find Get your API Tokens link. Alternatively, go to your Profile page and find the API Tokens tab, as shown below.
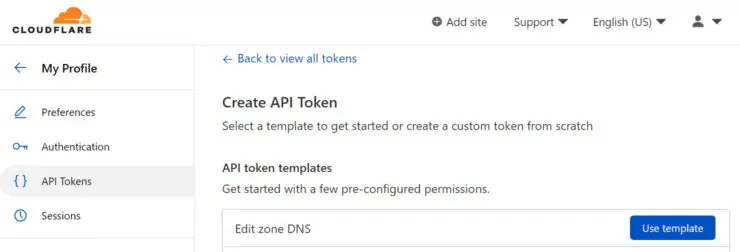
We are going to use the Edit zone DNS template to create our tokens. Create the token as shown below.
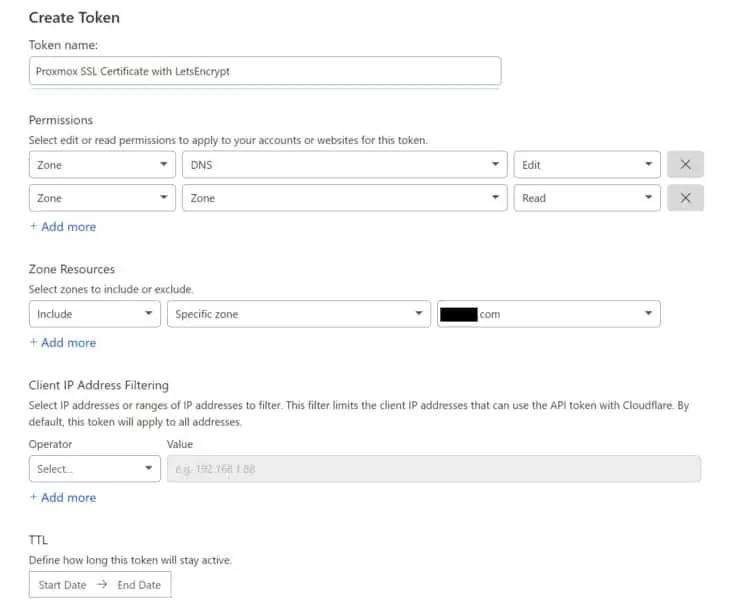
You will need to enable Zone DNS Edit and Zone Zone Read permissions for this token. Optionally (recommended), for improved security restrict this token to only the root domain name of your Proxmox server.
For even more security, you may specify the IP address of your server to allow usage of the token from only this IP with Client IP Address Filtering setting. But if you have a dynamic IP, do not use this option. In this Proxmox SSL tutorial, I am going to leave this off.
Click Go to Summary, confirm the choices, and create the token. Copy and save this token, as you did with the Accound ID previously. We will need this in the steps below.
4. Create Proxmox Let's Encrypt Accounts
Now that all the ground work is done, let us begin creating LetsEncrypt SSL certificates for Proxmox.
We need to create TWO accounts for LetsEncrypt: Staging and Production. Staging allows you to test before getting the real certificate. Staging is important because, if there are too many attempts, Let's Encrypt will block you for a certain period of time.
To create the Let's Encrypt accounts, go to Datacenter->ACME and click Add under Accounts.
First, we will register the staging account as shown below.
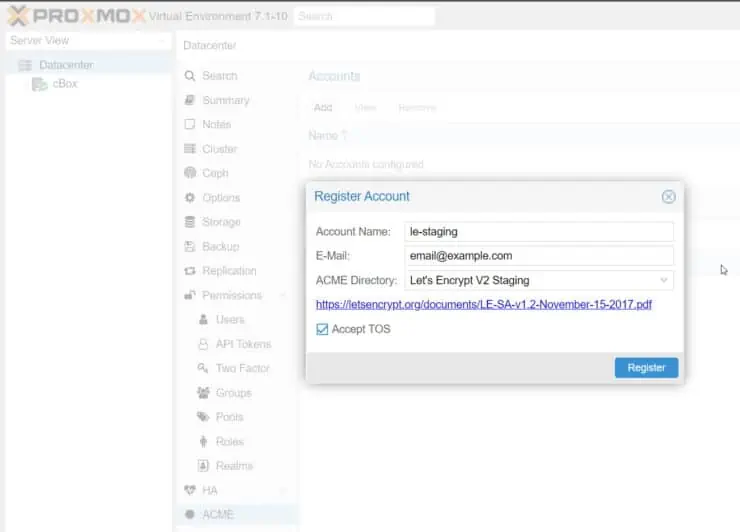
Provide anything recognizable for Account Name (e.g. le-staging). Email can be any valid email (it does not have to be on your domain). Then, choose Let's Encrypt V2 Staging for ACME Directory.
Accept the TOS and register the account. If successful, the Proxmox task viewer window should popup and say TASK OK.
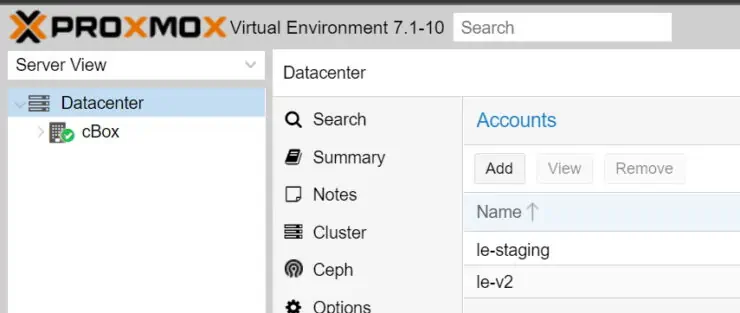
Then, repeat the exact same steps above to create the Let's Encrypt V2 account with a different Account Name (e.g. le-v2). You should now have 2 accounts as shown below.
5. Add ACME Challenge Plugin for Cloudflare
Next, we are ready to verify that we own the domain, using ACME DNS challenge. So let us add a new plugin by clicking Add under Challenge Plugins.
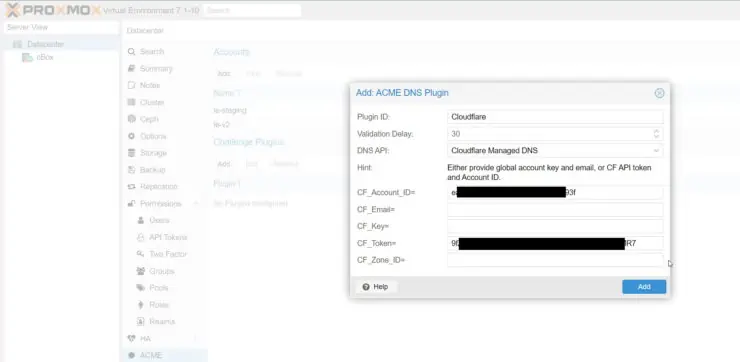
We are going to call this Cloudflare. Pick Cloudflare Managed DNS for DNS API. Finally, copy-paste the Account ID and Cloudflare API Token we created previously and add the plugin.
6. Add Domain Name for ACME Challenge
Then, go to the Node/Proxmox Host (not Datacenter) and find the Certificates tab. Edit the Using Account and pick the le-staging account we created previously.
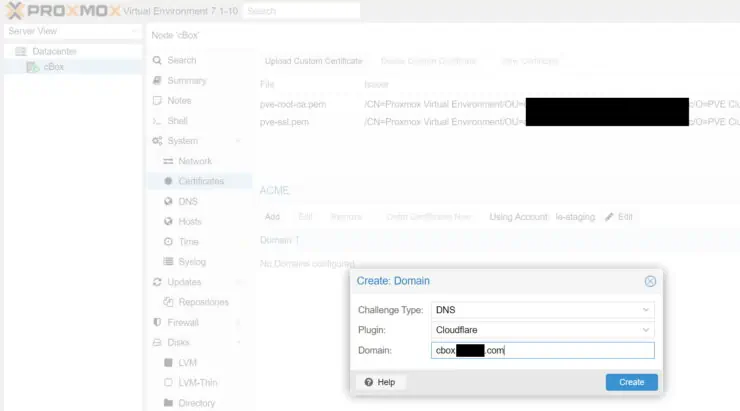
Next, click Add and add a domain as shown above. For Challenge Type pick DNS and for Plugin choose the one we added in the previous step (Cloudflare).
Create the domain.
7. Order Let's Encrypt SSL Certificate Proxmox
Now the magic begins. Highlight the domain you created and click Order Certificates Now. After few seconds or couple of minutes, the Proxmox task viewer should show that the certificates were download and end with TASK OK.
And finally, if the staging was successful, we can now order the real Proxmox SSL certificate.
Change the Using Account to le-v2 we created previously. Then, highlight the domain and click Order Certificates Now.
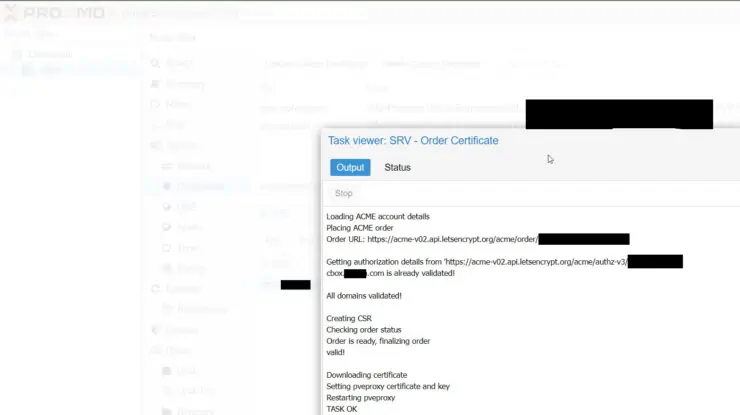
If successful, the Proxmox task viewer should popup, go through certificate retrieval, and end with TASK OK as shown above.
Now reload your Proxmox VE web interface using the domain name and port (default: 8006) and you should see your shiny new Proxmox ACME SSL certificate at work.
Concluding Remarks on Proxmox VE SSL Certificates
After setting Proxmox Let's Encrypt certificates for the first time, you can practically forget about it. Renewal happens automatically in the background every few days.
It is also possible to install your existing certificates from the web interface using Upload Custom Certificates button in the node/host's Certificates tab. But that was not the scope of this post.
Eitherway, having valid SSL certificates for Proxmox is nicer, secure, and convenient compared to self-signed certificates. So if you have been putting it off, just go ahead and do it. It literally takes less than 10 minutes from start to end.

![Ultimate Docker Server: Getting Started with OS Preparation [Part 1] Docker Server Tutorials 1 OS Preparation](https://www.smarthomebeginner.com/images/2024/01/Docker-Series-01-Intro-and-OS-Prep.png)
