With so many different solutions in the CCTV surveillance space, you may wonder what's the need for so much variety.
Surely, some of the most advanced options such as Frigate have a place in this realm, but sometimes there is a better tool for the job. Today, we are going to present to you the benefits that MotionEye brings along, and its most favorable use cases.
In this article, we will go over what MotionEye is, and how to set up a simple MotionEye Docker container along with its pros and cons. We will also give you some information about other installation options such as MotionEyeOS and bare metal installation.
Table of Contents
- What is MotionEye?
- MotionEye Installation
- FAQ
- What is MotionEye?
- What Is the Best OS for MotionEye?
- What is MotionEyeOS?
- Where can MotionEyeOS be installed?
- How to install MotionEyeOS on Raspberry Pi?
- How do I access MotionEye?
- What is the default login for MotionEye?
- What Configuration Files Does MotionEye Use?
- How Do You Use MotionEye with Home Assistant?
- Concluding Remarks on MotionEye Docker Container
What is MotionEye?
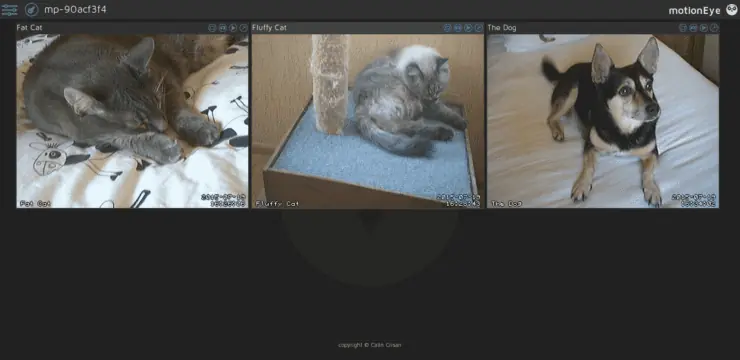
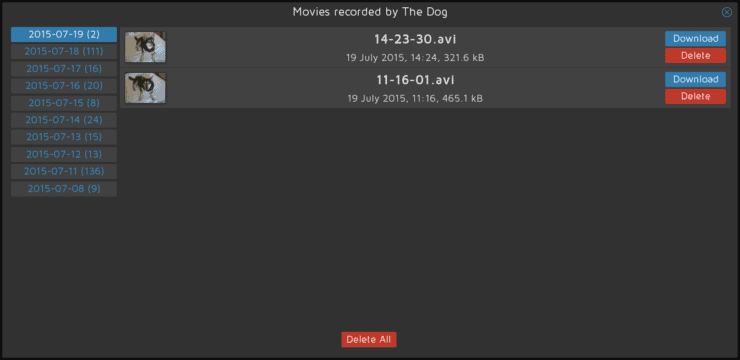
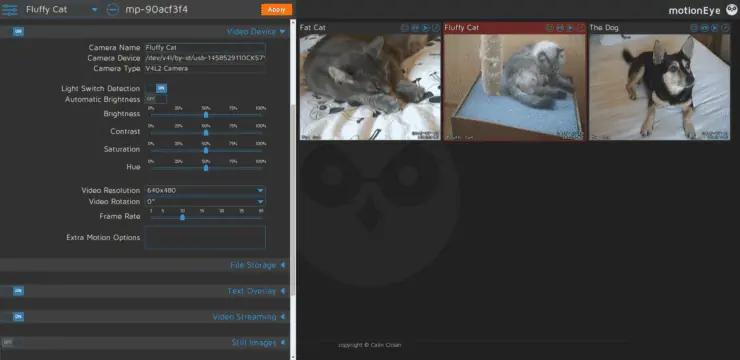
MotionEye is a frontend for Motion, a software created to monitor video from cameras and trigger actions based on movement. Both are open source and widely used. MotionEye allows users to easily manage video feeds and configure recording, as well as many other tasks, making Motion's main features easily accessible.
This tool is a great solution for several different use cases, but it may be best to not expose it to the internet directly to the internet.
This is mainly because updates to it have been slow and rare recently , and may pose security concerns. [Read: 10 Best MotionEye Alternatives : Rock-Solid Video Surveillance]
However, if your network is secure and/or you use a VPN or reverse proxy to access MotionEye that shouldn't be much of an issue. You can learn more about this in Step 4 of this guide.
What are the advantages and disadvantages of MotionEye?
If you have a low-end computer that you can use, MotionEye is perfect. Most computers running a recent Linux distro will suffice.
Sometimes it may be the perfect solution to put an old camera to use, as setting up any USB camera is extremely simple. It can create a network stream for each of the cameras, essentially turning them into IP cameras.
| The Good | The Not-so-Good |
|---|---|
|
|
MotionEye Installation
Installation Methods for MotionEye
MotionEye can be installed directly on Linux distros such as Debian, Ubuntu, Raspbian, Fedora, and Arch. This may take a bit longer than Docker MotionEye installation method covered in this guide, since you may have to install several packages before MotionEye.
Running it in a container is the best option for several use cases, such as testing or when you want to run a few different instances in the same host. I recommend this method as it's easy to set up and does not require you to modify your host operating system (other than installing Docker if you haven't already).
For single-board computers such as the Raspberry PI you can also use MotionEyeOS, a complete operating system maintained as an open-source project. You can find more information about MotionEyeOS in the FAQ section at the bottom of this article.
Installing MotionEye Docker Container
Requirements
Docker and Docker Compose
This guide will be easy to follow, but I will assume you already have a working Docker setup. If you don't, you can check out Anand's Docker guide for beginners.
In fact, if you are new to Docker, I encourage you to browse other related articles at Smart Home Beginner to see its full potential as it relates to home servers.
If you prefer a video on this topic, Anand covered how to install Docker with Compose in this detailed video:
Camera RTSP Stream
You may also want to look for information about your camera. If it's a network camera, you should get its RTSP stream URL. This URL will depend on the model of your camera, but it probably looks a lot like this: rtsp://user:[email protected]:554.
Most often, you can find this information through a quick Google search. Adding other camera types should be relatively straightforward too.
Step 1. Create a Directory to Store MotionEye Docker Container Files
If you are following Anand's usual folder structure you should create this directory under ~/docker/appdata/, but any location should work as long as you know where it is. You will need this route in step 2.
mkdir motioneye
Step 2. Create a MotionEye Docker Container
There are some options you should know about before creating your MotionEye Docker container:
- privileged - This means the container has full access to all of the host's devices, including the filesystem. For improved security, it would be best to set it to False. To add USB cameras into your MotionEye Docker container, you have to run it as privileged or give the container access to each device in the host system.
- volumes (-v option in docker run) - In this section you can map paths in your system to those used by MotionEye, so things like storage and configuration files can be accessed in the host itself.
- ports (-p option in docker run) - These ports are mapped to access the container through the network. You can change them if you already have services occupying them. MotionEye can provide RTSP streams to be used in other systems, if you enable them you will need to map those ports as well.
Make sure to change the volumes configured to reflect the location of your motioneye folder created in Step 1. In this case, I used /home/user/motioneye.
For MotionEye Docker Compose, follow step 2a. This is often the best approach, especially when troubleshooting your setup.
Using Docker Compose for MotionEye also makes it easier to bundle other services you run on the same host, as described in Anand's Ultimate Docker Media Server guide.
Using docker run may be easier for single-run tests, so we provide details for that method in step 2b.
Step 2a. Create docker-compose.yaml File
I used nano, a simple text editor often shipped in Ubuntu, but any other editor should work fine as long as you respect the file's indentation and name.
Make the contents of the file as such:
version: "3.9"
services:
  motioneye:
    privileged: True
    image: ccrisan/motioneye:master-amd64
    container_name: motioneye
    restart: unless-stopped
    ports:
      - "8765:8765"
    volumes:
      - /etc/localtime:/etc/localtime:ro
      - /home/user/motioneye/shared:/shared
      - /home/user/motioneye/etc:/etc/motioneye
Once your docker-compose.yaml file is ready, you can start the container by running docker compose in the same directory:
sudo docker compose -f docker-compose.yml up -d
Step 2b. Use docker run to Create Your MotionEye Container
If you prefer to use docker run, you can simply run this command:
docker run -d \
  --name motioneye \
  --privileged \
  --restart unless-stopped \
  -p 8765:8765 \
  -v /etc/localtime:/etc/localtime:ro \
  -v /home/user/motioneye/shared:/shared \
  -v /home/user/motioneye/etc:/etc/motioneye \
  ccrisan/motioneye:master-amd64
Step 3. Access Your MotionEye Docker Container
You can log into your new MotionEye instance at http://YourIP:8765. The default username is admin, with an empty password. At this point, there will be no cameras to see, so you may want to add yours.
Note that if the rtsp URL that you have contains the username and password for your camera, make sure to take that part out. In my case, rtsp://user:[email protected]:554/stream1 became rtsp://192.168.4.180:554/stream1.
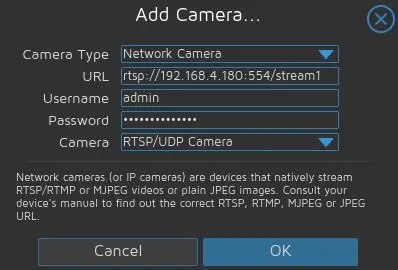
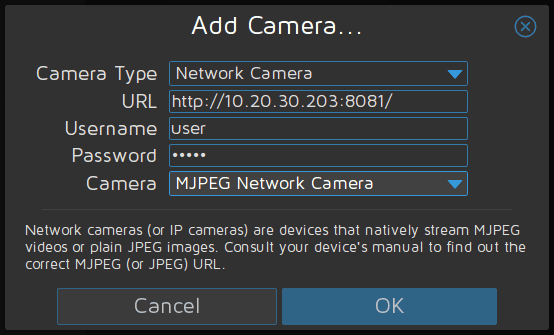
Adding streams provided by other MotionEye instances should be straightforward too. This means you can use low performance computers to create a stream from your USB cameras, and feed that stream into your main NVR to do the surveillance and recording in a single computer. MotionEye also allows you to add HTTP streams, providing the appropriate credentials.
Step 4. Accessing Your MotionEye Docker Container Over the Internet (Optional)
You should be able to access your MotionEye Docker container in the way described above while connected to the same LAN of your Docker host. However, you may be interested in accessing your MotionEye interface over the internet. There are several ways to achieve that.
The easiest and less secure way to do this is to forward port 8765 on your router/gateway to point to your MotionEye server.
Accessing MotionEye With VPN
A secure way to access MotionEye on Docker is to connect to your home network using a VPN service. Home routers and network-attached storage devices sometimes come with a built-in VPN server. Once connected, you can use the same home network IP address of your MotionEye Docker server.
You may also use a third-party VPN mesh network such as Tailscale or Zerotier-One.
Another alternative is to set up your own Wireguard network. But this is a more advanced topic.
Other Posts in the Wireguard Series:
- Wireguard VPN Intro in 15 min: Amazing new VPN Protocol
- Complete Wireguard Setup in 20 min – Better Linux VPN Server
- Wireguard Windows Setup: Powerful VPN for Windows
- Wireguard Mac OS Client Setup – The sleek new VPN
- Wireguard Android Client Setup – Simple and Secure VPN
- Ultimate WireGuard Docker Compose: with CF and Traefik Support
Exposing MotionEye with Reverse Proxy
Another way to access MotionEye NVR is to put it behind a reverse proxy. But this requires a domain name or a DDNS.
Nginx Proxy Manager is very simple to set up but not very flexible.
We use and recommend Traefik. You can read all about setting it up in Anand's Docker Traefik guide or refer to his GitHub repo.
With a reverse proxy, you can access your MotionEye Docker container using a nicer URL (e.g. https://motioneye.example.com).
FAQ
What is MotionEye?
MotionEye is a lightweight open-source surveillance software that provides a frontend for Motion. While easy to set up, MotionEye has all the features usually found in any software NVR.
What Is the Best OS for MotionEye?
MotionEye runs well in most modern Linux distros. Installing on Ubuntu, Debian, or Raspbian, may be the better choices should you encounter any issues and need support.
What is MotionEyeOS?
MotionEyeOS is an open-source project that provides a full operating system for single-board computers such as the Raspberry Pi. The complete Motion and MotionEye stack are included, so no installation is needed other than writing it into the SD card.
Where can MotionEyeOS be installed?
MotionEyeOS officially supports the following devices: Banana Pi M1, Nano Pi Neo2, Odroid, Orange Pi One, Pine A64/A64+, Raspberry Pi, and Tinker Board.
How to install MotionEyeOS on Raspberry Pi?
To install MotionEyeOS on Raspberry Pi you have to download the image from MotionEye's github and extract it. Then, you have to use a script that will guide you through the essential configuration options and write the image to your SD card.
How do I access MotionEye?
The easiest way to access MotionEye is probably by forwarding port 8765 on your router. More advanced users may also choose to access their MotionEye server through a VPN or reverse proxy.
What is the default login for MotionEye?
The default username for MotionEye is admin, with an empty password.
What Configuration Files Does MotionEye Use?
Configuration files fore MotionEye are created automatically. After the first run, within your motioneye folder you can find a directory named etc containing configuration files. There should be a motion.conf and motioneye.conf file as well as an additional cameraname.conf file for each camera added to your setup.
How Do You Use MotionEye with Home Assistant?
There is a MotionEye Home Assistant integration available. This integration allows for the addition of camera streams in Home Assistant views, and managing features such as motion detection, still image captures, and video uploads.
Concluding Remarks on MotionEye Docker Container
If you need surveillance software that is easy to set up and low on resources, MotionEye is probably right for your needs. You may like to read that there is also a MotionEye mobile app that interfaces with the server quite nicely and is easy to use. Keep in mind this app is developed by an independent developer, not by MotionEye's team.
One of MotionEye's downsides however is the limited support for adding ONVIF cameras, which can make adding cameras easier in solutions such as ZoneMinder. However, the web interface makes working with MotionEye much easier for the less tech inclined user when compared to Frigate.
MotionEye also lacks some advanced features such as object recognition, which may be helpful especially when integrating your software NVR with Home Assistant. In case you are interested, we have an article covering some of the best CCTV software alternatives.
Make sure to leave a comment if you find this helpful, or send your successful MotionEye Docker setup captures our way!


