In our previous posts, you learned how to install Plex server on Windows, Ubuntu, Raspberry Pi, Odroid C2, and Docker to organize and stream your media library easily. PlexPy is a web based application based on python that allows you to monitor Plex usage. Specifically, it will allow you to see the number of plays for each user, the time when the server was most used, the server usage and other useful information. You can also receive customized notifications on stream activity and recently added media and get complete library statistics and media file information. Let's get right to it with our PlexPy guide and see how you can monitor Plex usage for your server.
Table of Contents
PlexPy Installation
Before starting our guide, make sure you installed PlexPy on your server. We covered PlexPy in the past but let me remind you that you can follow our PlexPy guide on how to install PlexPy on Ubuntu and how to install PlexPy using Docker. In the future, PlexPy will be available in the AtoMiC ToolKit so you automate your install.
Recommended HTPC / Home Server Builds:
- Best Home Theater PC Build 2017 to do it all (Plex, Kodi, NAS, Gaming)
- Best Emby Server builds 2018 – Pre-built and DIY options
- Medium Budget 4K HTPC Build 2017 for Kodi, Plex and Gaming
- Cheap 4K HTPC Build for Kodi, OpenELEC, and LibreELEC 2017
- Low Power Home Server Build 2017 for Network File and Media Storage
- Best HTPC for Kodi with 4K on a Medium Budget 2017 (~$400)
- Energy efficient budget HTPC-NAS combo build 2016
PlexPy Setup Wizard configuration
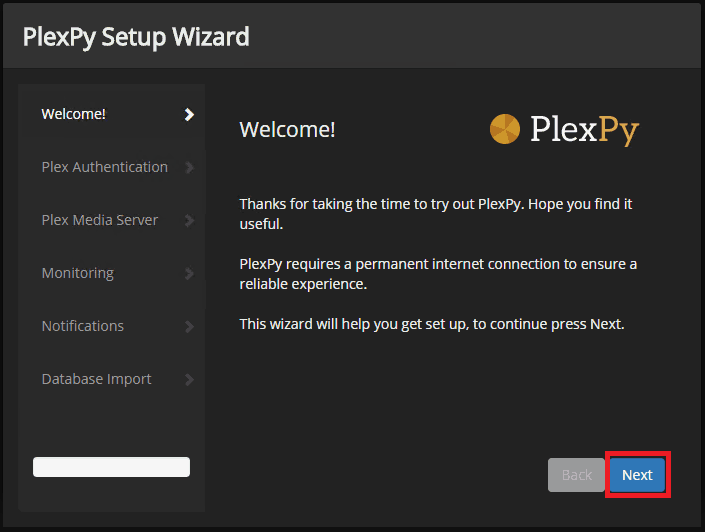
After installing PlexPy, you will be greeted by the PlexPy Setup Wizard Welcome Page, where you need to click on the Next button.
On the second page, you need to enter your Plex.TV username and password in order to login in your Plex account, then click on Authenticate button. If the Authentication successful message appears, then you are good to go. So click on the Next button.

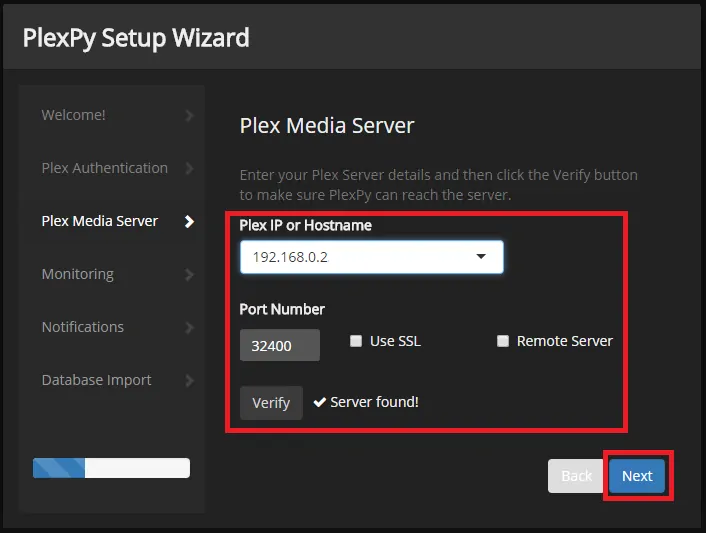
You will need to enter your Plex Media Server IP or Hostname from within your network. After you enter the information, click on the Verify button and wait for the Server found! message to confirm that the connection has been made, then click Next.
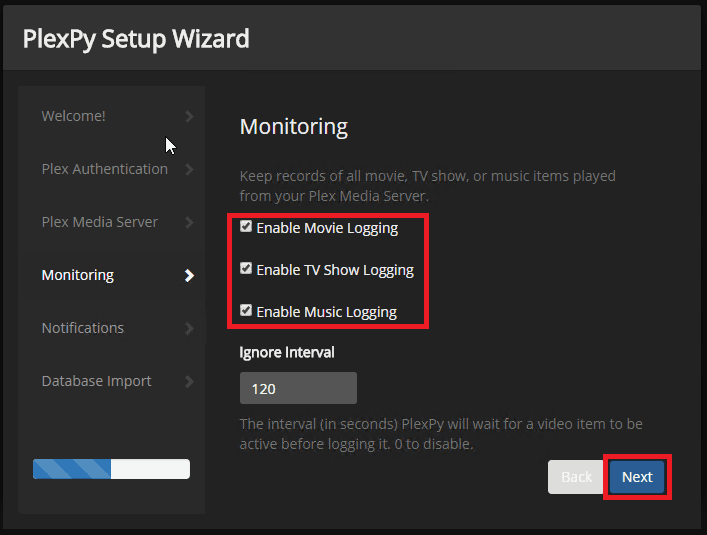
On the Monitoring page, you need to make sure that all logging options are ticked, just like in the screenshot below, then click on the Next button.
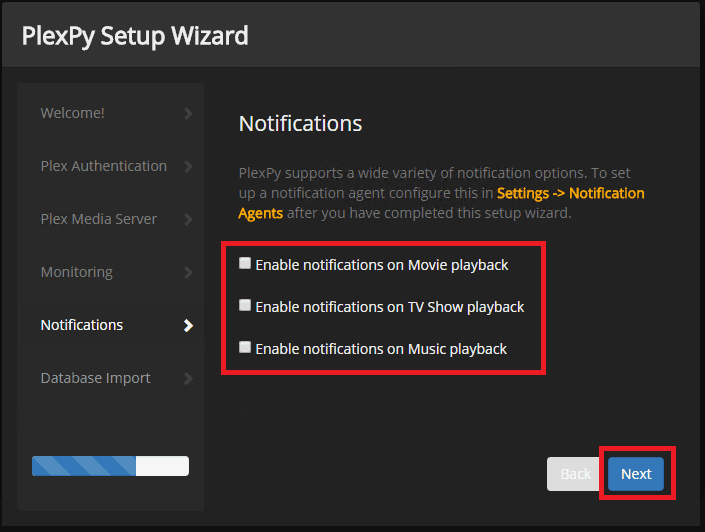
On the Notifications page, tick only the notification options you want to use, then click Next.
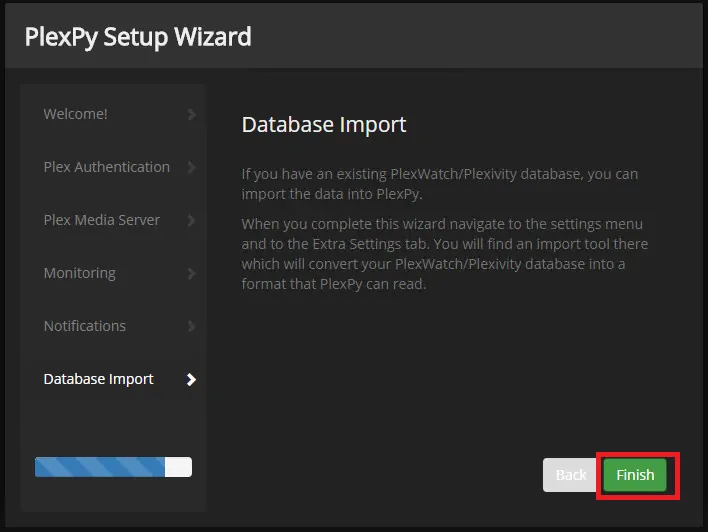
Finally, you can import an old PlexPy database if you want to restore your previous data, but in our case this is a clean install, so you need to click on the Finish button in order to close the Setup Wizard and start enjoying your PlexPy stats.
Surfshark VPN Exclusive Offer - 82% off ($2.39/month):
♦ Hide your browsing (no logs), Anonymize Streaming and Downloads
♦ Wireguard Protocol support for VPN.
♦ Circumvent Geo/Country Restrictions and access worldwide content
♦ Works on Windows, Mac, Linux, Android, iOS, Router, and more
♦ 1 TB Encrypted Storage
♦ Money back guarantee - Sign Up Now
Monitor Plex Usage with PlexPy
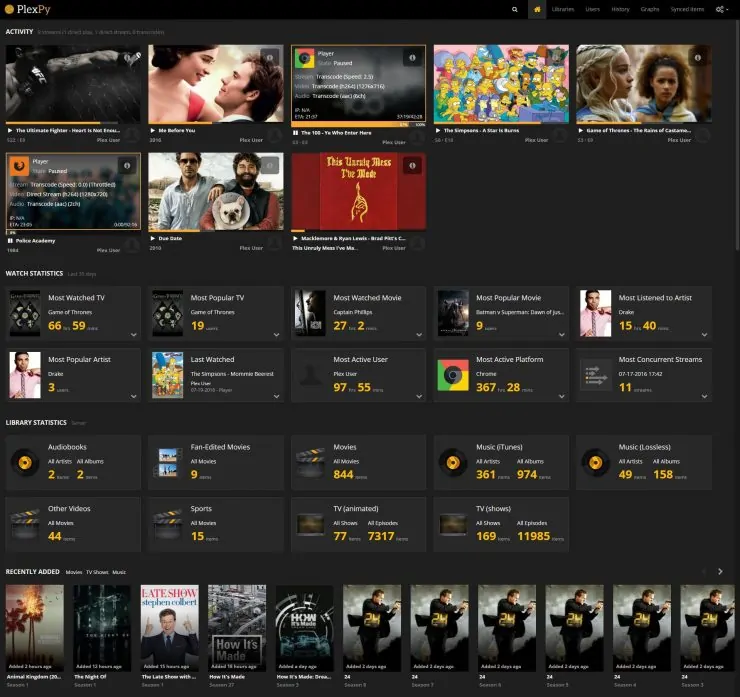
If you followed all the steps from the PlexPy guide, then you should currently be in the PlexPy Homepage. On the top side, you have the Activity thumbnails that show you the currently playing streams and the user playing the particular stream. You can also check if transcode is used by clicking on the i button from the top right corner shown on each video stream.
In the middle section, you can find the Watch Statistics that show you a couple of useful information like Most Watched TV, Most Popular Artist, Most Active Platform and more. You can also see the Most Concurent Streams information, which can help you if you are experiencing slow performance on your Plex Server.
In the lower section, you will find information regarding your Library Statistics where you can find the number of different files present on your Plex Media Server. On the bottom of your Homepage, you will find the Recently Added media that has been scanned by your Plex Media Server.
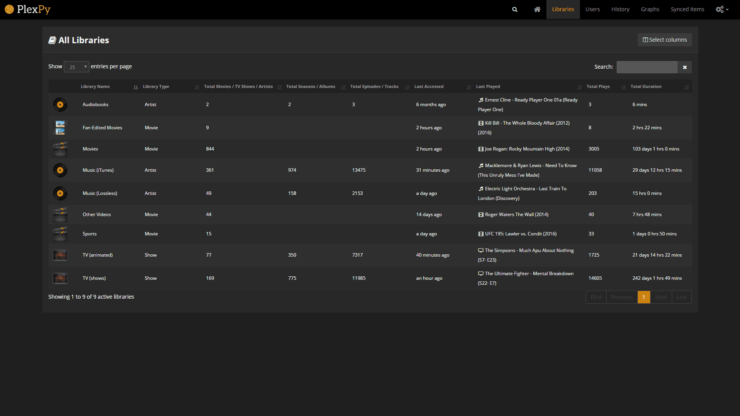
On the Library tab, you will find detailed information about your library.
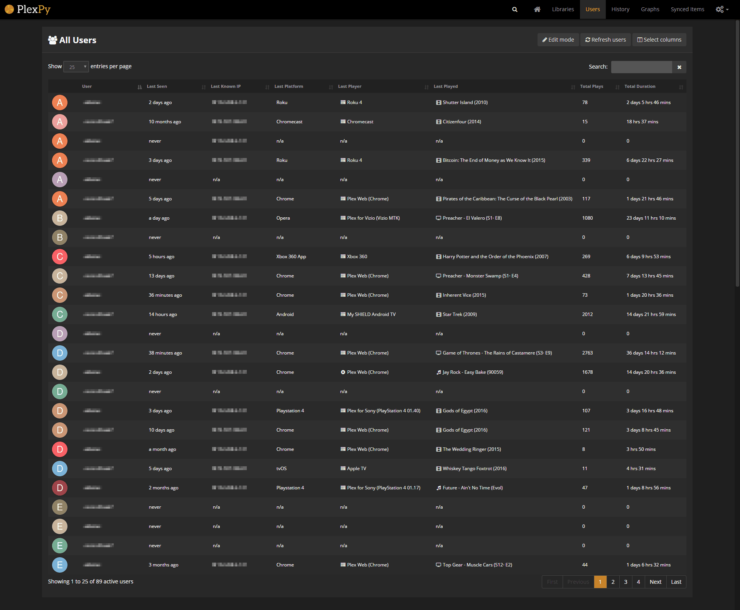
On the Users tab, you will find the detailed information for all users accessing your Plex Media Server. Besides the username, you will find the last known IP, the device used for playing your media, the last played file and total plays number.
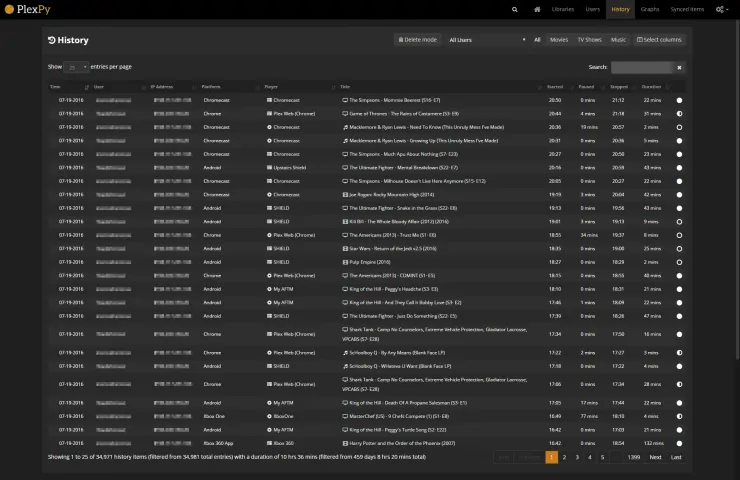
In the History tab, you will find a complete list of all the media files played from your Plex Media Server, with the type of player, IP and platform.
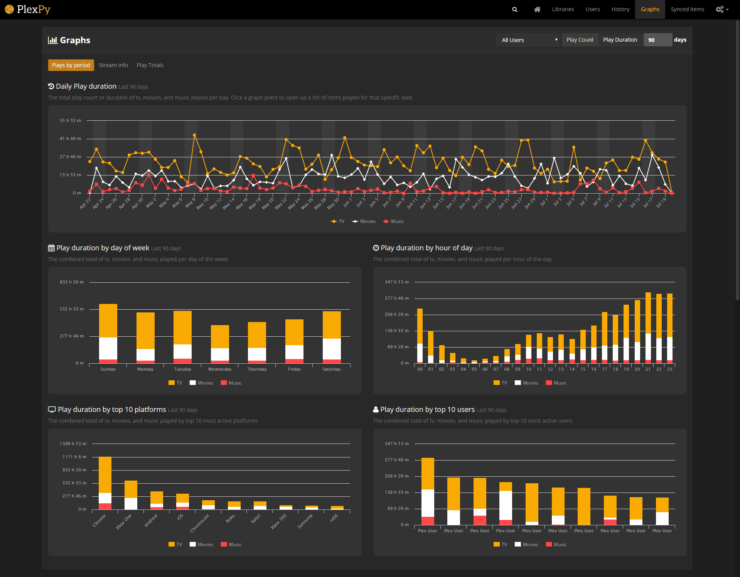
The PlexPy Graphs tab is probably the most exciting because it displays your information in graphs helping you understand and monitor Plex usage at a glance.
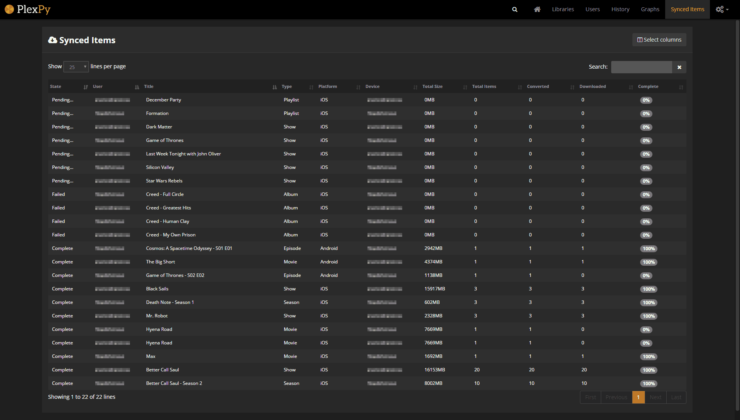
Last, but not least, you have the Synced Items tab where you can find the Sync status for files on your server, the platform for the device used for syncing and the level of completion.
Wrapping up
I hope that after following our PlexPy guide you are now in full control of your Plex Media Server. In a future post, I will show you how you can use the PlexPy Android app to remotely access your PlexPy server and start to monitor Plex usage on the go. Until then, you can learn how to install Plex Requests using Docker, a service that allows your Plex Users to request new media. You can also install Sonarr in Docker or Sickrage to manage your media library and easily add requests to your server. Check back soon to learn more about Plex and how you can install various tools to improve your media server experience.



![15 Best Plex Alternatives [2022] - FREE and BETTER Options Best Plex Alternatives feature image](https://www.smarthomebeginner.com/images/2022/08/best-plex-alternatives-feature-image.gif)
![15 Best Jellyfin Plugins [2023] - Supercharge your Media Server Jellyfin Intros Plugin Preview Pre-Roll](https://www.smarthomebeginner.com/images/2022/08/jellyfin-intros-preroll-preview.jpg)
![10 Best Plex Client Devices [2022] - STUTTER-free Streaming Best Plex Client Devices](https://www.smarthomebeginner.com/images/2022/02/best-nas-for-plex-server-featured-images-from-pexels-photography-maghradze-ph-3764958-e1648542743772.jpg)
