Typically SickBeard update to new release is done manually but in this post I will show you how to make SickBeard auto update itself on Linux. Sick Beard, an awesome little app that automates show downloads, has been covered extensively by us, including installation (Windows / Ubuntu), and uninstallation. We have also shown you how to use SickBeard. SickBeard autoupdate can save time as it happens in the background without any user interaction. Plus, you will always have the latest and the greatest, including any security patches. So let us see how to enable SickBeard auto update on Ubuntu and other Linux distros. [Read: 5 Best Usenet Search providers for Sick Beard and CouchPotato]
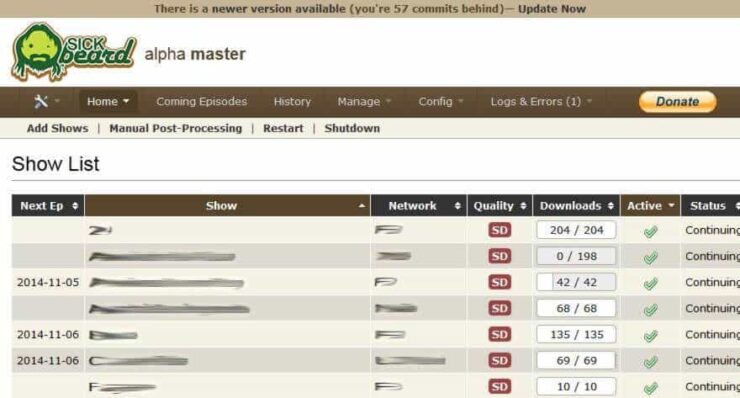
SickBeard Update Notification
When an update is available, Sick Beard app notifies you by throwing a notification at the top of the SickBeard web interface.
Then you click update to update SickBeard installation. But what if you could auto update SickBeard when updates are available without you doing anything? [Read: SickBeard alternative: NzbDrone vs SickBeard]
Create SickBeard Auto Update Script
As described in my Sick Beard installation guide, you can always stop SickBeard, update it using the git pull, and restart it manually from the commandline. This process can be simplified by creating an update script.
| Provider | Rating | Features | Monthly | Yearly |
|---|---|---|---|---|
| Newshosting | >3000 days, unlimited, SSL, VPN | $9.99 | $99.99 ($8.33 / month) | |
| UsenetServer | >3000 days, unlimited, SSL, VPN | $9.99 | $99.99 ($8.33 / month) | |
| Eweka | >3000 days, unlimited, SSL, EU Servers | €7,50 (Special!!!) | ||
| For more plans that may fit your needs please read our Usenet plan selection guide. | ||||
Note that for this to work, you will have to have installed SickBeard following our guide and your SickBeard should be installed under .sickbeard in your home folder. If your SickBeard app is installed in a different location then this should be reflected in the /etc/default/sickbeard file.
Create a file (using nano) or your favorite text editor and copy the following contents to it. Change USERNAME to your username. Save the file as sickbeard-updater.sh in your home folder (or anywhere you like).
#!/bin/bash
# SickBeard Auto Update Script from htpcBeginner
sudo service sickbeard stop
sleep 10
cd /home/USERNAME/.sickbeard
git pull
sudo service sickbeard start
Basically, what this SickBeard auto update script does is that it stops SickBeard and moves to SickBeard folder. Then it updates SickBeard using git pull command and restarts SickBeard. [Read: How to install Sick Beard on Android to download Shows?]
Next, cd in your home folder (or where you saved the file) and give the script execute permission using the following command:
sudo chmod 755 sickbeard-updater.sh
Now anytime you want to upgrade SickBeard, all your have to do is move to where the SickBeard autoupdate script is saved and issue the following command:
sudo ./sickbeard-updater.sh
Don't ignore the sudo and the dot in the front. This is all fine and dandy but how do I auto upgrade SickBeard? That's next. [Read: Sick Beard Apache proxy setup]
Autorun SickBeard Update using Cron
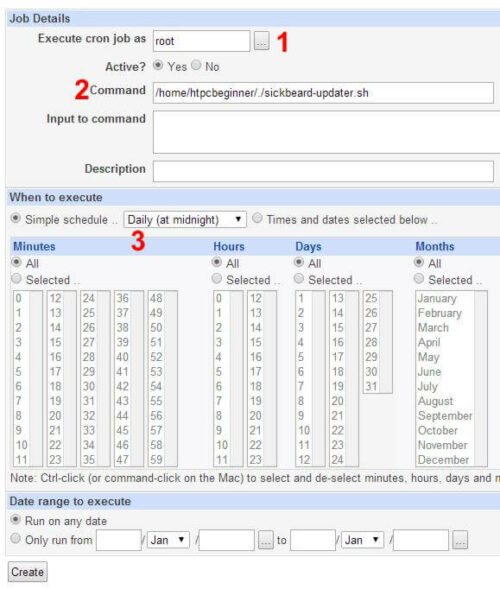
Webmin makes several system administration tasks easier, especially on a headless system. If you are not comfortable with commandline, I recommend installing and securing Webmin. You can create a cron job using Webmin interface to automatically run the SickBeard auto update script at a set frequency. Go to System -> Scheduled Cron Jobs create a cron job as shown below.
In the example above, I am setting up the auto update SickBeard script to autorun at midnight. You could also do the same thing from commandline by creating a cron tab item, if you know what you are doing. Cron should email you the output of the command. If you find that annoying you may disable Cron email notifications.
That is all there is to it. Go ahead setup your SickBeard auto update and get one step closer to completely automating your home server.

