Setting up a VPN connection on your HTPC is easier with paid services than if you try to use free alternatives. When you buy a paid VPN account, you get certain benefits, that depend mostly on the company you buy it from, but generally can be summarized in simplicity and security. If you have been following our series of guides on the topic of using VPN on Kodi, then you already know you can use the OpenVPN client for Windows or install OpenVPN on Kodi for your connection needs. However, a paid service named IPVanish offers a free and simple VPN setup just by signing up to their website, and installing their client. Is it worth to buy an IPVanish account and use it in your Kodi VPN Windows setup? Let's find out.

The first benefit you get when using IPVanish on Windows is simplicity. Just install the client, start it, select a country to run from, and you're good. Basically, this means now you will be browsing and getting your content as if you were on the VPN country instead of your own, which is great to access geoblocked content you can find in some of the best 20 Kodi addons, and enjoy plugins such as the ones included in our 10 best legal Kodi addons list in an easier way, with no geographical restrictions. [Read: 10 best Kodi movies addons in 2015 for your HTPC]
Surfshark VPN Exclusive Offer - 82% off ($2.39/month):
♦ Hide your browsing (no logs), Anonymize Streaming and Downloads
♦ Wireguard Protocol support for VPN.
♦ Circumvent Geo/Country Restrictions and access worldwide content
♦ Works on Windows, Mac, Linux, Android, iOS, Router, and more
♦ 1 TB Encrypted Storage
♦ Money back guarantee - Sign Up Now
How to setup a Kodi VPN Windows connection with IPVanish?
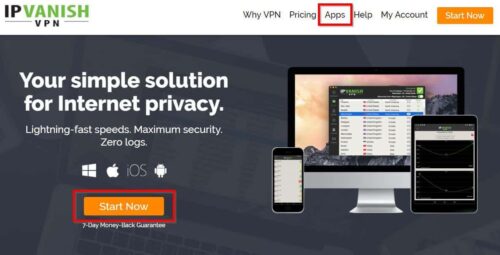
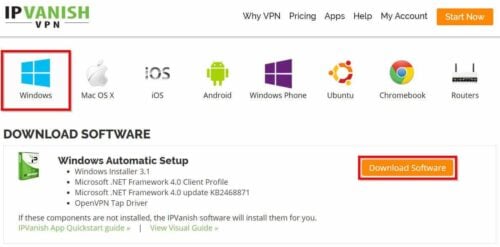
For the sake of simplicity, I will assume you already have an IPVanish account. If you don't yet, you can get one at their website, or clicking on the banner you see above, and then clicking on Start Now. If you already have an account, click on Apps, on the top-right corner of the webpage. There you will see a selection with all the OSes for which IPVanish download is available.
If you want to start your Kodi VPN Windows connection setup, click on the Windows option. After that, a section of the webpage will unfold below. Click on the Download Software button and then the installer will download to your PC. [Read: Guide: How to install Kodi on Windows in three easy steps]
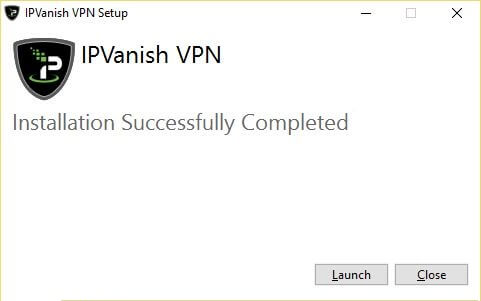
Open the installer, and then click the Install button. To install IPVanish on Windows you will need administrator privileges. If a window opens asking for confirmation to let the software modify your device, click Yes. Wait a few seconds, and IPVanish Windows 10 client will be installed on your device (You can also use it with other versions of Windows). You will see this screen once it's done:
Congratulations. You are done installing IPVanish. You can now use it to access geoblocked content no matter your location, and also keep your browsing and internet traffic more secure, which is important nowadays. Now you just need to know how to use IPVanish, but that is a simple thing as well.

How to use IPVanish on Windows?
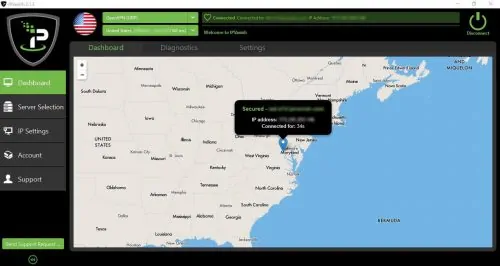
Simply launch the IPVanish client, whether it is after the installation, by clicking the Launch button, or later on, by clicking the desktop shortcut. If Windows asks for confirmation to open, click Yes. You will see a screen where you can select your VPN server, connect and disconnect in an easy way. Wait for IPVanish to ping all the available servers, so you can select one, and then simply select it from one of the drop-down menus on top of the window (the other one lets you select a connection protocol). After you select your server, you would have something like this:
That's it! You're ready now to start using geoblocked addons on Kodi. Just launch Kodi and click on your favorite addons. Connection speed will largely depend on your service, since IPVanish does not really induce any sensible delays on it. Still, if you see connection issues, you can just switch the location to which you are connected, and start using your Kodi VPN Windows capabilities to keep your browsing secure. This is specially useful with some of the best 10 Kodi sports addons that are restricted by location, and also with some Kodi live TV addons, but honestly, even if your addon is not geolocked there are added benefits to using IPVanish on Windows, such as a better connection route and added security. Unlock more content on your HTPC by setting up a Kodi VPN Windows connection with IPVanish!



![Watch College Football Online FREE [2022]- 25+ WORKING websites 2022 Watch College Football Online Free](https://www.smarthomebeginner.com/images/2022/08/2022-watch-college-football-online-free.jpg)
![Watch NFL Games Live FREE 🏈: 23+ WORKING websites [2023] Watch NFL Games Live FREE](https://www.smarthomebeginner.com/images/2023/08/nfl-streaming-1.jpg)
![Watch College Football Online FREE [2023]: 🏈 23+ WORKING websites Watch College Football 2023](https://www.smarthomebeginner.com/images/2023/08/college-football-2023-e1692045798880.jpg)
![8 Amazing Raspberry Pi Ideas [2022]: Beginners and Enthusiasts Raspberry Pi ideas](https://www.smarthomebeginner.com/images/2021/09/raspberry-pi-4-dev-board.jpg)