Table of Contents
Introduction: What is Kodi Beginners Guide
Welcome everybody to the Kodi Beginners Guide Part 2: How to use kodi! In Kodi Beginners Guide Part 1: What is Kodi, I focused on the origins of the Home Theatre Software and explained about what it does. If you haven't read it yet, feel free and drop me a comment while you're at it. In this second part I will walk you through the installation and how to use kodi! So let's get right into it.
How to install Kodi Home Theatre Software
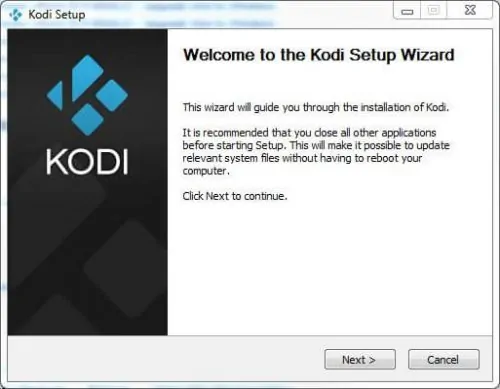
We've already provided you with a detailed guide to install Kodi for Windows, so this will be a brief recap of what to do. As mentioned in Part 1, you can find the latest Kodi release on the Kodi.tv Download page. When the download is completed just double click on the exe file and follow the Kodi setup wizard.
Alternatively, if you own an Android TV box, you should download Kodi For Android, which can be found directly in the Google Play Store. For Ubuntu Linux take a look at our Ubuntu Kodi install guide. For the purpose of this Kodi beginners guide we will focus on the Windows version. In any case, and for added comfort, take a look at wireless HTPC keyboard options or Kodi remote apps for Android, in order to find an HTPC setup tailored to your liking.
Best Android TV Boxes:
- NVIDIA SHIELD TV Pro Home Media Server - $199.99
- Amazon Fire TV Streaming Media Player - $89.99
- WeTek Play 2 Hybrid Media Center - $134.00
- Kukele Octacore Android TV Box - $179.99
- U2C Android TV Box - $95.99
First Kodi Startup
When the installation is complete we can fresh start Kodi for the first time.
Double click on the kodi.exe file, either via the shortcut on your desktop or go to the installation folder. By default it would be: C:\Program Files (x86)\Kodi\Kodi.exe
If you want to create a dedicated home server -which can be done with powerful machines such as the Gigabyte Brix Pro barebones computer- there are different ways to start Kodi automatically on Windows boot. This will be a subject for another part of the Kodi Beginners Guide.

After Kodi has launched it will show you the basic interface and look, which is by default a skin called "Confluence". One of the great things I find about Kodi is that you can customize a lot of things like the skin. There are a lot of great Kodi skins available and I'll show you how to change them and other addons in part 3 of the Kodi Beginners Guide. [Read: 20 Best Kodi addons in 2015 to help you cut the cord]

Naming media files
Ok, we're in Kodi, but what do we want? We want Kodi to recognize and organize all our media (Movies, TV Series, etc.), right? The official term is called scraping and what it does is, it links your media with the information from an online database or media scraper if you will. The default scraper in Kodi for movies is The Movie Database (TMDb) and for TV Series it's the The TV Database (TVDb). In order for them or any media scraper to pick up the correct information, the file names and folder structure must follow a certain format. Following these simple guidelines will avoid a lot of frustration later on. There are multiple ways to organize your files but for movies I would advise to create a separate folder for each movie:
C:\Movies\1408 (2007)\1408.avi
The folder is named 1408 and in parenthesis I've put the movie's year of release. This is optional but can be helpful to avoid mistakes as we are living in the era of reboots and remakes that use the same movie title as its original. Take Alice in Wonderland for example. The original cartoon was made back in 1951 but Tim Burton's live action take on it with the same title was made in 2010.
Next up is TV Series. Naming rules are different than movies as there are multiple episodes and seasons to take into account. First thing you have to do is decide on a folder structure. This will be ignored by Kodi as it will look for episode and season information in the filename. More on this later on. But to give myself an overview I always create a separate sub-folder per season within the TV Show folder, like so:
C:\TV Series\True Detective\Season 1
C:\TV Series\True Detective\Season 2
But as I mentioned before, it's the filename of the episode that will be read by the Kodi media scraper. You also have different formats that are accepted but I always use this one:
C:\TV Series\True Detective\Season 1\anything_s01e03.ext
This example will be read as season 1, episode 3.
For more detailed information about naming your media files, check out this Kodi.wiki page regarding video file naming.
Starting with Kodi? Read these Kodi Beginner guides!
- Kodi Beginners Guide Series: Part 1 (What is Kodi?), Part 2 (Kodi Usage), Part 3 (Adding Media), Part 4 (Changing Appearance), and Part 5 (Folder Structure).
- Understanding Kodi Settings: Audio and Video
- Beginner Blueprint: Complete Kodi Setup Guide.
- Beginner Blueprint: Complete Amazon Fire TV Kodi Guide.
And with that, the Kodi Beginners Guide Part 2 comes to an end. Please look out for Part 3 coming soon where I will go into topics like adding media sources, Addons and Skins.
Please do send me a comment if you like this article or if you have any questions or remarks.


![8 Amazing Raspberry Pi Ideas [2022]: Beginners and Enthusiasts Raspberry Pi ideas](https://www.smarthomebeginner.com/images/2021/09/raspberry-pi-4-dev-board.jpg)
![15 Best Jellyfin Plugins [2023] - Supercharge your Media Server Jellyfin Intros Plugin Preview Pre-Roll](https://www.smarthomebeginner.com/images/2022/08/jellyfin-intros-preroll-preview.jpg)

