Recently I compared the benefits of both Kodi and Plex and teased that you can start using Plex with Kodi together to enjoy the benefits of both applications. Doing so brings the centralized media management feature of Plex and the customizability of Kodi, together to provide an awesome media experience. In fact, setting up a system to use both Plex Media Server and Kodi Home Theatre Software is actually quite easy - by following these instructions you should be able to have it setup in 15 minutes or less!
Table of Contents
Integrating Kodi and Plex: How it Works
Many of you have guessed what I was hinting at in the article comparing Plex Home Theater vs Kodi Media Center - I'm sure that like me, you have found using Plex with Kodi is an effective and integrated way to package all your entertainment needs in one place for the whole family to enjoy. This setup uses two Kodi addons: PleXBMC and the Amber Skin (or any other skin that supports PleXBMC).
If you are using Raspberry Pi and perfectly OK with just Plex then installing Rasplex on RPi may be enough to make you happy. [Read: Speed up RasPlex on Raspberry Pi: 4 performance tweaks]
PleXBMC Kodi Addon (Required)
PleXBMC is the Kodi add-on that connects Kodi with your Plex Media Server(s). Shout out to @hippojay, @pecinko, @magnesium, @austin1howard and others for their work on this program. The install file for PleXBMC can be downloaded from GitHub. [Read: 20 Best Kodi Add-ons in 2015 to Help you Cut the Cord]
PleXBMC Integrated Skin (Recommended)
There are two (Helix compatible) skins that I am aware of that can be integrated into PleXMBC: the Amber Skin and the Titan MediaBrowser Skin. Being a PleXMBC integrated skin means that the skin populates the movies and TV menus using the data from the Plex server(s). If you are aware of any other integrated skins please post in the comments (and include links). [Read: 6 Best Kodi Skins in 2015 to Enhance Your Media Center]
If you want to use PleXBMC with another favorite skin which is not integrated, this is still possible, it just means that you would have to launch it as a separate video add-on much like you would launch the YouTube add-on for example. This article will be using the Amber skin, but the process should be very similar for Titan MediaBrowser. I'm using Amber in this article because it is quite popular and well, it's one of my favorite skins. I find that is:
- light weight and fast (works well on a Raspberry Pi 1);
- looks great and many views prominently feature fan art;
- highly customizable menus; and
- most importantly: it is wife friendly
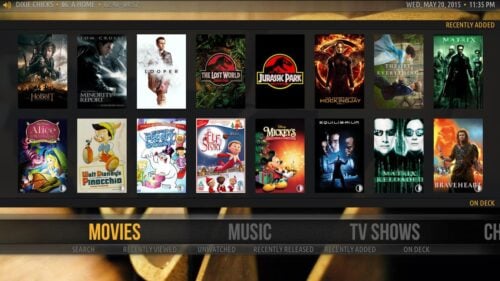
I've included a few screenshots of how things look at the bottom of this post, so you can check out what the final product looks like before going through the installation steps. Shout out to @pecinko, @jester, @joethepartylion, @gismo112 and others for their work on the Amber skin. The install file for the Amber skin can be downloaded by following the links in this Kodi Forum post. It is also available through official Kodi repositories. [Read: 5 Best XBMC skins for Raspberry Pi]
PleXMBC Helper Script (recommended)
While it is not required to get yourself up and running, I recommended that you also install the PleXBMC helper script which is a service that allows iOS and Android Plex client apps to communicate from with the PleXMBC add-on. This allows you to 'cast' your library from a Plex App on your iOS or Android device directly to Kodi - much like airplay.
You can download PleXMBC Helper from GitHub. Thanks to @hippojay, @wickning1 and others for their work on this application.
Installation: Using Plex with Kodi
The first step is to get Kodi up and running on the device you wish to use:
- How to install Kodi on Ubuntu?
- How to install Kodi on Windows
- Install Kodi on Amazon Fire TV in a few simple steps
- Install OSMC on Raspberry Pi 2 and 1 on a Windows System
- Install OpenELEC on Raspberry Pi 2 Mobel B on Windows
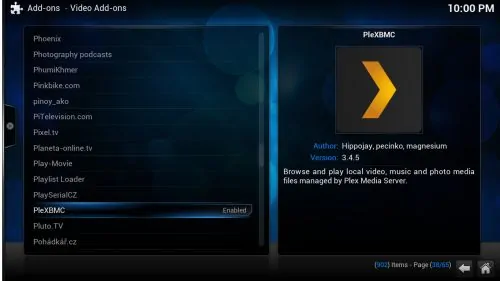
Then you will need to install the PleXBMC add-on. If you are running the default Confluence skin, select "Programs" and then "Get More...". You will now need to move back up the directory tree (using the "..") until you see "Video Add-ons". Select "Video Add-ons" and move down the list until you see PleXBMC. Now select and install it. Alternatively you can install it from the Zip files by downloading it from the link above.
If you want to use the PleXBMC Helper, download it from the location above. In Kodi go select "Programs" and and move back up the directory tree until you see the "Install from Zip File" option. Select this and navigate to the location where you downloaded the PleXMBC Helper zip file noted above. Select the Zip file and the add-on will install. You will now need to do two quick things to get it working.
- Turn on control of Kodi by other devices via HTTP. Go to "Settings", "Kodi", "Services". Under general, put in the name you wish for this device. Then under "Web Server" turn on the "Allow Control of Kodi via HTTP". Insert a username and password.
- Configure PleXBMC Helper. Go to "Settings", Kodi, Add-ons, "Enabled Add-ons" then "Services". Select PleXBMC Helper and go to Settings. You will need to ensure that "Use XBMC Client Name" is on (it should be by default). You should now be able to 'cast' to your Kodi device from a Plex client app.
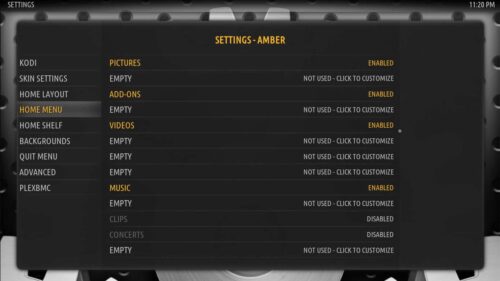
Next you will need to install your Plex integrated skin. As mentioned, in this case we will be using the Amber skin. Again, select "Programs" and then "Get More..." You will again need to move back up the directory tree, but this time you are looking for "Skins". Select "Skins" and move down the list to "Amber" and select and install it. Once installation is complete, it will ask you if you would like to switch the skin - select yes. This can also be installed from the Zip file downloaded from the link above. Once you've switched to the skin, navigate to the settings menu and select "Go Plex" (by pressing the down arrow when on the settings menu).

Bam! That's it - you should be up and running with Kodi and Plex. Scroll to the left and you should see your TV shows, Movies Channels, Music, etc on your Plex Server (it may take a couple seconds to load the cover art).

If you don't see your media, it might be because your Plex server is not on the same network or can not be auto discovered. You should be able to fix this by going to "Settings", PleXBMC Settings" then "Server". Put in your Plex account and password information.
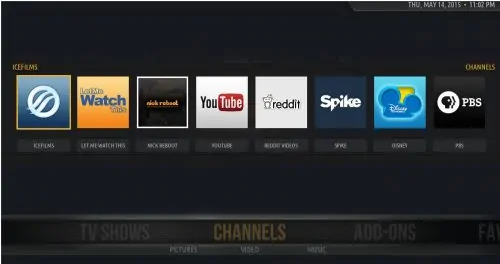
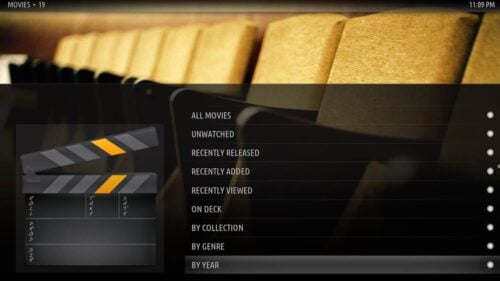
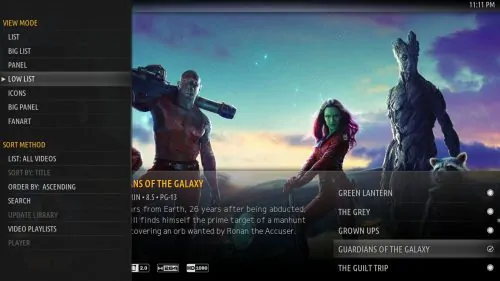
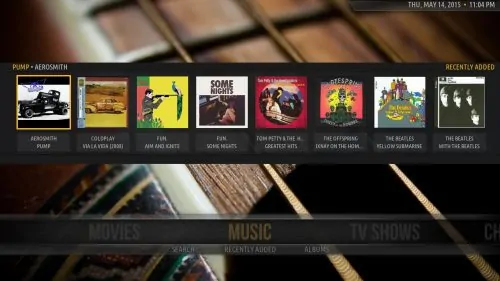
Amber with PleXBMC Integration Screenshots:


PleXBMC Setup - Final Thoughts
That's it - it is a pretty easy Kodi and Plex setup and should have taken less than 15 minutes. You can play with all the customization options to get the right feel for you. You can also quickly repeat this setup on all of your devices to use Kodi and Plex together and have them all connected to your central Plex library.


![15 Best Jellyfin Plugins [2023] - Supercharge your Media Server Jellyfin Intros Plugin Preview Pre-Roll](https://www.smarthomebeginner.com/images/2022/08/jellyfin-intros-preroll-preview.jpg)
![10 Best Plex Client Devices [2022] - STUTTER-free Streaming Best Plex Client Devices](https://www.smarthomebeginner.com/images/2022/02/best-nas-for-plex-server-featured-images-from-pexels-photography-maghradze-ph-3764958-e1648542743772.jpg)
![8 Best NAS with Plex Server Support [2022] - 4k, Transcoding, etc. Best NAS Server for Plex](https://www.smarthomebeginner.com/images/2020/02/best-media-server-for-plex-ft.jpg)

![10 Best Emby Client Devices [2023] - 4k, Hardware Transcoding, etc. setup emby server with raspberry pi](https://www.smarthomebeginner.com/images/2017/02/setup-emby-server-with-raspberry-pi.jpg)