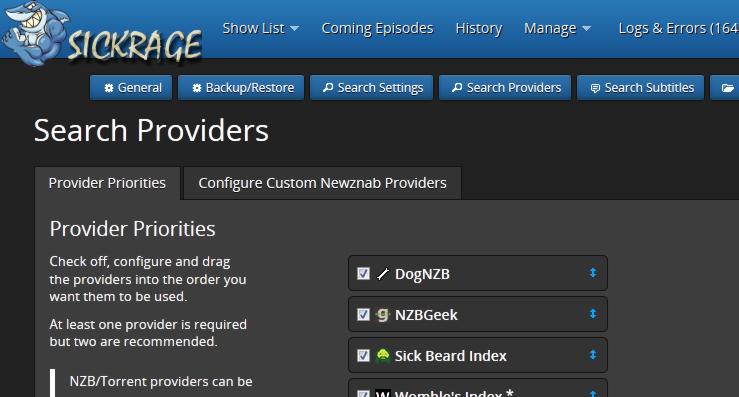
After a recent SickBeard vs SickRage comparison, I decided to install SickRage on Ubuntu Server 14.04, replacing my SickBeard installation that has been working well for 2 years. SickRage is a video file manager for Shows based on the popular SickBeard PVR. Like SickBeard, it also automatically downloads TV Show episodes when they become available. SickRage's unique features, including torrent and subtitle support, led me to decide that SickRage is better than SickBeard (at this point). You may choose to install SickRage on Ubuntu and other Linux distros as described in this guide or go with other SickBeard forks with torrent support.
Looking for an automated solution? Try our AtoMiC ToolKit, which makes installation and management of Home Server software such as SickBeard, CouchPotato, Torrent clients, etc. easy.
Table of Contents
SickRage Unique Features
SickRage, also known as SickBeard-TVRage, has several advantages over SickBeard. The unique features are too many list and I suggest that you read up on my comparison of SickBeard and SickRage. Some key unique features include torrent support, subtitle support, backup and restore, better failed download handling, more search providers, custom naming schemes, and more.
Usenet is Better Than Torrents:
For apps like Sonarr, Radarr, SickRage, and CouchPotato, Usenet is better than Torrents. Unlimited plans from Newshosting (US Servers), Eweka (EU Servers), or UsenetServer, which offer >3000 days retention, SSL for privacy, and VPN for anonymity, are better for HD content.
| Provider | Rating | Features | Monthly | Yearly |
|---|---|---|---|---|
| Newshosting | >3000 days, unlimited, SSL, VPN | $9.99 | $99.99 ($8.33 / month) | |
| UsenetServer | >3000 days, unlimited, SSL, VPN | $9.99 | $99.99 ($8.33 / month) | |
| Eweka | >3000 days, unlimited, SSL, EU Servers | €7,50 (Special!!!) | ||
| For more plans that may fit your needs please read our Usenet plan selection guide. | ||||
Step 0: Prerequisite for SickRage Installation
SickRage installation on Ubuntu Linux is essentially the same as that of SickBeard setup. The major difference is only in the github repository that is cloned. This guide assumes that you are doing a clean installation of SickRage. If you already have an active SickBeard app, then uninstall SickBeard before proceeding. SickRage uses some of the same files as SickBeard and there will be conflicts if both are running. [Read: 5 Best Usenet Search providers for SickRage and CouchPotato]

Alternatively, if you have an existing SickBeard app you may migrate from SickBeard to SickRage with little or no downtime.
Step 1: Install the Essentials
To setup SickRage, I recommend running it from source (to keep up with the latest features and bug fixes) using Python with git as the updater. If you do not have python and git installed already, install them and python-cheetah (also needed) using the command below:
sudo apt-get install git-core python python-cheetah
Step 2: Install SickRage on Ubuntu
First, if you already have a .sickrage folder in your home directory (/home/$USER) from a previous install you may rename the folder and save it for now while you setup SickRage. If your previous SickRage installation is in your home folder (which is what I recommend) then from there do the following:
sudo mv .sickrage .sickrage_old
After your new SickRage is running you can delete the previous version's folder (.sickrage_old). Next, to install SickRage on Ubuntu, move to your home directory (or any other directory) and clone a copy of SickRage git repository:
cd ~
git clone https://github.com/SickRage/SickRage.git.  .sickrage
This will download the contents to the folder .sickrage. The "." in the front keeps the .sickrage folder hidden. That is all there is to it. It is that easy to install SickRage on Ubuntu.
At a later stage, to update SickRage setup, just go into .sickrage folder and type git pull, which will pull the latest changes from SickRage GitHub repo. You may also update Sickbeard-TVRage from the web interface by going into Settings->Force Version Check or by clicking on the "Update Now" notification or by enabling automatic updates. [Read: 5 Must have Android apps for HTPC or Home Server control]
Best Standalone Bittorrent Downloaders:
Step 3: Start SickRage
After you install SickRage on Ubuntu, there is one thing that you will have to do before you start Sick Rage. Create autoProcessTV.cfg in /home/USER/.sickrage/autoProcessTV/:
cd ~/.sickrage
cp -a autoProcessTV/autoProcessTV.cfg.sample autoProcessTV/autoProcessTV.cfg
Then, use the following command to start:
python ~/.sickrage/SickBeard.py -q
Sick Rage is now running on your system (unless you encounter any errors). SickRage default port is 8081. So you can access the SickRage's web interface by going to:
http://localhost:8081
If your SickRage is on your internal network and port 8081 is not blocked, you can also access it through its network IP address (see example below):
http://192.168.0.20:8081
If you have port forwarding enabled on your router and you have a domain name referring to your server running SickRage, you may also view it through the internet using your domain name:
http://domain.com:8081
For now, http://localhost:8081 should be enough.
Step 4: Configure SickRage
After you install SickRage on Ubuntu, follow my post on SickBeard configuration to get the basic SickRage configuration done. Configuration is similar to that of SickBeard's. After configuring your SickRage setup on Ubutnu, you may return to this post and continue. In order to make SickRAge function properly, you will have to install and configure SABnzbd to listen to downloads requests from SickRage. Refer to my guide on installing and setting up SickRage and SABnzbd to properly automate downloading Shows. As mentioned earlier, you will benefit from a reliable Usenet account. You may get a free Usenet account as described in this post, or go with a reliable Usenet service from Astraweb or Newshosting.
Step 5: Autostart SickRage
Manually starting SickRage all the time can be cumbersome. Therefore, after you install SickRage on Ubuntu Server, enable autostart SickRage at boot as described below. First, use the following commands to clean any previous installation of SickRage running with autostarting enabled (with the init script name sickbeard):
sudo rm /etc/init.d/sickrage
sudo rm /etc/default/sickrage
sudo update-rc.d -f sickrage remove
If you installed SickRage following this guide exactly then it should be installed in /home/user/.sickrage/, where user is your username. cd into the /home/user/.sickrage folder:
cd ~/.sickrage/runscripts
For Ubuntu, there are 2 files of importance. First copy the file init.ubuntu to /etc/init.d/sickrage and give the file execute permissions (issue the following commands one by one):
sudo cp ~/.sickrage/runscripts/init.ubuntu /etc/init.d/sickrage
sudo chmod +x /etc/init.d/sickrage
Edit the copied file sudo nano /etc/init.d/sickrage and ensure that the following lines appear or are edited as shown below:
# Source SickBeard configuration
if [ -f /etc/default/sickrage ]; then
    . /etc/default/sickrage
else
    echo "/etc/default/sickrage not found using default settings.";
fi

# Source init functions
. /lib/lsb/init-functions

# Script name
NAME=sickrage

# App name
DESC=SickRage
In summary, find all sickbeard or SickBeard words in the above code section and replace them with sickrage or SickRage (all case sensitive), respectively. Doing these changes will ensure that you do not have any conflicts with any existing or future Sick Beard installs (in case you want to have them both). Then, create a new file called sickrage in /etc/default folder:
sudo nano /etc/default/sickrage
Add the following contents to it:
# COPY THIS FILE TO /etc/default/sickrage
SR_HOME=/home/user/.sickrage/
SR_DATA=/home/user/.sickrage/
SR_USER=user
SR_HOME and SR_DATA are important. They are the folder in which SickRage is installed and database is stored, respectively. Typically, they refer to the same folder. SR_USER should be your Ubuntu username. Save and exit. Then, give the file execute permission using the following command:
sudo chmod +x /etc/default/sickrage
Finally, update boot sequence:
sudo update-rc.d sickrage defaults
From now on, you can manually start and stop SickRage app using the following commands:
sudo service sickrage start
sudo service sickrage stop
Alternatively, you can create bash_aliases to simplify starting, stopping, and restarting SickBeard TV Rage edition using shortcut commands. [Read: Four free android apps to remotely monitor and control torrent, NZB, and other downloads]
That is all there is to SickRage installation. Go ahead Install SickRage on Ubuntu and enjoy.


![Ultimate Docker Media Server: With 60+ Docker Compose Apps [2024] Ultimate Docker Media Server](https://www.smarthomebeginner.com/images/2024/01/Docker-Series-02-Docker-Stack.png)