There's no shortage of Raspberry Pi distributions with a home media twist, such as OpenELEC for Raspberry Pi and OSMC for Raspberry Pi. Notably, the Raspberry Pi also serves as an excellent retro gaming console. The utilitarian Pi is inexpensive yet powerful. The capable boards are suitable as a home theatre PC (HTPC), music player, IoT device, and more. You soon might be able to install Android on Raspberry Pi, getting even more games available on the small platform with it. In this article you will learn how to install Recalbox on Raspberry Pi. This distro combines Kodi and EmulationStation, merging media and gaming capabilities. [Read: OpenELEC vs OSMC for Raspberry Pi 2 Media Center]
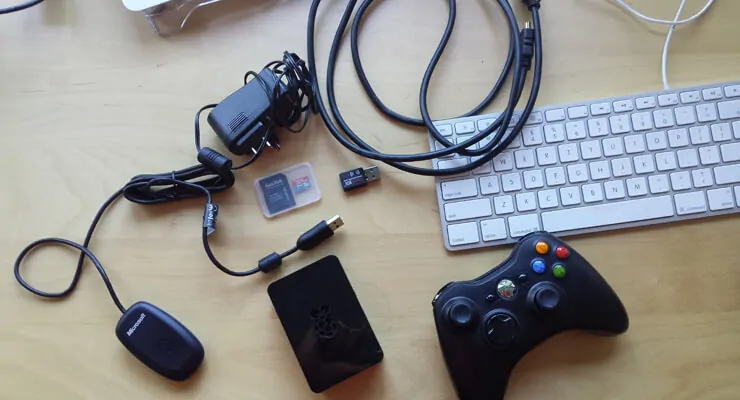
Table of Contents
- What is Recalbox?
- What do I need to install Recalbox?
- Install RecalBox on Raspberry Pi
- Starting Up RecalBox
- Navigating RecalBox
- Launching Kodi Media Center on Recalbox
- Exiting Kodi on Recalbox
- Why should I install Recalbox on Raspberry Pi?
- Why should I not get Recalbox on Raspberry Pi?
- Final Thoughts on Recalbox
What is Recalbox?
Recalbox is a neat little Raspberry Pi distro. The Linux-based operating system is similar to RetroPie. If we compare Recalbox vs Retropie, some differences become evident. Where RetroPie features Kodi as "port," Recalbox launches Kodi via a start menu. [Read: How to build a Raspberry Pi Retro Console]
What do I need to install Recalbox?
Before proceeding to install Recalbox on Raspberry Pi, you'll need a few items.
Required:
- Raspberry Pi
- microSD card
- Compatible Raspberry Pi power supply
- RecalBox distro
- Gamepad
Optional:
- Case (here's a good option for a Kodi Raspberry Pi case)
- Keyboard (Read: 5 best Wireless HTPC keyboard and mouse options in 2015)
- Wi-fi dongle (Raspberry Pi 3 includes built-in Bluetooth and wi-fi)
While almost any Raspberry Pi should work, I recommend using a Raspberry Pi 3. It's the latest and most powerful iteration. However, I'm still using my Pi 2 and it's been great. But for longevity, the 3 is your best bet. While you may source the various components separately, I suggest picking up a full kit. These offer a better value, coming with a case and compatible power supply.
Install RecalBox on Raspberry Pi
First download RecalBox in order to mount it to a microSD card. Locate the zip folder (likely in your Downloads directory) and unzip it. Once the RecalBox OS folder has been uncompressed, simply copy all of the files in that folder to the your microSD card.

Now remove your microSD card once the file transfers complete and prepare to start the process to get Recalbox on Raspberry Pi.
Starting Up RecalBox
Pop your microSD card with a fresh install of RecalBox into your Raspberry Pi. Plug in your compatible controller (I'm using a wireless Xbox 360 game pad), plug in your Raspberry Pi power cable and connect the HDMI cable. This will start the Raspberry Pi Recalbox setup.
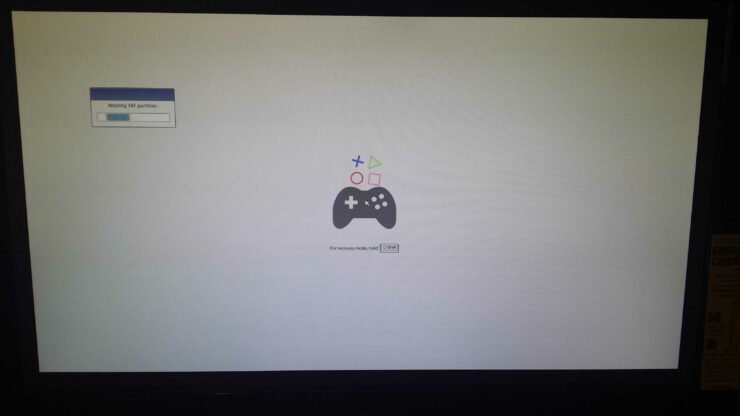
You'll see a loading screen with a picture of the RecalBox logo and may see a message that says Resizing FAT partition.
When you first load up Recalbox, you'll be greeted with the EmulationStation frontend. If you've ever used RetroPie, you'll have difficulty distinguishing the two. Like with RetroPie, the initial boot prompts a quick controller configuration. If you're using a Bluetooth dongle, Recalbox sports native Playstation 3 controller support. On RetroPie, PS3 controllers require a bit of tweaking.
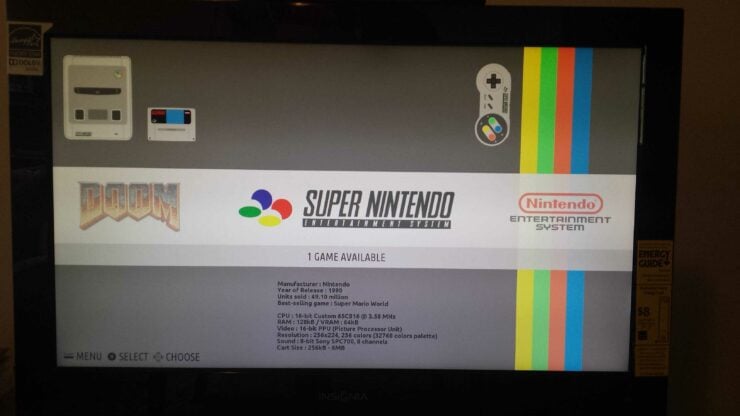
Launching Kodi Media Center on Recalbox
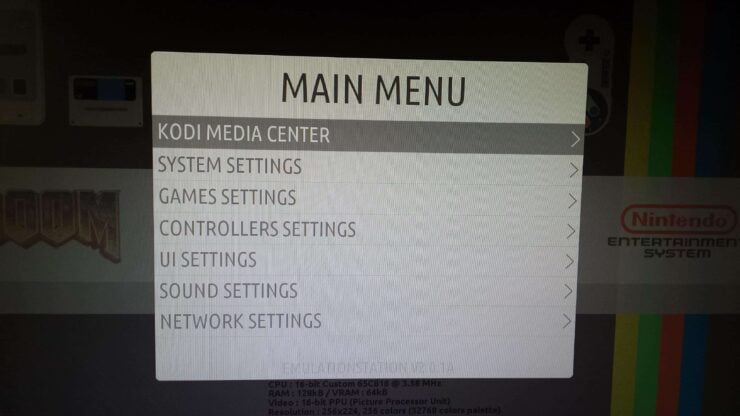
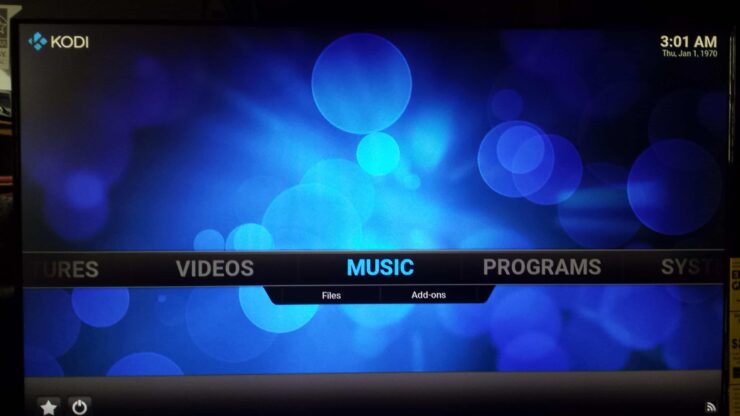
To load Kodi, simply press the X button on your controller. This launches Kodi Media Center, or XBMC. Alternately, press the start button and you may launch Kodi via the start menu.
From here, you're using the vanilla Kodi. You can now install one of these best addons for Raspberry Pi, play media from external drives, or via your home network. A neat touch, Kodi within Recalbox supports gamepad navigation. So you don't have to swap your controller for a remote or keyboard. Notably, RetroPie also includes Kodi as a "port". However, Kodi on RetroPie does not support controller navigation. [Read: 5 Best Kodi skins for Raspberry Pi in 2016]
Exiting Kodi on Recalbox
Quitting Kodi is as easy as starting it on Recalbox. Navigate to the power symbol in the lower left corner of the XBMC user interface (UI), and select "Power Off System." Using "Exit" may work, but it's been known to freeze some systems.
Why should I install Recalbox on Raspberry Pi?
Why should you use Recalbox? This release boasts several advantages. It's much easier to get going with Recalbox. Unlike RetroPie, Recalbox install is pretty intuitive, and as simple as copying files over to a microSD card. You don't need any prior knowledge of bootable medium as with RetroPie.
PS3 controllers work by default with Recalbox, and in Kodi Media Center, there's native controller navigation. When I switch to Kodi on my RetroPie install, I have to swap my wireless Xbox 360 gamepad for my Rii Mini keyboard. Recalbox offers a more streamlined experience when first starting. If you're new to the Raspberry Pi landscape, Recalbox offers a low learning curve so it is a great distro to start using the Raspberry Pi capabilities.
| Build a Low-Cost Raspberry Pi Media Center | Price |
|---|---|
| Raspberry Pi 4B Starter Kit with case, power adapter, and heat sinks | ~$82.00 |
| Sandisk Ultra 32GB Micro SDHC UHS-I Card 98 MB/s | ~$8.00 |
| SANOXY Wireless USB PC Remote Control Mouse for PC | ~$8.00 |
Why should I not get Recalbox on Raspberry Pi?
If you are a power user you may want to consider RetroPie. It has a larger list of compatible game system emulators. Additionally, RetroPie is increasingly customizable and has an open ecosystem thanks to RetroArch.
Recalbox also has a few quirks. When performing a fresh install, I had to completely reformat my microSD for it to work. However, that may be a hardware issue. A few random lockups occurred, but again, I'm running Recalbox on a Pi 2 so it might be because of the older hardware.
If you value manual emulator settings and custom shaders, opt for RetroPie. But if you just seek an easy to use gaming and media center, Recalbox is the perfect distro. Alternately, there are methods for dual booting distros on a Raspberry Pi. However, using Recalbox is a solid all in one solution to running multiple operating systems.
Final Thoughts on Recalbox
While Recalbox may not be perfect, it's nearly flawless. Install Recalbox on Raspberry Pi for a stellar comprehensive retro gaming/media center package. Bundling EmulationStation with the power of Kodi means satiating your HTPC and gaming fixes in one tiny device. Recalbox even includes Moonlight for game streaming if you want to transform your Raspberry Pi into a Steam box. For beginners or those seeking a quick set up, Recalbox is an excellent Raspberry Pi distro.

![8 Amazing Raspberry Pi Ideas [2022]: Beginners and Enthusiasts Raspberry Pi ideas](https://www.smarthomebeginner.com/images/2021/09/raspberry-pi-4-dev-board.jpg)
![10 Best Plex Client Devices [2022] - STUTTER-free Streaming Best Plex Client Devices](https://www.smarthomebeginner.com/images/2022/02/best-nas-for-plex-server-featured-images-from-pexels-photography-maghradze-ph-3764958-e1648542743772.jpg)
![10 Best Jellyfin Client Devices [2022] - 4k, Hardware Transcoding, etc. Jellyfin Roku App](https://www.smarthomebeginner.com/images/2021/02/jellyfin-roku-client-app-ft.jpg)
![10 Best Emby Client Devices [2023] - 4k, Hardware Transcoding, etc. setup emby server with raspberry pi](https://www.smarthomebeginner.com/images/2017/02/setup-emby-server-with-raspberry-pi.jpg)

![10 Best Media Server for Plex + one SURPRISING bonus [2022] Media Server for Plex](https://www.smarthomebeginner.com/images/2020/04/plex-free-movies-and-tv.jpg)