In a previous post, I showed you how you can install Plex in Docker, so you can start enjoying your media. As you know, Plex Media Server organizes your media library and streams it to any Plex compatible device. Probably, you shared your media with other users and you were asked to add new content on your Plex server, but wouldn't be easier for your friends to be able to go on a website and submit their requests? Enter Plex Requests!
Must Read: Docker Media Server Ubuntu: Compose for 23 Awesome Apps
Plex Requests allows you to automate users requests for new content in Plex, by allowing them to search for the content they want. Besides that, Plex Requests makes your life easier by integrating with services like CouchPotato, Sickrage and Sonarr making it easier to search and download the requested content. If i got your interest, continue reading and learn how you can install Plex Requests using Docker in just a few easy steps.
If you do not know what Docker is, be sure to read our What is Docker guide and comparison to VirtualBox in advance and get familiarized with the terms used. [Read: Plex and VPN: An excellent combination for your home server]
Table of Contents
Install Plex Requests using Docker
Before starting the Docker Plex Requests installation guide, make sure to follow our previous guides where you can learn to Install Docker on Ubuntu, Windows 10 Pro/Ent, and Windows 7 and 8.
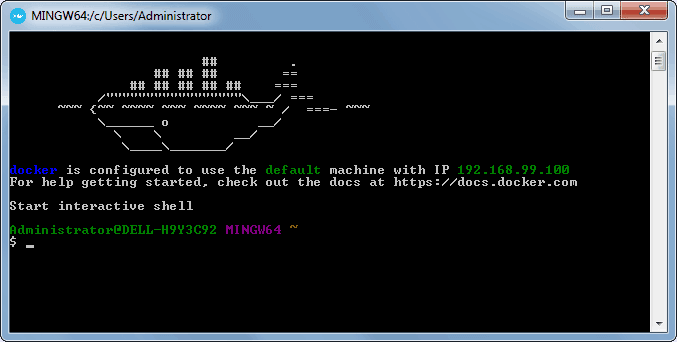
You can install Plex Requests using Docker in a new Docker container from scratch. But, ready-made containers are already available for several apps on Docker Hub. So all you need to do is pull those containers and install. If you are ready, open Docker command prompt and get ready to install Plex Requests using Docker.
Best Plex Client Devices:
- NVIDIA SHIELD TV Pro Home Media Server - $199.99
- Amazon Fire TV Streaming Media Player - $89.99
- Roku Premiere+ 4K UHD - $83.99
- CanaKit Raspberry Pi 3 Complete Starter Kit - $69.99
- Xbox One 500 GB Console - $264.99
1. Plex Requests Pull Command
To install Plex Requests using Docker, you will first need to grab the latest version of Plex Requests container from the linuxserver Docker Hub. LinuxServer is a Docker repository with several HTPC and home server app containers.
docker pull linuxserver/plexrequests
Pull the ready-made Plex Requests docker container using the above command.
2. Set Plex Requests Configuration Parameters in Docker
After pulling the container with the latest version of Plex Requests, we need to configure the usage parameters such as download folders, port number, etc. for the service. Copy all lines in the code block below (it is one single command) and paste it into docker prompt.
sudo docker create --name=plexrequests \
--restart=always \
-v /etc/localtime:/etc/localtime:ro \
-v /home/docker/plexrequests/config:/config \
-e PGID=1001 -e PUID=1001 \
-e TZ=Europe/London \
-e URL_BASE= \
-p 3000:3000 \
linuxserver/plexrequests
While you can just copy and paste the settings mentioned above, I recommend that you understand each parameter using the description below and customize it to your liking, in order to setup Plex Requests in Docker. Therefore, before issuing the above docker command, change certain parameters (eg. port number, folders, etc.) to fit your situation.
sudo docker create --name=plexrequests \- Creates a new docker container with the name "plexrequests"--restart=always \- Starts the Muximux container automatically during boot. If you don't want the container to be started automatically, you can skip this command.-v /home/docker/plexrequests/config:/config \- Specifies the location of the Plex Requests config files. In this case, the config folder is located in /home/docker/plexrequests/ directory.-v /etc/localtime:/etc/localtime:ro \- Enables time sync.-e PGID=1001 -e PUID=1001 \- Specifies the user id in order to minimize permission issues that can arise between the host OS (Ubuntu) and the container.-e TZ=Europe/London \- Specifies the timezone information. You can check your timezone by following this link.-p 3000:3000 \- Specifies the ports used by Plex Requests . In this case, the port is 3000:3000.
3. Start and Stop Plex Requests Container in Docker
If you used the correct parameters, you can go ahead and start the Plex Requests container you have just created, using the following command.
sudo docker start plexrequests
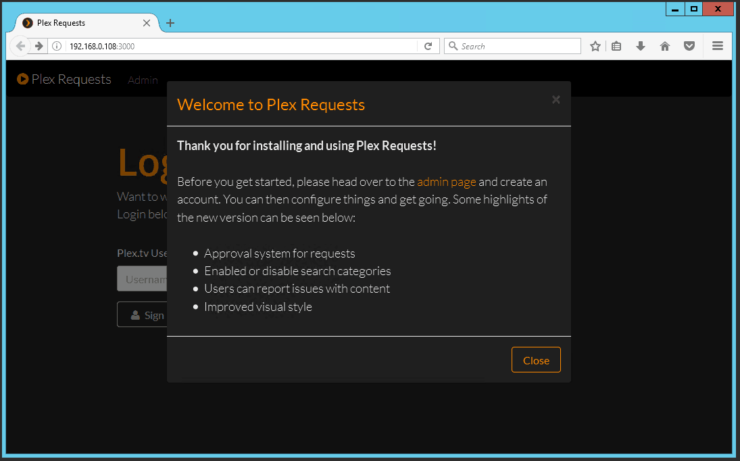
After starting the Plex Requests Docker container, you will be able to open the web interface on port 3000. In my case the ip is http://192.168.0.108:3000.
First time you run Plex Request, you need to head over to the admin page in order to create an Administrator account where you can check your requests. In my case, the admin address is http://192.168.0.108:3000/admin.
After you create your admin account, you just need to go in the settings and follow the instructions for configuring Plex Requests.
Plex Requests is now installed in Docker. What to do next?
Congratulations! You managed to setup Plex Requests in Docker successfully. Once Docker is setup, it is extremely simple to create and destroy containers with apps. If you want your users to be able to access the Plex Requests interface outside your home network, be sure to setup port forwarding on your router. You will have to forward the Plex Requests port to the local/internal IP address of the system with Docker installation.
Next, you can install Sonarr in Docker or Sickrage to manage your media library and easily add requests to your server. Check back soon to learn more about Docker and how you can install various other services in Docker containers.


![10 Best Plex Client Devices [2022] - STUTTER-free Streaming Best Plex Client Devices](https://www.smarthomebeginner.com/images/2022/02/best-nas-for-plex-server-featured-images-from-pexels-photography-maghradze-ph-3764958-e1648542743772.jpg)

![8 Best NAS with Plex Server Support [2022] - 4k, Transcoding, etc. Best NAS Server for Plex](https://www.smarthomebeginner.com/images/2020/02/best-media-server-for-plex-ft.jpg)

![15 Best Jellyfin Plugins [2023] - Supercharge your Media Server Jellyfin Intros Plugin Preview Pre-Roll](https://www.smarthomebeginner.com/images/2022/08/jellyfin-intros-preroll-preview.jpg)
![10 Best Jellyfin Client Devices [2022] - 4k, Hardware Transcoding, etc. Jellyfin Roku App](https://www.smarthomebeginner.com/images/2021/02/jellyfin-roku-client-app-ft.jpg)