Plex Media Server is a service made specifically for a server or HTPC that allows you to stream your media anywhere and on any Plex compatible device. Besides streaming, this service processes your media and organizes it in beautiful libraries ready for consumption. We recently showed you how to install Plex server on Windows and Ubuntu Server. Today I will show you how you can install Plex on Windows Server 2016 in just a couple minutes. The process is very similar to regular Windows installation. [Read: Plex vs Emby: A Comprehensive Comparison]
Table of Contents
Download the Plex Installer
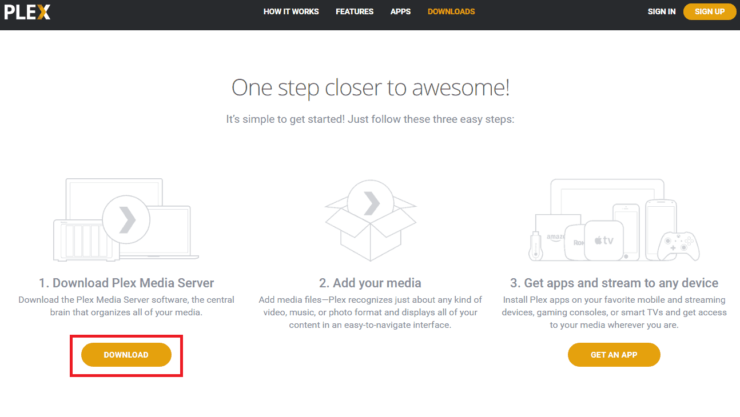
In order to download the latest Plex Media Server installer, you need to first go on the Plex download page on plex.tv.
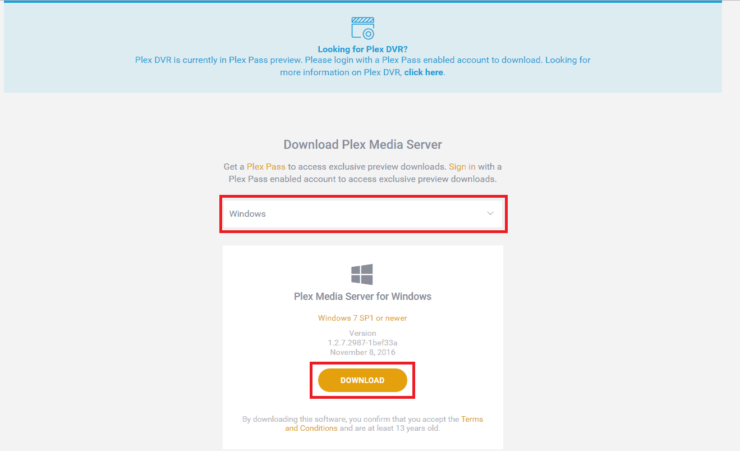
Then, select the appropriate operating system (in this case, Windows) and click the Download button.
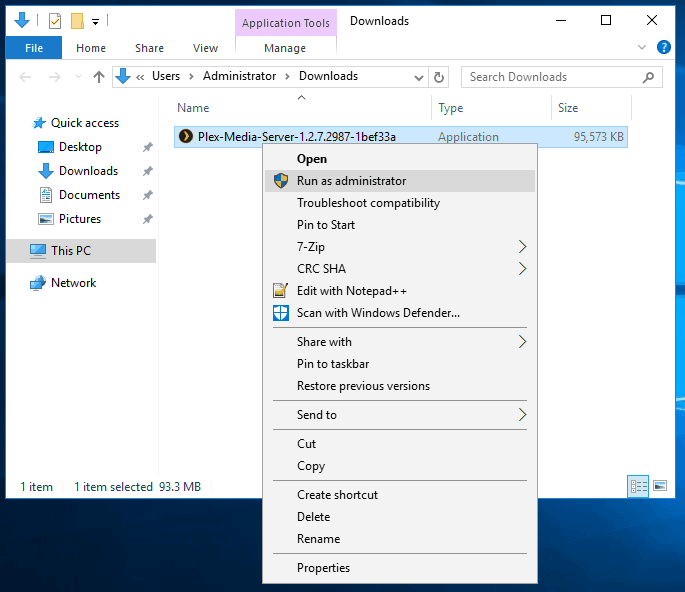
After completing the download, open the location of the installer, right click on it and then click on Run as administrator to start the setup.
Install Plex on Windows Server
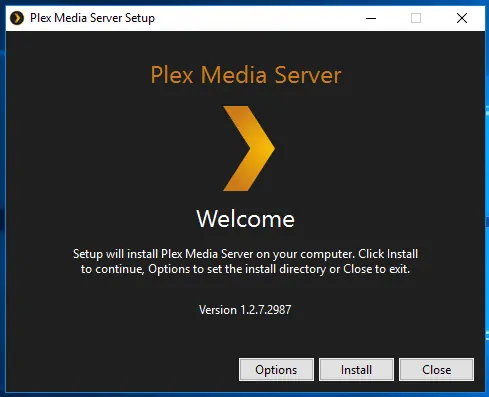
The Plex Media Server Setup will begin. You can click on Options if you want to change the default installation folder, but the default is in C:\Program Files (x86)\Plex\Plex Media Server. Click Install and wait for the process to finish. When the setup has been completed, you can click on Launch.
If everything is OK, the internet browser will open on port 32400 on the Plex login page. If you don’t have an account, click on Sign Up and proceed to create one, then sign in.

Configuration and Plex Media Library
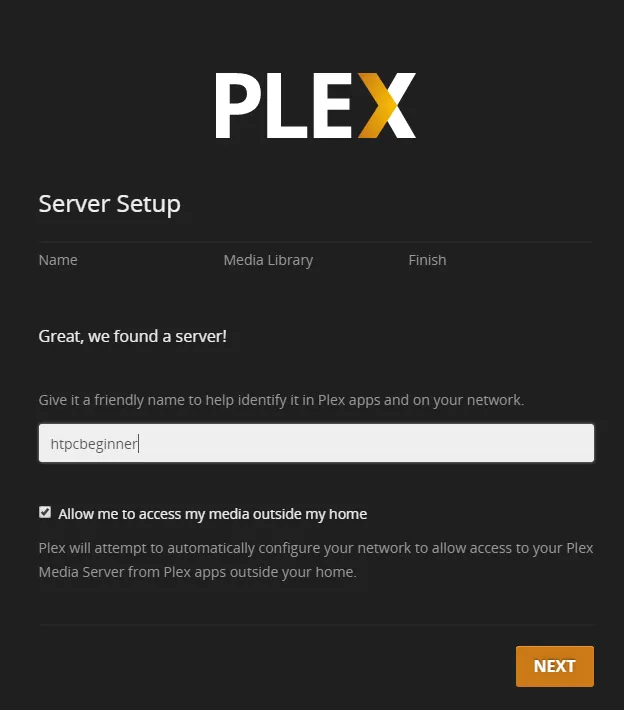
After the login, the Plex Server Setup will start, and you will be asked to give your new server a name, in order to identify it in the future. Also, make sure the Allow me to access my media outside my home option is checked, in order to be able to stream your media from anywhere, then click Next.
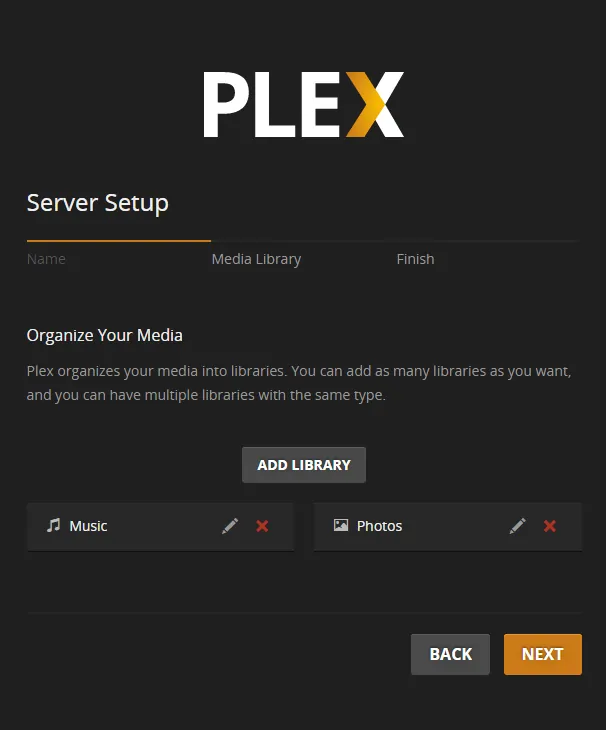
On the Media Library page from the Server Setup, you will need to click on the Add Library button.
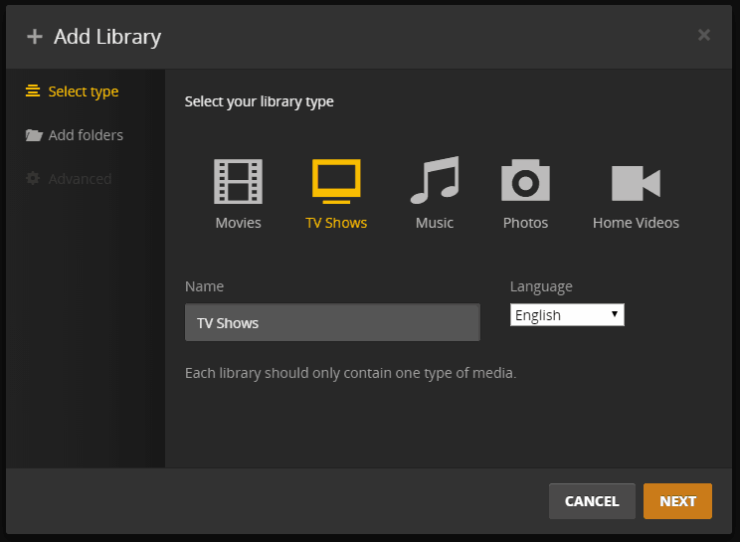
Then, select the type of library you want to add (in this case TV Shows), then click Next. Browse for the Media Folder containing the type of media you selected previously and then click on Add Library.
Please note that it is recommended to have a different folder for each type of media. For example, you will have one folder for TV Shows, one folder for Movies and one folder for Music.
Recommended HTPC / Home Server Builds:
- Best Home Theater PC Build 2017 to do it all (Plex, Kodi, NAS, Gaming)
- Best Emby Server builds 2018 – Pre-built and DIY options
- Medium Budget 4K HTPC Build 2017 for Kodi, Plex and Gaming
- Cheap 4K HTPC Build for Kodi, OpenELEC, and LibreELEC 2017
- Low Power Home Server Build 2017 for Network File and Media Storage
- Best HTPC for Kodi with 4K on a Medium Budget 2017 (~$400)
- Energy efficient budget HTPC-NAS combo build 2016
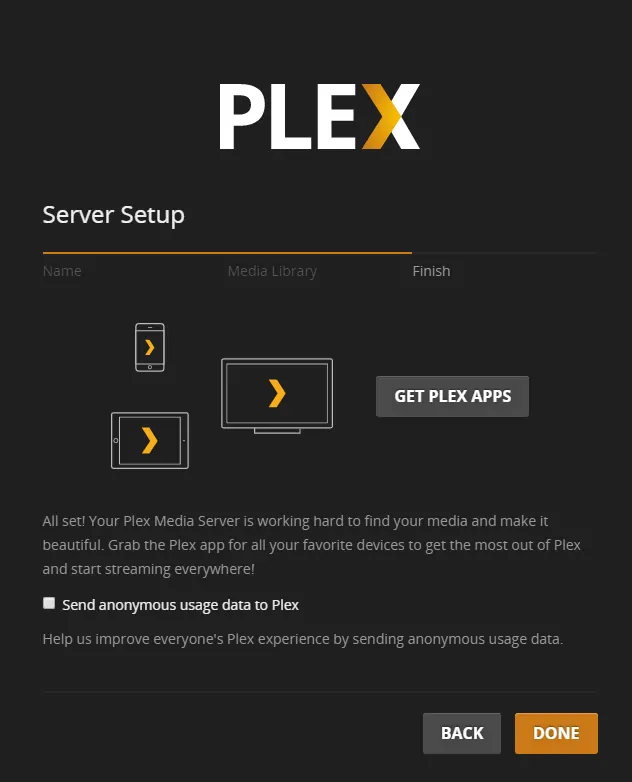
After you have added the media libraries, click next, and choose if you want to Send anonymous usage data to Plex or not. On the same screen you can click on Get Plex apps to download Plex Media Player on various devices you own. When finished, click Done and wait for the indexing to finish.
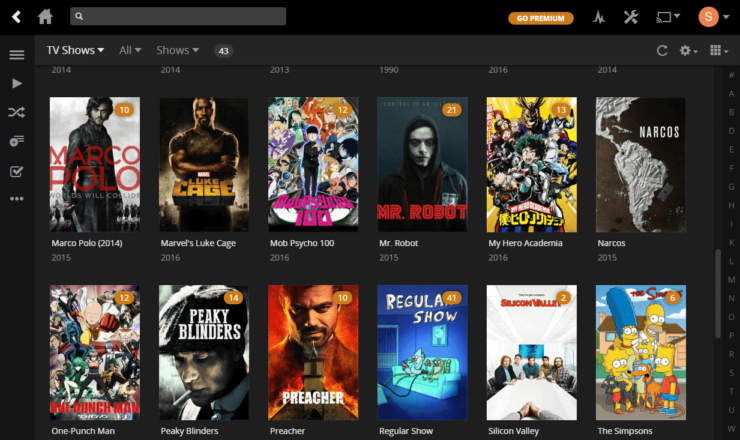
In the end, if the libraries were added correctly, your Plex Dashboard should look like in the screenshot below.
You managed to install Plex on Windows Server 2016 successfully. What to do after that?
After successfully installing Plex, you will probably want to install a service for automatic media downloading, in order to populate your Plex Media Server library. If you have Ubuntu Server, you could use our famous AToMiC ToolKit for automating media management. On Windows, you can do that by following our guides on SickRage, CouchPotato, etc.
To play media from your Plex Server you will need Plex Client hardware and app. For Plex hardware you may refer to our guide on choosing Plex Hardware and list of best Plex clients. On Raspberry Pi, you could use Rasplex. On other devices, you need the Plex client app. Finally, you can extend your Plex media server's functionality further by installing additional Plex channels. So go ahead install Plex on Windows Server and get started.

![10 Best Plex Client Devices [2022] - STUTTER-free Streaming Best Plex Client Devices](https://www.smarthomebeginner.com/images/2022/02/best-nas-for-plex-server-featured-images-from-pexels-photography-maghradze-ph-3764958-e1648542743772.jpg)
![10 Best Emby Client Devices [2023] - 4k, Hardware Transcoding, etc. setup emby server with raspberry pi](https://www.smarthomebeginner.com/images/2017/02/setup-emby-server-with-raspberry-pi.jpg)

![10 Best Jellyfin Client Devices [2022] - 4k, Hardware Transcoding, etc. Jellyfin Roku App](https://www.smarthomebeginner.com/images/2021/02/jellyfin-roku-client-app-ft.jpg)
![8 Best NAS with Plex Server Support [2022] - 4k, Transcoding, etc. Best NAS Server for Plex](https://www.smarthomebeginner.com/images/2020/02/best-media-server-for-plex-ft.jpg)