In this post, I will show you how to install Monit on Ubuntu to monitor the health and status of your home server. I just finished building my new 2016 HTPC-NAS Combo system. It runs Ubuntu Server with several apps including: Webmin, SickRage, CouchPotato, Transmission, SABnzbd, ShellInABox, and more. My Kodi boxes stream content from it. There was no way for me to know when any of these services fail or if my hardware is failing. This is where Monit comes into play. Monit sends an email alert anytime a service fails, a hard is failing (SMART Health Failure), or any other criteria you set is not met. Monit goes one step further and attempts to fix any failed services. This makes it a perfect companion for home server monitoring.

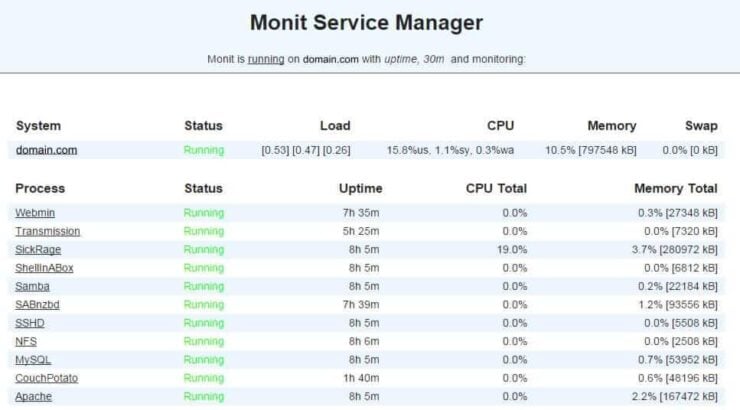
As shown below, Monit provides the status information in a simple but informative web interface.
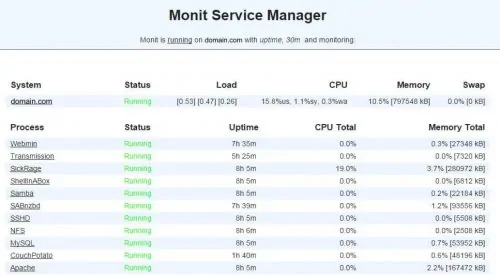
In addition, you can also monitor hardware status (HDD temperature, Fan Speed, SMART Health, CPU Temperature, Motherboard Temperature, etc.). In the picture below, HDD-Health and SSD-Health are waiting for the SMART test to complete. Rest everything is currently OK.

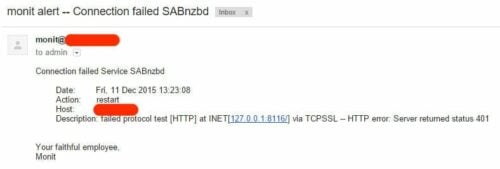
I already use it on my Digital Ocean droplet that runs this site. With the revamping of my server, I decided install Monit on Ubuntu server to be alerted when something goes wrong. Below is an example of an email alert sent by Monit when somethings goes wrong.
Awesome right? Let us go ahead and setup Monit on your Linux server. [Read: 5 Most common NAS or Home Server uses]
Install Monit on Ubuntu Server
Here I describe how to setup Monit on Ubuntu server, but you can do so any Linux, BSD, or OSX system. The next 2-3 guides from me will show Monit configuration and Monit examples to help you setup your server monitoring services. Installing Monit on Ubuntu Server is an easy single command step. From command line, just run the following command:
sudo apt-get install monit
Monit should now be installed and accessible through one of the following URLs:
- http://localhost:2812
- http://IPADDRESS:2812 (local network IP)
- http://domain.com:2812 (if you have domain name pointing to your server)
Option 3 will require port forwarding to be enabled on your router. Using the web browser you can now keep a check on your home server. [Read: 5 Must have Android apps for HTPC or Home Server control]
Monit Configuration
Before you can start using Monit for automatic server monitoring, you have to do some basic configuration. First backup the existing default Monit configuration using the following command:
sudo mv /etc/monit/monitrc /etc/monit/monitrc.bak
Next, create a new monitrc file using the command sudo /etc/monit/monitrc and copy the following contents to it.
# How often in seconds should monit check your services.
set daemon 120

set logfile /var/log/monit.log
set idfile /var/lib/monit/id
set statefile /var/lib/monit/state

# Configure your SMTP out server.
set mailserver smtp-server.columbus.rr.com port 25,localhost

set eventqueue
    basedir /var/lib/monit/events # set the base directory where events will be stored
    # optionally limit the queue size
    slots 100

# Use one of the following 2 lines. The second line alerts on every little change and can be annoying.
set alert [email protected] but not on { instance, pid, ppid } #does not send alert on pid changes
#set alert [email protected]

set httpd port 2812 and
    #Change username and password
    allow Username:Password
    # To enable SSL for WebUI uncomment the next 2 lines
    #ssl enable
    #pemfile /path/to/unified/certificate.pem
    # To restrict access to localhost only uncomment the following line
    #allow localhost

include /etc/monit/conf.d/*
Lines that begin with a # are comments to help you customize the configuration. Make sure you have at least the admin email, SMTP server, and SMTP port configured correctly. You should also consider changing Monit WebUI username and password. If you have an SSL certificate you can enable that as well for HTTPS access. [Read: How to run a Ubuntu home server on VirtualBox VM?]
That is it in this Monit tutorial. Isn't it easy to install Monit on Ubuntu?. You are done with basic configuration but you have not enabled home server monitoring yet. You will have to enable services that you want to monitor. I use Monit to monitor several services listed below:
Monitor your home server with Monit:
- Home server system load monitoring (CPU, RAM, Swap)
- Server hard drive storage monitoring (HDD space)
- Motherboard temperature monitoring
- Processor or CPU temperature monitoring
- Monitor Hard drive SMART health and temperature
- Monitor file server status (Samba and NFS)
- Monitor web server status (Apache, NGINX, and MySQL)
- Monitor CouchPotato process status
- Monitor SickBeard process status
- Monitor SickRage process status
- Monitor SABnzbd process status
- Monitor Webmin process status
- Monitor qBittorrent process status
- Monitor Transmission process status
- Monitor ShellInABox process status
For now use the following commands to ensure Monit is working well.
To test Monit configuration for syntax errors: sudo monit -t
To start Monit: sudo monit
To check Monit Status: sudo monit status
Monit Wiki page has several examples. But in the next few guides I will show configuration of Monit specific home server apps. So hang in there (I will update this post and link to the new articles). For now, just install Monit on Ubuntu home server and get ready for the ride.

