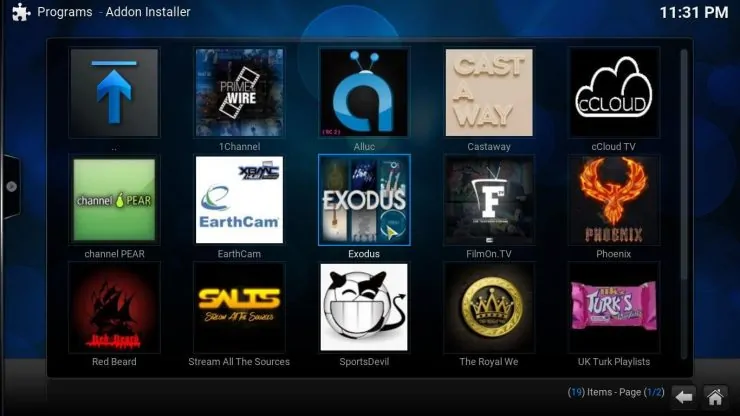
If you have interacted with Kodi addons in the past, you probably know by now that the best way to get them on your media player is through a repository. This guarantees that the addons will update automatically, and that you get the best possible version, as long as the repository is one with good reputation. Some repositories with good reputation include, of course, the official Kodi addon repository and the SuperRepo addon repository. Another very good way to get addons in your Kodi system is through the Fusion Addon installer. In this guide, you will learn how to install it after you get Fusion Repo on your Kodi device. [Read: Guide: How to install MetalKettle Repository for Kodi]
If you install Kodi Addon Installer, you will be able to get good-quality addons for your system. Usually, the Fusion Addon installer also gets you the repository, so you won't have to worry about updating your addons. However, if you read our guide to install Fusion Installer - Method 1, it's done through a .zip file. This makes it difficult to keep the Addon Installer itself properly updated.
It is necessary to have a method that allows us to Install Fusion Repository, and be able to install Kodi Addon installer from it. If you want to get Fusion repo, it's very easy. We will get to that soon. However, a word of advice: the process will be faster if you have a wireless HTPC keyboard connected to your device. The reason is, you will have to type the URL where the repository can be found, and this is a pain to do with the on-screen keyboard.
How to install Fusion Repository?
Best Kodi Addons:
- 20 Best add-ons for Kodi 18 Leia with installation instructions - 2019
- Top Kodi Addons: Ultimate List of 93 Working Kodi Addons in 2018
- 6 Must have Kodi addons for Broadcast TV streaming
- 6 best legal Kodi TV show addons – TV show addons for Kodi
- The 6 best legal Kodi movie addons – Movie addons for Kodi
- 5 Best Legal Kodi Anime Addons for your Kodi HTPC
- 10 Best Kodi Kids Addons List for your HTPC
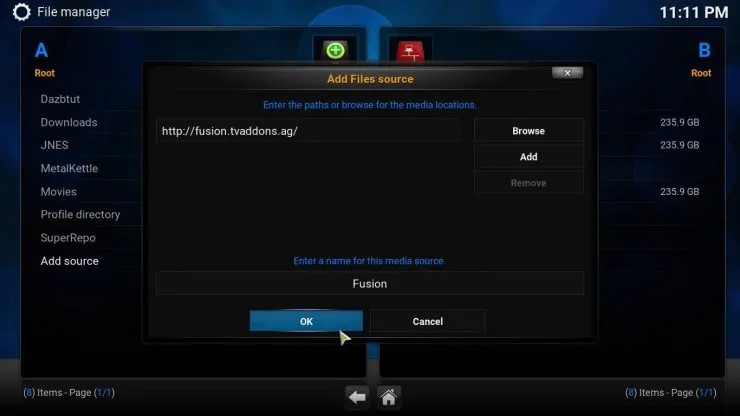
From the main menu on Kodi, head to System -> File manager. Once in the File manager interface, click on Add source. You will see a dialog where you can enter the URL for the source, as well as a name. Type http://fusion.tvaddons.ag on the path field, and type Fusion on the name field. Click OK to save it.
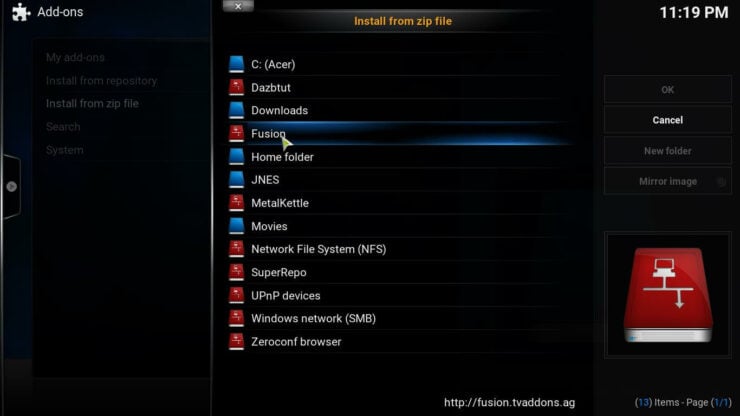
Go to the Kodi main menu again. To install Fusion Repository, head to System -> Settings -> Add-ons -> Install from zip file. You will see a dialog with all the sources available on your device. To get Fusion Repo, click on Fusion.
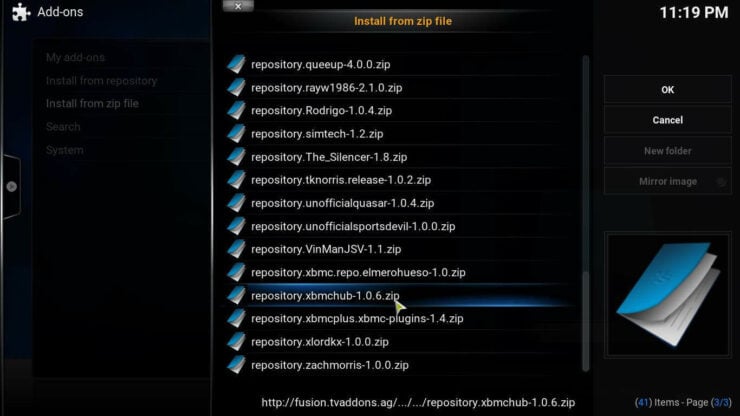
After you do that, click on xbmc-repos -> english and then scroll until you find repository.xbmchub-1.0.6.zip (the version number might vary).
This will let you see a notification on the bottom right corner of your screen, indicating the repository has been successfully installed.
How to install Kodi Addon installer after you get Fusion Repo?
To install Kodi Addon installer, head to System -> Settings -> Add-ons -> Install from repository. Scroll until you find the TVADDONS.ag Addon Repository. Click on it. Click on Program add-ons. Now you will see a list with the available addons. Click on Addon installer. This will open a dialog with an Install button, which you have to press.
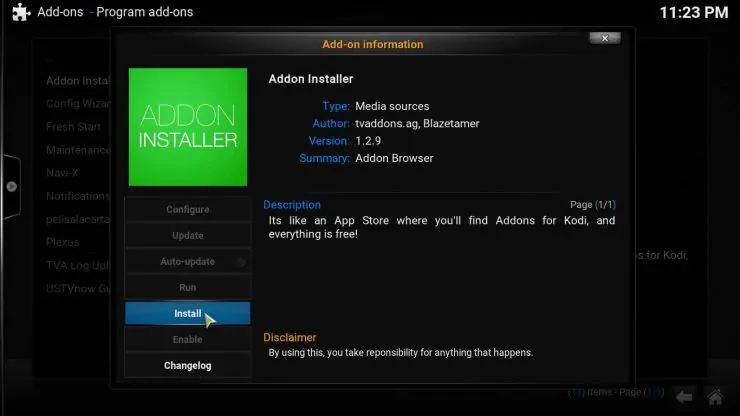
After a few seconds, you should see this notification on the bottom right corner of your screen.

Congratulations! You have successfully installed Fusion Addon installer on your media center, and you're now ready to take your Kodi experience to the next level. Many of the addons we recommend on our lists, such as the 10 best Kodi movies addons or the 10 best addons to watch the Olympics, are available from the Fusion Addon installer, so if you don't yet have it on your Kodi media center, it's time to download it and give it a try!

![15 Best Jellyfin Plugins [2023] - Supercharge your Media Server Jellyfin Intros Plugin Preview Pre-Roll](https://www.smarthomebeginner.com/images/2022/08/jellyfin-intros-preroll-preview.jpg)

![Ultimate QNAP Docker Compose and Container Station Guide [2023] QNAP Container Station](https://www.smarthomebeginner.com/images/2023/05/ContainerStation.png)
![Ultimate Docker Server: Getting Started with OS Preparation [Part 1] Docker Server Tutorials 1 OS Preparation](https://www.smarthomebeginner.com/images/2024/01/Docker-Series-01-Intro-and-OS-Prep.png)