eXtplorer, is a feature-rich web-based file manager. In this post, I will explain how to install eXtplorer on Linux hosting account, specifically on GoDaddy. GoDaddy offers a great hosting service that is not only cheap but also has extensive feature list. But irrespective of whether it is GoDaddy, HostGator, or Bluehost that you use, you need a good FTP client to connect to your hosting space transfer files. Unfortunately, many enterprise networks block FTP ports and you may not be able to install FTP Clients on your system. Here is where a web-based file manager comes in handy. So let us look at how to install eXtplorer on Linux hosting space. This method should also work on other hosting providers as well.

Table of Contents
Install eXtplorer on Linux Hosting
GoDaddy, like most other hosting providers comes with a web-based file manager. Unfortunately, if you have used them, you will know that they are not the most user-friendly. They are slow and cumbersome to use.
So my quest for finding a web-based FTP client that is fast, lightweight, user-friendly, secure, and is accessible for anywhere through the browser result two solutions: eXtplorer and Ajaxplorer. In this post, I will show you how to install eXtplorer on Linux hosting account on GoDaddy. eXtplorer currently includes the following great features:
- Copy & Move Files and Directories by Drag&Drop
- Dynamic Directory Tree with on-demand loading of subdirectories
- Edit Files (with Syntax-Highlighting thanks to EditArea)
- Rename, Delete or Create new Files and Directories
- Access Files through ''FTP'' or directly (using PHP) to totally overcome permission and file ownership issues
- Upload or Download files just as you like
- Create and Extract Archives (ZIP, Tar, Tar/GZ, Tar/BZ)
- User Management with different permission levels like "View only" or "Edit" and "Admin"
Download eXtplorer
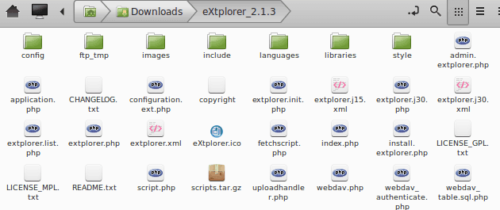
First, visit this page, download the latest version of eXtplorer as a zip file, and extract it. In this instance it is version 2.1.3.
Upload eXtplorer
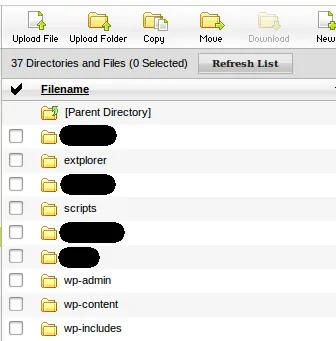
For now you will either have to use GoDaddy's file manager or any FTP Client. In the example below, I have renamed the extplorer_2.1.3 folder to extplorer and uploaded it to the root directory of my hosting space. Note that you can call it anything. In fact, I recommend that you name it something other than extplorer for security reasons (just one tiny step to make a hacker's life harder).
If not, no big deal, after we install eXtplorer on Linux hosting, I will show you how to secure it.
Visit Your eXtplorer
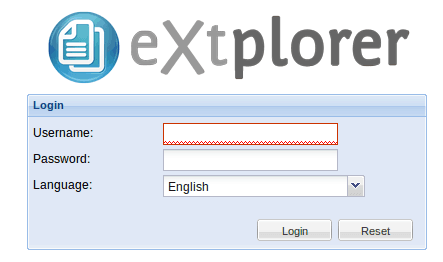
Next, open your browser and visit location where you installed extplorer (example: http://www.domain.com/extplorer). You should be greeted with a login screen.
The default username and password are admin and admin. Needless to say, these have to be changed as soon as you login for the first time. In fact, eXtplorer will warn you as soon as you login.
Click "OK", close the window, and move on for now.
Setup Folder Permissions
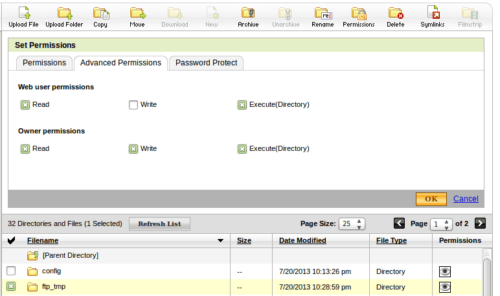
Before we proceed with password change and setting up user accounts, you will first have to ensure that right permissions are set for some of the files and folders. Go back your GoDaddy file manager and into the eXtplorer folder. Select the ftp_tmp folder and then click on "Permissions" from the menu. Move to "Advanced" tab and ensure that the permissions are set as shown below and click "OK".
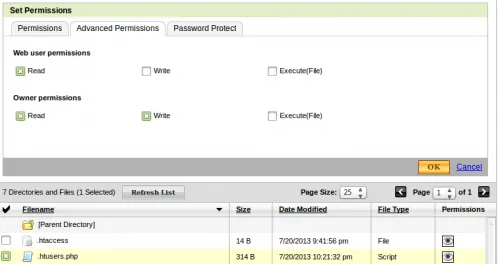
Then, find the .htusers.php file within config folder and ensure that the permissions are set as shown below and click "OK".
Setup Your Admin Account
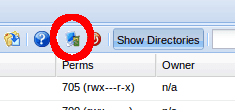
Click on the "Admin" icon and you will see a list of all the user accounts that can access your eXtplorer. At this point, you should only see the admin user. You may select admin user, edit it, and change the password. However, you cannot change the default username "admin" as you are currently logged in as "admin".
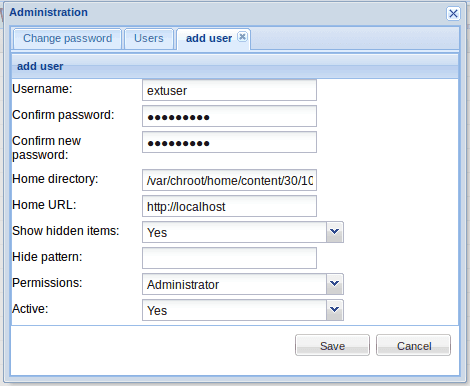
Therefore, I recommend you do something different. Click on "Add" and create a new user with settings shown in the picture below. Of course, you may choose the username and password of your choice. You do not have to edit "Home directory" or "Home URL". Ensure that "Administrator" is selected for permissions and click "Save" to create a new user.
Now logout and login as the new user you just created. Click on the "Admin" icon to open the users list. Then, select the "admin" user (the default admin account) and click "Remove". Now you will have one admin account with a custom username (another tiny step to improve security).

That is all there is to install eXtplorer on Linux hosting.
eXtplorer Security
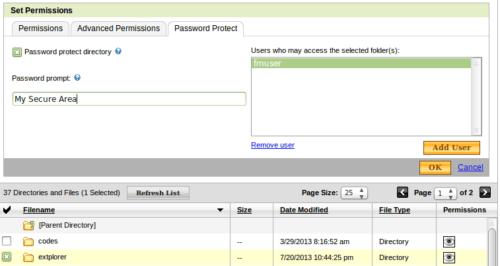
You have already changed the default username and default password. In addition, I recommend that you password protect the "extplorer" folder on your GoDaddy hosting space. This will add Apache HTTP authentication, providing another big layer of security. To enable HTTP authentication, select the eXtplorer folder and click on "Permissions". Move to the "Password Protect" tab and check "Password protect directory". For password prompt provide anything you would like. This name will appear on the login window. Then, click on "Add user" and provide a username and password to access eXtplorer.
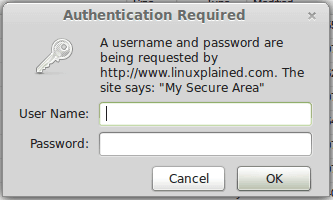
Finally, click "OK" to enabled HTTP authentication for eXtplorer. Doing this will add double authentication to your eXtplorer. First, HTTP authentication screen is presented.
Upon providing the correct username and password you will be taken to the eXtplorer login screen.
eXtplorer as FTP Client
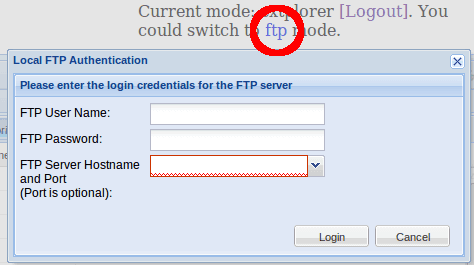
Not only can you use eXtplorer as a web-based file manager, you can also use it as a FTP client to connect to files on a remote FTP server. Just switch from the "extplorer" mode to "ftp" mode and provide the credentials to access the FTP server.
There you go, install eXtplorer on Linux hosting space and access your files with easy from anywhere.





![30 Best SSH Clients for Windows [2022]: Free and Paid Best SSH Clients for Windows featured image](https://www.smarthomebeginner.com/images/2022/11/image-by-geralt-9301-gerd-altmann-from-pixabay-dotcom-matrix-2883623-1280.jpg)
