You probably have heard about the new name taken by Media Browser this year, along with several modifications that gave way to what is now Emby. Despite of its long run prior to its name change, there is still much to be said about this interesting open software application. If you want to use all the features of Emby, it is advised to install a different application for it in at least two devices; one will be the client, from where you will stream your media -this could be a tablet, smartphone, or other device-, and after that, make sure to install Emby server on your home server device. [Read: Emby: a media server alternative to Plex and Kodi]
In this sense, Emby works in a similar way to Plex, and in fact, it is possible to make an Emby vs Plex comparison to know which one suits you best. If you are a Kodi user, whether you use Kodi on an Android media player or a small device such as the Banana Pro, you will see Emby is completely different to what you're used to. With Kodi, you can stream from addons and locations on the web, however, if you install Emby server, you need to supply the media, which you can download with applications such as CouchPotato or SickBeard. Nevertheless, Emby also allows you to access your media from anywhere -even through the internet-, so it is a pretty useful software to have.
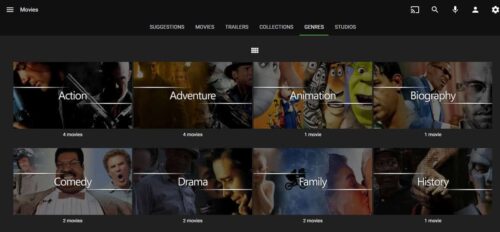
Anyways, first things first. If you want to start enjoying the things Emby has to offer, you need to install the server application. Since it is a very popular OS, we will tell you how to get Emby Server on Windows. Later on, you will find out with us how to install Emby client software on devices like an Android tablet or even a Roku. Remember, this software would run on your server where all your media is, so a device such as an Intel NUC or the Gigabyte Brix Pro might come in handy. [Read: Roku 4 Preview: bigger, faster Roku device for your HTPC]
Recommended HTPC / Home Server Builds:
- Best Home Theater PC Build 2017 to do it all (Plex, Kodi, NAS, Gaming)
- Best Emby Server builds 2018 – Pre-built and DIY options
- Medium Budget 4K HTPC Build 2017 for Kodi, Plex and Gaming
- Cheap 4K HTPC Build for Kodi, OpenELEC, and LibreELEC 2017
- Low Power Home Server Build 2017 for Network File and Media Storage
- Best HTPC for Kodi with 4K on a Medium Budget 2017 (~$400)
- Energy efficient budget HTPC-NAS combo build 2016
How to install Emby server on Windows?
Download the Emby latest version from the Emby website or alternatively, click Download and then select the Windows Emby server version from the icons you see, clicking on the Download button marked with the Stable Release label. This is the first Emby server setup step which, depending on your connection speed, will be relatively fast, and you will be able to install Emby server in no time after this step. When you successfully download Emby, you will see a different indicator, depending on what browser you use, in this case I used Google Chrome, and it looks like this:
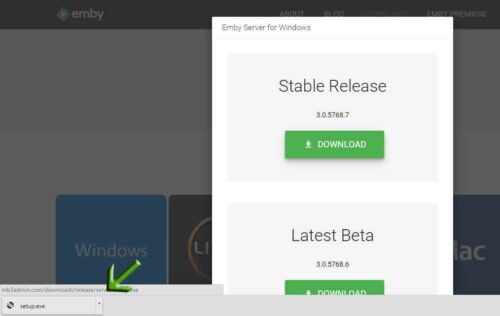
Click on the executable you downloaded, and it will install Emby server on your Windows system. If you see a prompt asking you whether to run the file or deny permission, click Run. You should see dialogs in a configuration similar to this now, where you should click Run again:
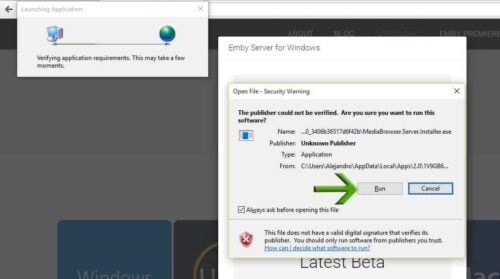
At this time Windows might ask you yet a third time whether or not you want to keep going and install Emby server. If this happens, the answer is Yes. This time the Emby installer should download everything else that's needed, and you will see this window:
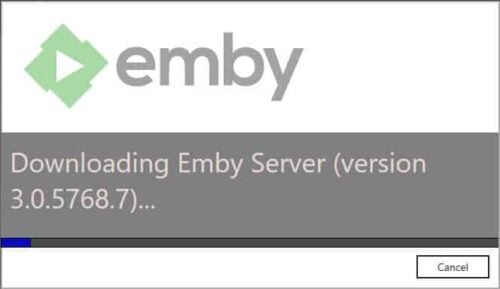
After you install Emby server and it has loaded, you can configure your media. This might take a while. Once it loads, it will open as a website on your browser. To continue to install Emby server, you need to enter parameters such as your preferred language, first name and -optionally- link your Emby account. I recommend doing it, if you plan on having access to your Emby server later on from an external location. If you choose this option, you will be sent an email to your Emby account email address, with a link you must click to activate your account on that device. After you click the link on the email, click OK and then Next in your Emby webpage. You will arrive to the following screen:
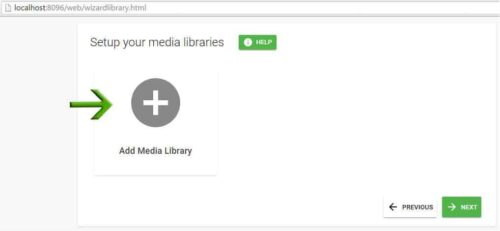
For this tutorial, I will only add a library with sample images, and in another upcoming tutorial we will check in detail how to add other libraries. Once you click on the Add Media Library button, you will see three fields on the webpage. The first one lets you specify the content type (in this case, Photos). You can also add a display name below, and finally, tell Emby where in your system is the media folder located, with the + Add button. In the end it should look similar to this:
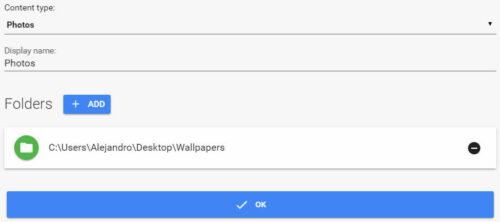
Click OK, and then Next. You are faced now with some metadata settings, which I left on their default values. Read them carefully, activate the ones you want, and then click Next. There is a step now to Setup Live TV, with the help of a TV Tuner, but I skipped this step. It can be added later, after you install Emby server, so no worries. Click Skip.
You will see now that the Emby media center Windows service has been installed. This indicates you successfully installed Emby and are now ready to use it. Click Next. You will be taken to the Emby terms of service and privacy policy, which you should read carefully. Click Next to continue. Now you're done. Click Finish and you will be taken to your server dashboard. Click on your username, and you are in!
Install Emby server? Why should I?
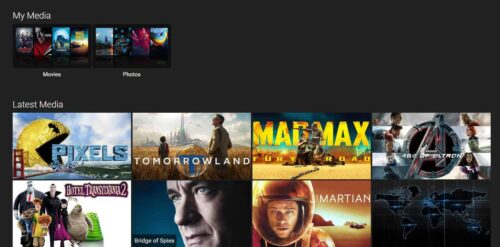
You can install Emby server for other things besides watching movies or listening to music. For example, I saw a cool feature where you can take pictures on your mobile and have them automatically uploaded to your computer, through Emby. The possibilities are many and you are only limited by your imagination; however, as with all home server software, there is a learning curve and some things might not run smooth on first try. If you just want to watch movies and tv shows, Kodi is a better option. You could install Kodi for Windows on your device instead if you don't have a media collection or don't want to invest time in making one (though you could use it with your media collection if you desire, as well).


![10 Best Emby Client Devices [2023] - 4k, Hardware Transcoding, etc. setup emby server with raspberry pi](https://www.smarthomebeginner.com/images/2017/02/setup-emby-server-with-raspberry-pi.jpg)
![10 Best Jellyfin Client Devices [2022] - 4k, Hardware Transcoding, etc. Jellyfin Roku App](https://www.smarthomebeginner.com/images/2021/02/jellyfin-roku-client-app-ft.jpg)
![10 Best Plex Client Devices [2022] - STUTTER-free Streaming Best Plex Client Devices](https://www.smarthomebeginner.com/images/2022/02/best-nas-for-plex-server-featured-images-from-pexels-photography-maghradze-ph-3764958-e1648542743772.jpg)

![15 Best Jellyfin Plugins [2023] - Supercharge your Media Server Jellyfin Intros Plugin Preview Pre-Roll](https://www.smarthomebeginner.com/images/2022/08/jellyfin-intros-preroll-preview.jpg)
![15 Best Plex Alternatives [2022] - FREE and BETTER Options Best Plex Alternatives feature image](https://www.smarthomebeginner.com/images/2022/08/best-plex-alternatives-feature-image.gif)