No matter what application you use for your HTPC needs, it is always a good thing to be able to customize it to your needs. The upper hand on customization is, without a doubt, held by Kodi; this application can be customized with the best Kodi movie addons to watch content directly from the internet, or even some of the best Kodi skins for touchsceens available, if you want your media center to look amazing every time it's turned on. However, other apps allow you to customize certain aspects of them with complements or plugins, and the more they are used and developed, the more they will compete directly with Kodi in order to offer the best user experience. Today we will tell you how to install Emby CoverArt plugin on your Emby media server; a complement that displays extra information on your movie covers. [Read: Plex vs Emby: A Comprehensive Comparison]
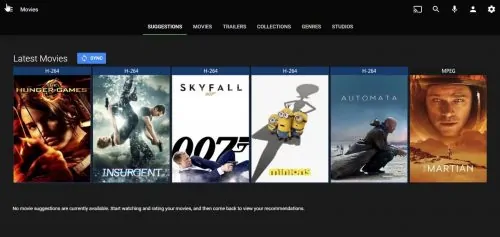
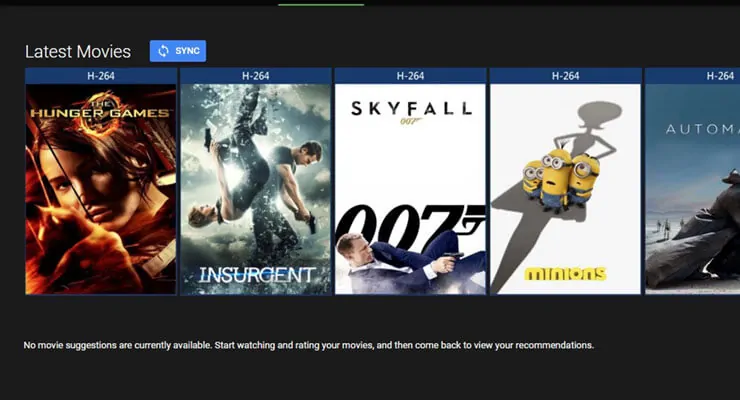
It is very convenient to know at a glance in what format is your media stored in your server. It is even more convenient to have your movie covers look good while displaying that information. The Emby CoverArt plugin aims to satisfy both of these needs, in an unobtrusive way that will not interfere with your media viewing or use. In a sense, it looks and feels like installing one of the most popular skins for Kodi, but on Emby -except in this case the change is not as extended, only the movie covers are affected-. Would it be wise to install Emby CoverArt plugin? Well, it certainly does not hurt to try.
Recommended HTPC / Home Server Builds:
- Best Home Theater PC Build 2017 to do it all (Plex, Kodi, NAS, Gaming)
- Best Emby Server builds 2018 – Pre-built and DIY options
- Medium Budget 4K HTPC Build 2017 for Kodi, Plex and Gaming
- Cheap 4K HTPC Build for Kodi, OpenELEC, and LibreELEC 2017
- Low Power Home Server Build 2017 for Network File and Media Storage
- Best HTPC for Kodi with 4K on a Medium Budget 2017 (~$400)
- Energy efficient budget HTPC-NAS combo build 2016
How to install Emby CoverArt plugin?
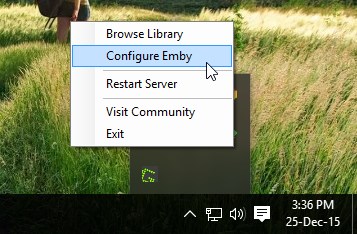
First, start your Emby server. In our example, I'm doing it on Windows; so I will look for the words Emby Server in the search box (I would have saved the trouble of doing this, if I had configured Emby server to start with the computer. Something to keep in mind). You will get a notification icon on the tray area, telling you that Emby Media Browser can be started and that Emby server is active. Right-click on the icon and select Configure Emby from the drop-down menu. [Read: Guide: How to install Emby server on Windows]
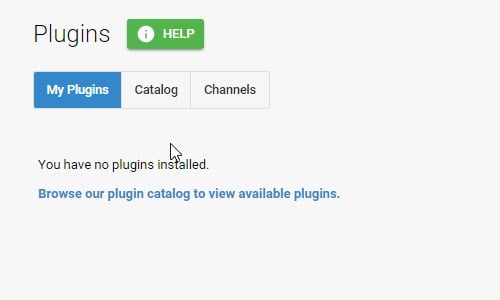
You will be presented with the Emby dashboard page, in your preferred web browser. To install Emby CoverArt plugin, scroll down on the menu on the left side of your screen, until you find the word Plugins. If you click on it, you will see the list of plugins for Emby installed on your system. Click on the Catalog button on top, to be able to see a list with all the plugins for Emby you can install, including former MediaBrowser 3 plugins, and new ones exclusive to Emby.
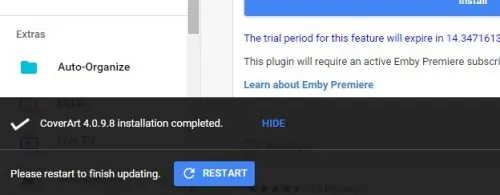
Browse the list until you find the CoverArt plugin; it is free to use for a trial period if you're not subscribed to Emby Premiere, so you should be able to get the Emby CoverArt plugin without a problem, in any case. Click it, and scroll down until you find the Install button. You could select a previous version here, or just click the button in order to install Emby CoverArt plugin on your setup. After you're done installing, you will be notified on your browser, and it will ask you to restart Emby server. Restart the server to let the changes take effect.
Congratulations, you were able to install Emby CoverArt plugin! Now your movies have information about the video format they are stored in, and the cover art looks way better than before. There are many more plugins you could install; though I have yet to see a plugin that lets you watch movies in the same way as the Genesis Kodi Addon does, for example; something that I consider would be way more useful for a complete Emby experience.

![15 Best Jellyfin Plugins [2023] - Supercharge your Media Server Jellyfin Intros Plugin Preview Pre-Roll](https://www.smarthomebeginner.com/images/2022/08/jellyfin-intros-preroll-preview.jpg)

![15 Best Plex Alternatives [2022] - FREE and BETTER Options Best Plex Alternatives feature image](https://www.smarthomebeginner.com/images/2022/08/best-plex-alternatives-feature-image.gif)
![8 Amazing Raspberry Pi Ideas [2022]: Beginners and Enthusiasts Raspberry Pi ideas](https://www.smarthomebeginner.com/images/2021/09/raspberry-pi-4-dev-board.jpg)
![10 Best Emby Client Devices [2023] - 4k, Hardware Transcoding, etc. setup emby server with raspberry pi](https://www.smarthomebeginner.com/images/2017/02/setup-emby-server-with-raspberry-pi.jpg)
![10 Best Plex Client Devices [2022] - STUTTER-free Streaming Best Plex Client Devices](https://www.smarthomebeginner.com/images/2022/02/best-nas-for-plex-server-featured-images-from-pexels-photography-maghradze-ph-3764958-e1648542743772.jpg)