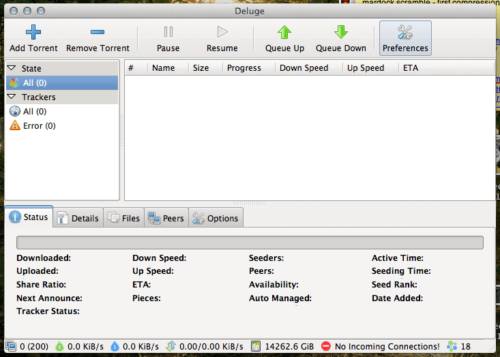
Deluge torrent is one of my favorite torrent download client and a great alternative for transmission torrent. I especially like its ability to run as a thin client and the feature rich torrent web ui. It has a bittorrent client for windows and linux. I started using it since Lucid Lynx and this post describes how to install Deluge with webui on Ubuntu 10.04 Lucid Lynx. Since Lucid Lynx, Ubuntu has undergone several changes, including starting services during boot using Upstart. This makes the procedure described for Lucid Lynx invalid for 12.04 Precise Pangolin. Therefore, I decided to write these instructions on how to install Deluge web interface on a server running Ubuntu 12.04 Precise Pangolin (with or without gui interface and with web interface). This method also works on Ubuntu versions 11.04 Natty Narwhal and 11.10 Oneiric Onelot which also use Upstart.
Table of Contents
- About Deluge Torrent
- Step 1: Add Deluge PPA Repository
- Step 2: Install Deluge Web Interface
- Step 3: Create the Init Script for Deluge
- Step 4: Create the Init Script for Deluge Webui
- Step 5: Starting and Stopping Deluge Daemon
- Step 6: Edit the Configuration Files
- Step 7: Enable HTTPS (or SSL) Support (optional)
- Step 8: Setting up Dynamic DNS (optional)
- What if you are upgrading from a previous version?
About Deluge Torrent
Deluge is a full-featured BitTorrent client for Linux, OS X, Unix and Windows. It uses libtorrent in its backend and features multiple user-interfaces including: GTK+, web and console. It has been designed using the client-server model with a daemon process that handles all the bittorrent activity. The Deluge daemon is able to run on headless machines with the user-interfaces being able to connect remotely from any platform.
Deluge torrent features a rich plugin collection; in fact, most of Deluge's functionality is available in the form of plugins.
Deluge was created with the intention of being lightweight and unobtrusive. It is our belief that downloading shouldn't be the primary task on your computer and therefore shouldn't monopolize system resources.
Deluge is not designed for any one desktop environment and will work just fine in GNOME, KDE, XFCE and others. We do our best to adhere to the freedesktop standards.
Deluge has a wide-array of features, including:
- Core/UI split allowing Deluge to run as a daemon
- Connect remotely to the Deluge daemon
- Web UI
- Console UI
- GTK+ UI
- BitTorrent Protocol Encryption
- Mainline DHT
- Local Peer Discovery (aka LSD)
- FAST protocol extension
- µTorrent Peer Exchange
- UPnP and NAT-PMP
- Proxy support
- Web seed
- Private Torrents
- Global and per-torrent speed limits
- Configurable bandwidth scheduler
- Password protection
- RSS (via Plugin)
- Other libtorrent features
- And much more!
Step 1: Add Deluge PPA Repository
Deluge is readily available in Ubuntu repository. However, Ubuntu repository is usually a bit slow on updating versions. So if you are like me and would like to have the latest version as soon as possible, then add the PPA repository as described below. If not proceed to step 2.
sudo add-apt-repository ppa:deluge-team/ppa
Step 2: Install Deluge Web Interface
Then update packages list and install Deluge:
sudo apt-get update
sudo apt-get install deluged deluge-webui
If you want the full desktop gui software then use:
sudo apt-get update
sudo apt-get install deluged deluge-webui deluge
Step 3: Create the Init Script for Deluge
Create the file /etc/init/deluge.conf (init script for Deluge) and enter the following contents in it:
start on (filesystem and networking) or runlevel [2345]
stop on runlevel [016]

env uid=USER
env gid=GROUP
env umask=022

exec start-stop-daemon -S -c $uid:$gid -k $umask -x /usr/bin/deluged -- -d
Replace "USER" with name of the user you want to run Deluge as and "GROUP" with group of the user. I like to run Deluge under my username and group, that way I have full access to the files downloaded through Deluge and to the log files as well. If you do not know your group then refer to this post under "Record the Current State". Or you could simply create a temporary file using the command "touch temp" and then check the username and group associated with file "temp" using the command ls -al. Below is an explanation of how you can manage access and permission of files downloaded through Deluge (umask parameter):
- 007 grants full access to the user and members of the group Deluge is running as (in this case Deluge) and prevents access from all other accounts.
- 022 grants full access to the user Deluge is running as and only read access to other accounts.
- 000 grants full access to all accounts.
Step 4: Create the Init Script for Deluge Webui
Create the file /etc/init/deluge-web.conf (init script for Deluge webui) and enter the following contents in it:
start on started deluge
stop on stopping deluge

env uid=USER
env gid=GROUP
env umask=027

exec start-stop-daemon -S -c $uid:$gid -k $umask -x /usr/bin/deluge-web
Don't forget to change "USER" and "GROUP". The same explanation from above applies. The umask parameter here only affects the plugins and logs created by Deluge. A value of "027" grants full access to the user Deluge is running as, read access to members of the group that Deluge is running as and prevents access from all other accounts.
Best Standalone Bittorrent Downloaders:
Step 5: Starting and Stopping Deluge Daemon
You can start and stop Deluge using the following commands:
sudo start deluge
sudo stop deluge
Deluge webui is tied to Deluge daemon and therefore does not normally require manual start stop. But you can still do that manually using the following commands:
sudo start deluge-web
sudo stop deluge-web
Worst that could happen is you might get a message saying that deluge-web is already running. For convenience, you could create bashaliases as described in this post. For example, delugestart could execute sudo start deluge.
Step 6: Edit the Configuration Files
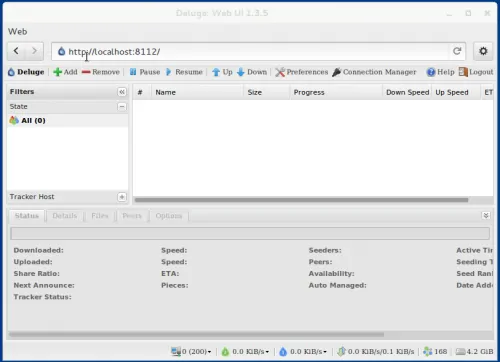
After starting Deluge and deluge-web, you can access the web interface at this address:
http://localhost:8112
The default password is "deluge".
Remember to change it as soon as you login for the first time. After you enter your password, you will be presented a connection manager showing Deluge daemons that are online (pictured below). Your Deluge daemon will be running on 127.0.0.1:58846, where 127.0.0.1 is the "localhost" and 58846 is the default daemon port.


You can go through various settings and configure them as you like it. You can also manually edit the configuration files at this location: /home/USER/.config/deluge. For manual editing stop Deluge before editing and start it again after finishing the edits. I also suggest backing up the files prior to editing. In case you mess up the settings just stop Deluge and delete /home/USER/.config/deluge folder and start Deluge again. The configuration files will be regenerated.
Do not forget to setup port forwarding on your router to divert Deluge traffic to the right computer running Deluge on your home network (if you are behind a router).
Step 7: Enable HTTPS (or SSL) Support (optional)
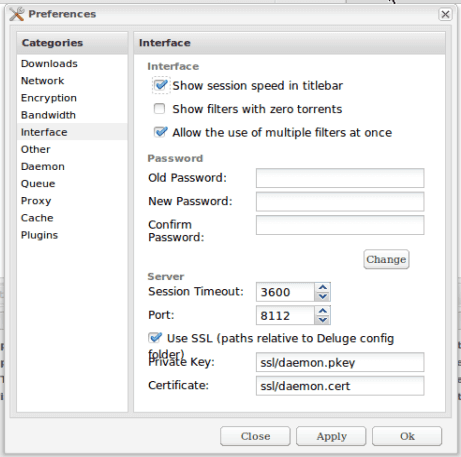
A SSL connection offers encryption and therefore more privacy. Deluge comes with default set of certificates and keys for encrypting the connection. All you have to do is enable HTTPS in the settings.
If you prefer to use self-signed certificates then continue with this step.
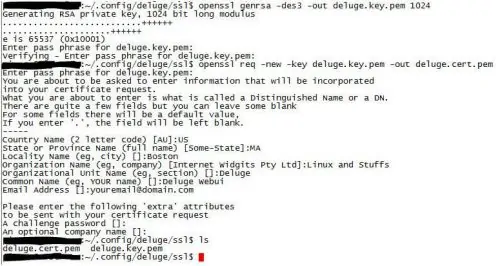
First make sure openssl is installed on your Ubuntu server. If not install it. Then, create certificate files:
$ cd ~/.config/deluge/ssl
$ openssl genrsa -des3 -out deluge.key.pem 1024
$ openssl req -new -key deluge.key.pem -out deluge.cert.pem
Follow the on-screen instructions. Just press enter to choose the defaults or customize it as you please. At the end, leave the "challenge password" empty. The deluge.cert.pem and deluge.key.pem files will be generated in ~/.config/deluge/ssl/ folder.
Best Standalone Bittorrent Downloaders:
Enable HTTPS in webui config. Or manually edit the following sections of the file ~/.config/deluge/web.conf:
...
"pkey": "ssl/deluge.key.pem",
...
"cert": "ssl/deluge.cert.pem",
...
"https": true,
Restart Deluge and Deluge webui using the command:
sudo restart deluge
There two additional settings that I like to enable. One is the "Allow Remote Connections", which allows you to connect to the Deluge daemon remotely using, for example mobile apps, as described in this post.

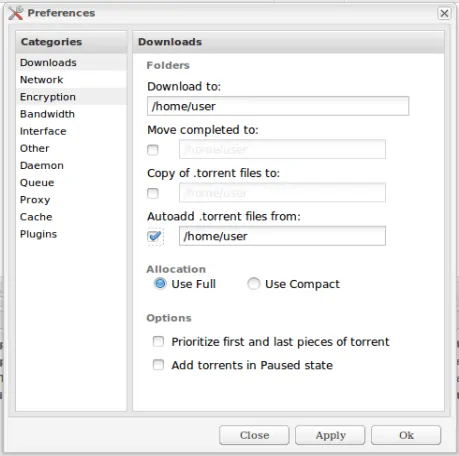
The second setting is the "Autoadd .torrent" files from the specified folder. This way all you have to do is to put the .torrent file in the specified folder and the download starts automatically.
Step 8: Setting up Dynamic DNS (optional)
If you would like to be able to access your Deluge webui from the internet then it might be easier to setup Dynamic DNS service. This way you can reach your server with a nice URL (example: http://mydeluge.dyndns.org) instead of the ip address. You can get free domain names through services like DynDns.com. For a guide to setup DDNS autoupdate client, refer to this post.
If you like to be able control your Deluge daemon through android phone, refer to this post.
Best Standalone Bittorrent Downloaders:
What if you are upgrading from a previous version?
If you are upgrading follow the steps described above. Additionally, delete Deluge's old (non Upstart) init files and update your runlevels:
$ sudo /etc/init.d/deluge-daemon stop
$ sudo rm /etc/init.d/deluge-daemon
$ sudo update-rc.d deluge-daemon remove
For more information, refer to Deluge FAQ. If you would like to install Transmission bittorrent instead of Deluge, refer to this post.
That is it. Enjoy deluging. Please share your thoughts and experiences in the comments section.



![15 Best Plex Alternatives [2022] - FREE and BETTER Options Best Plex Alternatives feature image](https://www.smarthomebeginner.com/images/2022/08/best-plex-alternatives-feature-image.gif)


