Apache, as The Apache Foundation calls it, "the number one HTTP Server on the internet". The Apache project develops and maintains the open-source HTTP server for both UNIX and Windows Servers. It provides a secure, efficient, and extensible server that provides HTTP services in sync with the current HTTP standards. In this post, I will explain how to setup Apache web server on a Ubuntu system. Of course, hosting your website with established hosting service providers such as HostGator or GoDaddy has its own advantages. That is a topic for a whole new post (coming soon). But self-hosting provides greater control over what goes on your server. In addition, you can use your server for other things in addition to hosting your website: file server, download station, media server, etc. So without further delay, let us look at how to setup Apache web server on a Ubuntu system.
Table of Contents
Setup Ubuntu Server
Before you can setup Apache web server, you will need a system to run it on. My recommendation is a Linux based server and my experience is that Ubuntu Server Edition is a easiest and most user friendly while offer very good security. I also suggest that you choose the LTS (Long Term Support) edition, which provides updates and support for 5 years. While, not being bleeding-edge LTS releases are the most stable for running reliable web servers.
The installation procedures are described in detail in several places. During server installation I typically choose to install LAMP Server (Linux Apache MySQL PHP), SAMBA file server, and SSH Server as shown in the picture below:
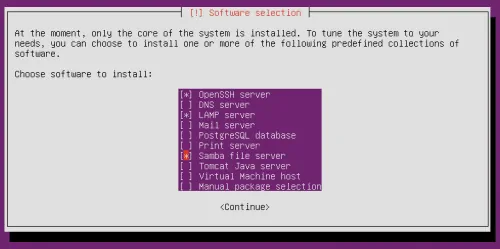
During installation you will be asked for username, password, host name (name for your server), MySQL administrative password, etc. For most other questions you can choose the default or leave blank. After finishing the installation, update your system using the following commands:
sudo apt-get update
sudo apt-get upgrade
Secure Apache and PHP
After installing LAMP server follow these minor steps to increase its security:
Apache Security
Edit /etc/apache2/conf.d/security using the following command:
sudo nano /etc/apache2/conf.d/security
Find the following lines and make the changes listed below:
#ServerTokens Minimal
#ServerTokens OS
#ServerTokens Full
ServerTokens Prod
And,
ServerSignature Off
#ServerSignature On
The # in front of the line makes Apache ignore that line (comment).
PHP Security
Edit /etc/php5/apache2/php.ini using the following command:
sudo nano /etc/php5/apache2/php.ini
Find expose_php = On and change it to the following:
expose_php = Off
The above changes will stop your server from revealing that PHP is installed (by adding its signature to the web server header) on your server along with other information. While it may not be a security threat, it does reveal to potential hackers that the web server uses PHP. The less a hacker knows about your server configuration the better it is. Reload your Apache server using the following command to apply the above changes:
sudo service apache2 reload
Installing a GUI Desktop Environment
Remember that a Web Server is more secure when headless, meaning when you do not have a GUI Desktop Environment running. That said it is much easier for beginners to accomplish things with a graphical user interface. Follow this guide to install a minimal or lightweight desktop environment on your server. If you want a full-fledged desktop environment (not recommended for servers) you may install Ubuntu Desktop (Unity), Kubuntu Desktop (KDE), or Lubuntu Desktop (LXDE).
sudo apt-get install ubuntu-desktop
sudo apt-get install kubuntu-desktop
sudo apt-get install lubuntu-desktop
Choose one from the above, based on your preference. Alternatively, you could install a web-based graphical environment such as Webmin (installation guide). All Webmin does is it makes system administration easier by providing web-based alternatives for commandline operations. It is not a traditional graphical desktop environment.
Change User Permissions
Before you you setup Apache web server to serve your websites, you will have change a permissions/ownerships for the username under which the websites will be served. Review my post on how to safely change primary group of a user in Linux before proceeding. Then, use the following commands to change the ownerships and permissions:
sudo usermod -g www-data -G mackey,adm,cdrom,sudo,dip,plugdev,sambashare,lpadmin mackey
Where, mackey (at the end of the above line) is the user that will own the website files. www-data, which is the group that all website files belong to, will be the user mackey's new primary group. mackey,adm,cdrom,sudo,dip,plugdev,sambashare,lpadmin will be the user mackey's secondary group associations. The secondary group associations will vary depending on your situation/installation. Review this post to come up with your list of secondary group associations. Any mistakes could lock you out of your system.
Setup Apache Web Server
After completing above steps, you are now ready to setup Apache web server. The configuration files are located in /etc/apache2 and the website files are located in /var/www. First, let stop Apache server for the time being:
sudo service apache2 stop
Rename the default site file /etc/apache2/sites-available/default using the following command:
sudo nano /etc/apache2/sites-available/default /etc/apache2/sites-available/default.bak
Now create a new file /etc/apache2/sites-available/default with the following contents in it:
<virtualhost *:80>

	ServerName domain.com
	ServerAlias www.domain.com
	ServerAdmin [email protected]
	DocumentRoot /var/www/mywebsite

	<directory></directory>
		Options FollowSymLinks
		AllowOverride None


	<directory /var/www/mywebsite></directory>
		Options Indexes FollowSymLinks MultiViews
		AllowOverride All
		Order allow,deny
		allow from all


	ScriptAlias /cgi-bin/ /usr/lib/cgi-bin/

	<directory "/usr/lib/cgi-bin">
		AllowOverride None
		Options +ExecCGI -MultiViews +SymLinksIfOwnerMatch
		Order allow,deny
		Allow from all
	</directory>

	ErrorLog ${APACHE_LOG_DIR}/error.log

	# Possible values include: debug, info, notice, warn, error, crit,
	# alert, emerg.
	LogLevel emerg

	CustomLog ${APACHE_LOG_DIR}/access.log combined

    Alias /doc/ "/usr/share/doc/"
    <directory "/usr/share/doc/">
        Options Indexes MultiViews FollowSymLinks
        AllowOverride None
        Order deny,allow
        Deny from all
        Allow from 127.0.0.0/255.0.0.0 ::1/128
    </directory>
</virtualhost>
The following lines have to be customized:
	ServerName domain.com
	ServerAlias www.domain.com
	ServerAdmin [email protected]
	DocumentRoot /var/www/mywebsite

	<directory /var/www/mywebsite></directory>

	LogLevel emerg
/var/www/mywebsite is the folder where your website files are located. The index file to your website should be present in this folder. Set your preferred logging level. emerg logs only emergency messages.
Save and exit. Although your default site may already be active, it might be good to activate it again using the following command:
sudo a2ensite default
Then restart your Apache server:
sudo service apache2 reload
You should now able able to reach your website using your IP address.
Setting Up DNS
Accessing your website using your IP address is inconvenient. If you have a domain name, you will need a DNS service to lookup your server using domain name. This is even more imperative if you have a dynamic IP address.
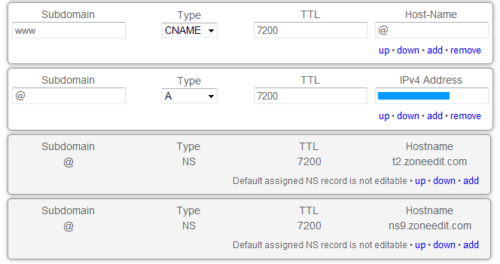
First, setup a DNS Service such as Zoneedit or DynDns, and edit the zone records to point the domain name to your IP Address. An example from Zoneedit is shown in the picture below.
Then copy the DNS Nameservers provided by your DNS service and enter them in the DNS Manager for your domain name provided by your domain registrar. An example from GoDaddy with Zoneedit's DNS Nameservers is shown in the picture below.
Give it a couple hours for the above DNS changes to propagate. Now you should be able reach your website with your domain name. If you have Dynamic IP Address, you may have to configure a dynamic DNS updater such as ddclient, as described in this post.
Running Multiple Websites
The most common way of running multiple websites on Apache is using name-based virtual hosts. Follow the exact procedure described under "Setup Apache Web Server" above. The first website will be under the name default. Create a similar virtual host file for the second domain but name it something other than default. I name my virtual host file the same as the domain name (eg. domain2.com, domain3.com, etc.). You will have to activate each virtual host using the following command:
sudo a2ensite domain2.com
Restart your Apache server after making any changes:
sudo service apache2 reload
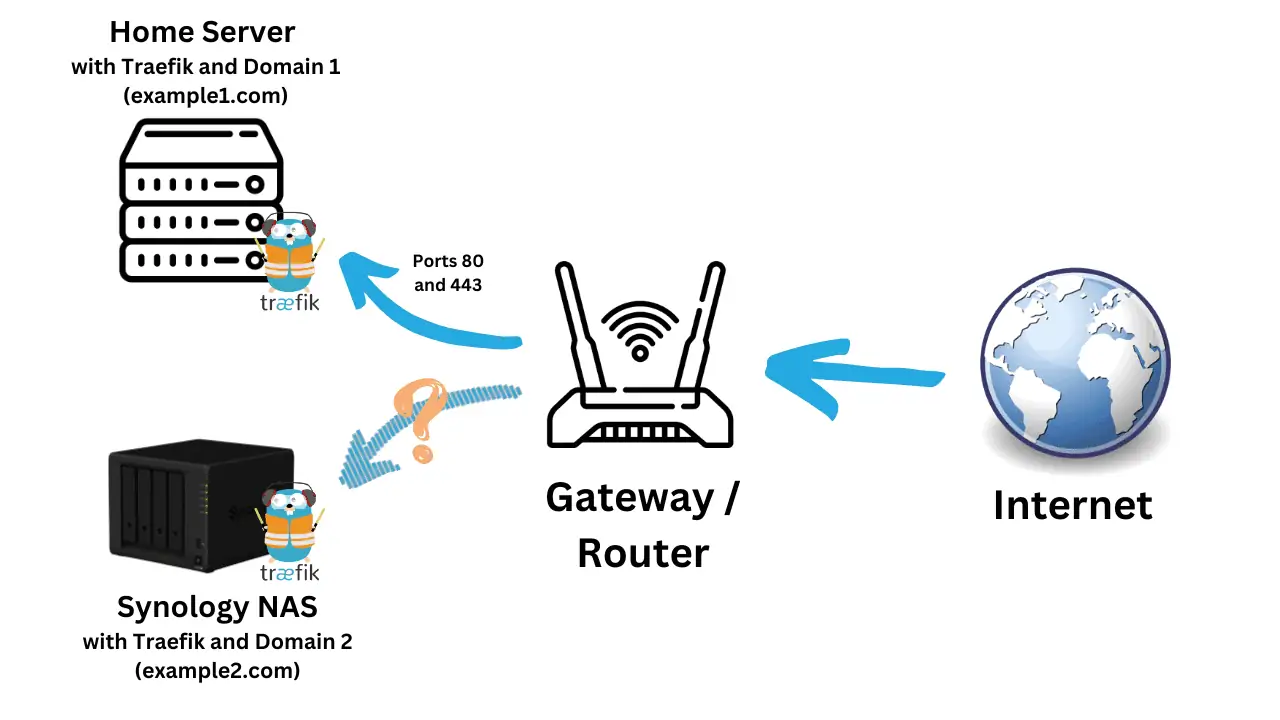
If your server is behind a router, then do not forget to forward port 80 to your server's network IP address. That is it. Setup Apache web server and serve websites from home.


