Recently, I described how to setup a Apache webserver on Ubuntu. One of the easiest ways to manage MySQL databases is using phpMyAdmin. In this post, I will explain how to install phpMyAdmin on Ubuntu systems. phpMyAdmin is a free tool intended to handle the administration of MySQL using the web. There are several good reference materials available, in case you want to learn more about phpMyAdmin and what it can do. Installing phpMyAdmin is one of the first things I do after installing a LAMP server. So without further delay, let us see how to install phpMyAdmin on Ubuntu.
phpMyAdmin Features
- Intuitive web interface
- Support for most MySQL features:
- browse and drop databases, tables, views, fields and indexes
- create, copy, drop, rename and alter databases, tables, fields and indexes
- maintenance server, databases and tables, with proposals on server configuration
- execute, edit and bookmark any SQL-statement, even batch-queries
- manage MySQL users and privileges
- manage stored procedures and triggers
- Import data from CSV and SQL
- Export data to various formats: CSV, SQL, XML, PDF, ISO/IEC 26300 - OpenDocument Text and Spreadsheet, Word, LATEX and others
- Administering multiple servers
- Creating PDF graphics of your database layout
- Creating complex queries using Query-by-example (QBE)
- Searching globally in a database or a subset of it
- Transforming stored data into any format using a set of predefined functions, like displaying BLOB-data as image or download-link
And much more...
Install phpMyAdmin
phpMyAdmin is available in Ubuntu repositories. To install phpMyAdmin on Ubuntu, all you have to do is type in the following command:
sudo apt-get install phpmyadmin
Few other required packages will be installed along with phpMyAdmin. During installation, you will be asked for the Webserver for which you would like to configure phpMyAdmin. If you have a LAMP server, choose Apache and then press OK.
Next, you will be asked if you would like to configure phpMyAdmin database. Say "Yes" and proceed.
If you said "Yes" above and continue to install phpMyAdmin. You will be asked for your MySQL administrator password. Type it in and press OK.

Installation is now done.
Accessing phpMyAdmin
phpMyAdmin is web-based. If you are on the system that is running phpMyAdmin then you can access it by going to:
http://localhost/phpmyadmin
If you are in an internal network you can use:
http://192.168.X.X/phpmyadmin
Replace 192.168.X.X with the network IP address of your server. If you followed my previous guide to install Apache webserver, and already have a working website, you can use one of the two commands:
http://X.X.X.X/phpmyadmin
or
http://domain.com/phpmyadmin
X.X.X.X is your server's external IP address. If you server is behind a router then you will have to enable port forwarding for the last two options to work from the internet.
Recommended Guides for MySQL and phpMyAdmin:
Login using your MySQL administrator username and password to access all databases or you could use username and password for access to only specific databases.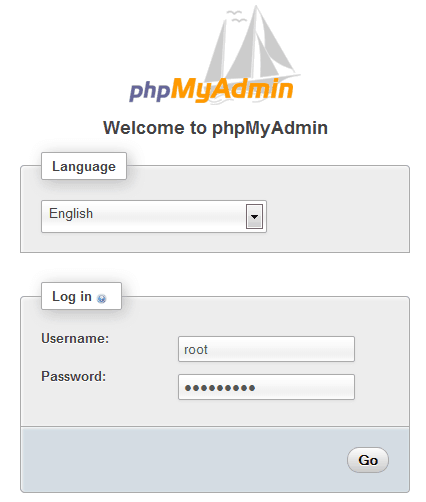
If you see the following warning/error: Additional features for working with linked tables have been deactivated, check this post for a fix. We recommend that you also read our post on 10 phpMyAdmin tweaks to simplify database administration.
So go head install phpMyAdmin and simplify your database administration!


