Synology is one of the best NAS devices to run Docker. This is the main reason why I went with Synology.
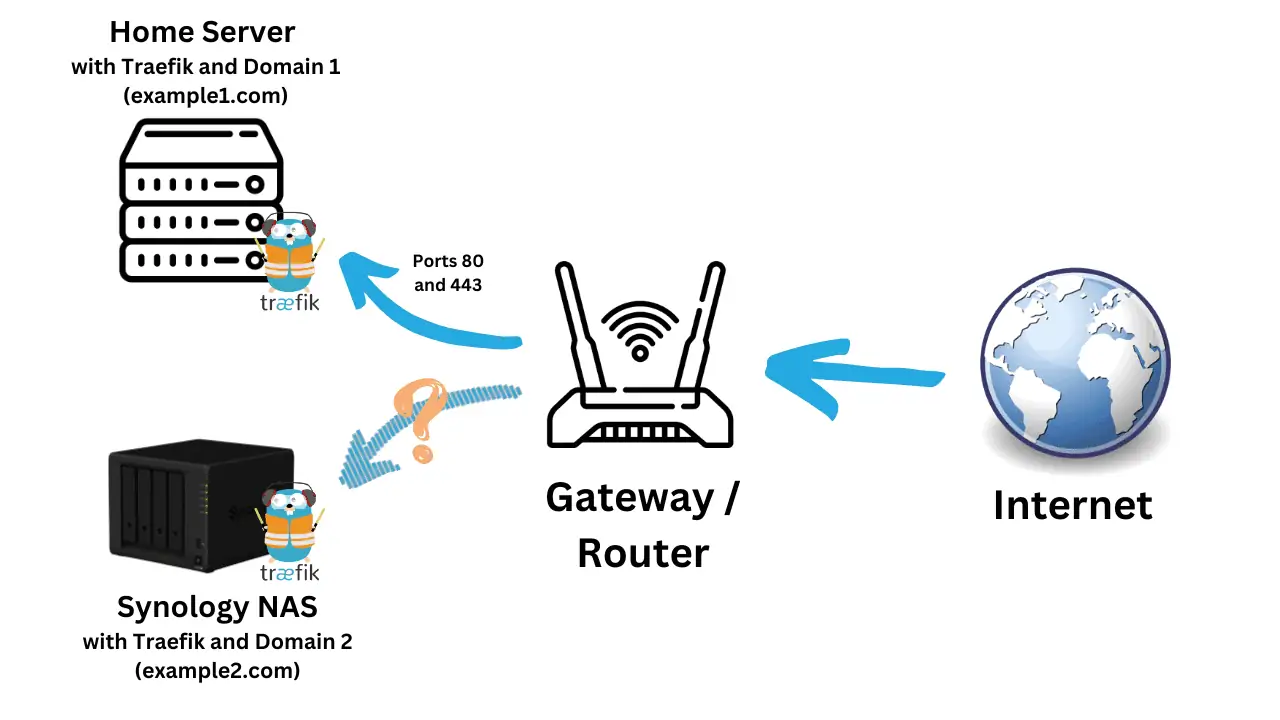
I documented my move from a home server to Synology + NUC setup previously. Today, I run a Docker-Traefik stack on Synology, in addition to my home server. This required me to leverage Traefik TCP passthrough to make the second traefik instance work.
But one of the most basic hurdles in setting up Traefik (or Nginx Proxy Manager) on Synology is the availability or rather non-availability of ports 80 and 443.
August 16, 2023: Guide updated for DSM 7.2.
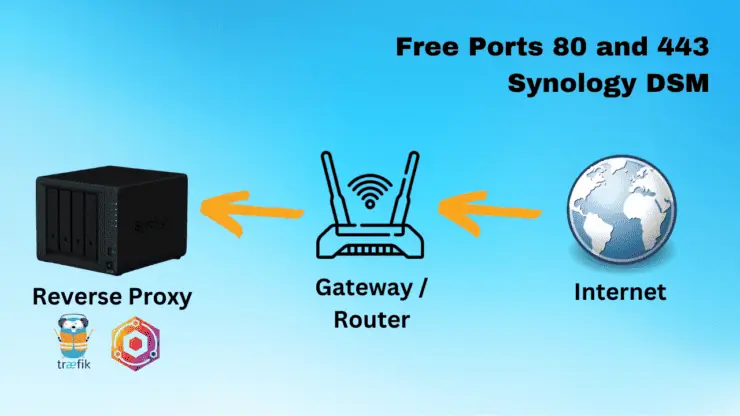
In this post, I will show you how to free ports 80 and 443 on Synology NAS to allow for running a reverse proxy such as Traefik.
Table of Contents
What Synology Services use Ports 80 and 443
As I said before, by default ports 80 and 443 are occupied on Synology DSM. So, what Synology services require ports 80 and 443?
For this let's take look at the official Synology ports list:
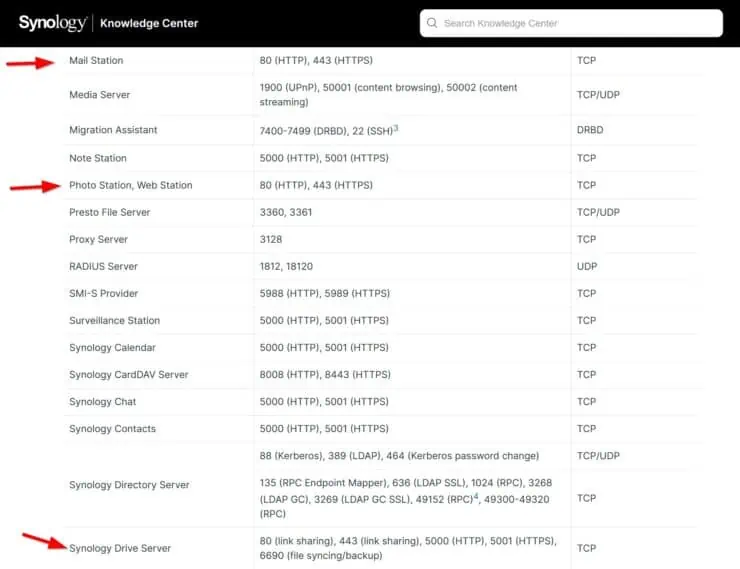
The following 4 services are listed as using ports 80 and 443:
- Mail Station
- Photo Station
- Web Station
- Synology Drive Server
Behind all of these is Nginx web server (to show these services via Web UI). Therefore, by default, on Synology ports 80 and 443 are occupied by Nginx.
In addition, Synology Reverse Proxy also uses ports 80 and 443.
Free Ports 80 and 443 on Synology
Now that you know which Synology Services use ports 80 and 443, let us see how to free them up so we can use a reverse proxy like Traefik or Nginx Proxy Manager. SSH into your Synology NAS and let's proceed.
Step 1. Checking if Synology Ports 80 and 443 are Free
First, let us check if ports 80 and 443 are indeed occupied, using the following command:
sudo netstat -tulpn | grep '80\|443'
We are listing all used Synology ports and filtering just those with 80 and 443 to not have to dig through the whole list.

The above output shows that ports 80 and 443 are being used by Nginx. In other words, ports 80 and 443 are not free on Synology.
Let's also check Nginx configuration files located in /usr/syno/share/nginx/ for instances where ports 80 and 443 are mentioned. We do this using the following grep command:
sudo grep -ri "listen 80" /usr/syno/share/nginx/
Next, we run the same command with listen 443.

If you have made any changes to the configuration files in the past, you should see about 4 mentions each for ports 80 and 443, as shown above.
Step 2. Backup Default Configuration
Backup Nginx Configuration
Just in case something goes wrong, let's backup the default Nginx configuration files on Synology. Use the following command to make a backup of the Nginx folder:
sudo cp -a /usr/syno/share/nginx /usr/syno/share/nginx_backup
If something goes wrong, just rename the nginx_backup folder to nginx and restart Nginx using the command below.
Backup DSM Configuration
I have automatic backups enabled for my Synology DSM configuration. But I recommend you to take a manual backup as well from Control Panel -> Update & Restore -> Configuration Backup.
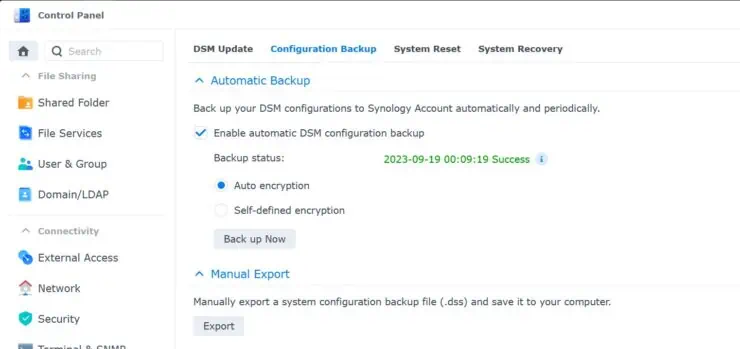
Save it in an accessible location.
Step 3. Free Ports 80 and 443 on Synology
The manual way to free ports 80 and 443 on Synology would be open the 4 instances shown above in Step 1 and change 80 to 81 and 443 to 444. Then issue, the following command to restart Nginx:
sudo synosystemctl restart nginx
Unfortunately, you will lose the changes after a reboot.
Script to Change Ports 80 and 443 on Synology
To automate the process of freeing ports 80 and 443 on Synology, let's create a bash script. Create an empty file in a known location and call it, for example, switch_ports.sh.
Copy the following contents to it.
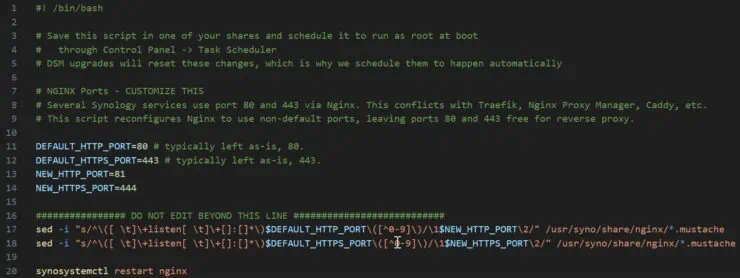
What does the script do?
You can run the script form commandline using the following command:
sudo bash /volume1/docker/scripts/synology/switch_ports.sh
Of course, replace /volume1/docker/scripts/synology/ with the path to the folder containing your switch_ports.sh. The output should look similar to what is shown below:

After Nginx is restarted, ports 80 and 443 should be free on Synology NAS. Optionally, you may repeat Step 1 for verification and you should see nothing as output.
Step 4. Automate Freeing Ports 80 and 443 on Synology
Now that we have a script that can automate the steps to free ports 80 and 443 on Synology NAS for us, let's add it to task scheduler.
As said before, the changes are overwritten during a reboot. Therefore, we are going to make this script run during reboot so we overwrite the overwritten changes :-p.
From Control Panel -> Task Scheduler, create a new task. Call it whatever you want, set it to be run as root during Boot-up event, as shown below.
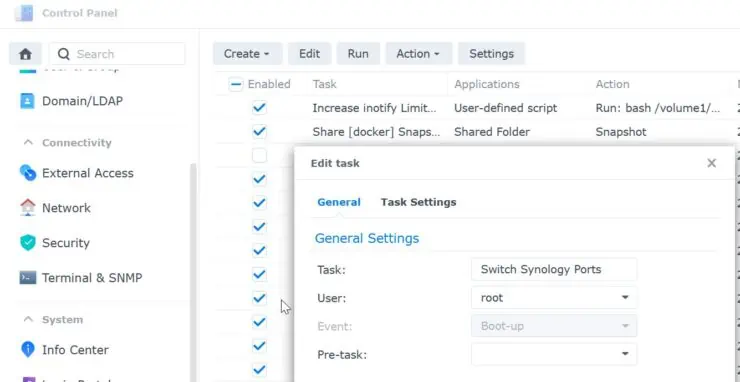
In the Task Settings tab, optionally, specify an email ID to be notified in case of an error (if you have Email notifications properly configured). For run command, specify bash /volume1/docker/scripts/synology/switch_ports.sh, with the correct path to the script.
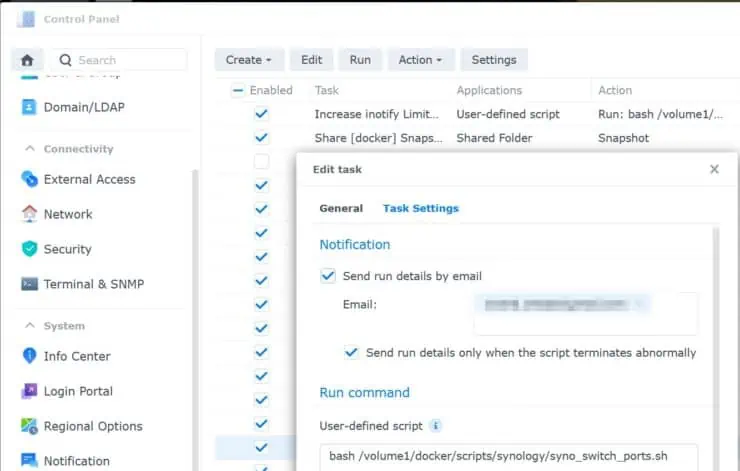
Save the task. Ensure that it is enabled with a check mark in the list of tasks.
Let's reboot Synology and NAS check.
Step 5. Verify if Synology Ports 80 and 443 are Open
To verify if the above script worked and Synology Ports 80 and 443 are open, go back and redo Step 1.
In the example output below, I am first searching for port 443 and nothing is shown - meaning no services are listening in port 443 (Yah!).
Now when I repeat the command with 444 instead, I see that Nginx is listening on port 444.

Similarly, you check ports 80 and 81.
Troubleshooting
When the configuration files are missed up, services such as File Station, Video Station, etc. become inaccessible.
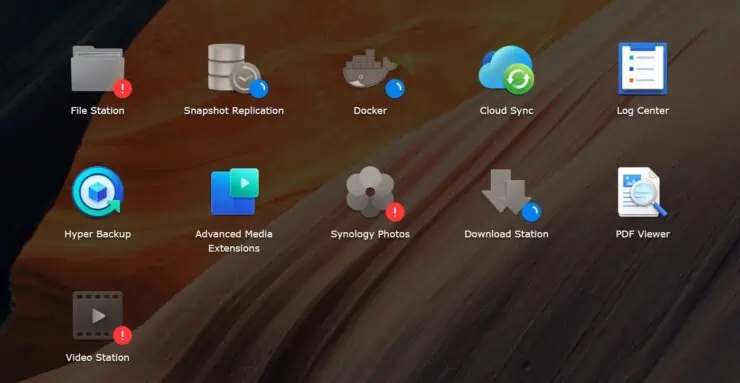
Restoring from Nginx Backup
The above is exactly the situation backups are so important and why I recommended you to take a backup of /usr/syno/share/nginx folder before starting. I hope you did.
Use the following commands in sequence (disable switch_ports.sh script from running during boot first) :
sudo synosystemctl stop nginx
sudo rm -r /usr/syno/share/nginx
sudo cp -a /usr/syno/share/nginx_backup /sur/syno/share/nginx
sudo synosystemctl start nginx
If your services do not already become accessible, reboot your NAS and you should be good. You may then start over with the script.
Resetting DSM
The other option is to reset your DSM using the following steps:
- In Task Scheduler, disable the script from running during boot.
- Backup DSM configuration from Synology Web UI, if you did not already do this as described previously.
- Reset Synology DSM: Press the power button and hold for about 3 seconds until 1 beep. Let go and press the power button immediately for about 3 seconds. You should here 3 fast beeps indicating a reset of DSM.
- Access your web interface and import the DSM settings you saved in step 2.
All your services should be working as before. Now go back to triple-checking the script for any mistakes and retry.
FAQ
Does Synology use port 443?
Yes, Synology services such as Mail Station, Photo Station, Web Station, and Synology Drive Server use port 443.
What is the default HTTPS port for Synology?
The default HTTPS for Synology DSM is 5001. Nginx service on Synology uses port 443.
What ports does Synology web Interface use?
The main Synology web interface (Synology DSM) uses port 5000 (HTTP) and 5001 (HTTPS) by default. Other services could use different ports.
Concluding Remarks
At this point, we have successfully freed up ports 80 and 443 on Synology NAS and it is ready to run another reserve proxy such as Traefik or Nginx Proxy Manager.
With Traefik and Nginx Proxy Manager, you can put your Synology Services such as DSM, Photo Station, etc. behind a reverse proxy with the security of a LetsEncrypt SSL certificate.
Now that ports 80 and 443 are free, be sure to check out our Docker Traefik guide for Synology and the list of best Docker containers.


![Ultimate Synology NAS Docker Compose Media Server [2022] Synology Docker Media Server](https://www.smarthomebeginner.com/images/2020/07/synology-docker-media-server-ft.jpg)
