In the recent months the XBMC ESPN addon errors out with "script failed" error message as shown in the picture below. Using this ESPN plugin by bluecop is one of the 3 ways to watch ESPN on XBMC. Many users of the XBMC ESPN addon have reported "Script Failed!: plugin.video.espn3", including on htpcBeginner. Football season is here (Go Buckeyes!) and it would be great to fix the script failed error message and get the XBMC ESPN addon to work. This plugin not only allows you to watch Live games but also go back and replay content from the past. This post describes the proper way to configure the XBMC ESPN plugin. This procedure has been verified to work in the latest version (0.9.9) of the plugin. [Read: 5 Websites to watch College Football online for free]
Table of Contents
Requirements
First, a minor clarification: even though the XBMC ESPN plugin has options for login and choosing channels (ESPN, ESPN2, etc.) the plugin only works for ESPN3. XBMC ESPN addon or XBMC ESPN3 addon both refer to the same plugin.
Best Kodi Addons:
- 20 Best add-ons for Kodi 18 Leia with installation instructions - 2019
- Top Kodi Addons: Ultimate List of 93 Working Kodi Addons in 2018
- 6 Must have Kodi addons for Broadcast TV streaming
- 6 best legal Kodi TV show addons – TV show addons for Kodi
- The 6 best legal Kodi movie addons – Movie addons for Kodi
- 5 Best Legal Kodi Anime Addons for your Kodi HTPC
- 10 Best Kodi Kids Addons List for your HTPC
The main requirement for the XBMC ESPN plugin to work is a valid Time Warner Cable or Comcast username and password. Even though you will be watching ESPN through your internet, your account should also be subscribed to receive ESPN cable content. Once the procedure below is completed you do not need ESPN subscription nor the account login anymore as the cookie once set is valid for several years. If you do not subscribe to ESPN's cable content, you may have good friends... 😉 ;-). [Read: Free Movies and TV shows bittorrent streaming with Popcorn Time]
Other requirements are:
- Works only in US. You may use a VPN Service such Kepard to obtain an US IP Address.
- On Linux, you need librtmp / rtmpdump version 2.4 or better. If you are using any of the latest releases, you should be fine.
- Firefox with Cookie Manager plugin or Google Chrome with Edit This Cookie extension
- Working XBMC installation
This post shows the procedure with Firefox and Cookie Manager addon but accomplishing the task with Chrome is just as easy.
Enjoy unlimited streaming of Movies and TV Shows on several devices, free 2-day shipping on orders, and free Kindle books for only $6.60 per month. Sign-up now to get a free 1-month trial.
1. Uninstall Existing ESPN XBMC Addon
First, uninstall the existing XBMC ESPN3 plugin. You can uninstall the plugin through XBMC interface or manually delete the following two folders:
The existing ESPN3 addon folder:
Windows:
C:/Users/UserName/AppData/Roaming/XBMC/addons/plugin.video.espn3

Linux:
/home/UserName/.xbmc/addons/plugin.video.espn3
and ESPN3 addon's data folder:
Windows:
C:/Users/UserName/AppData/Roaming/XBMC/userdata/addon_data/plugin.video.espn3

Linux:
/home/UserName/.xbmc/userdata/addon_data/plugin.video.espn3
2. Get ESPN Cookie
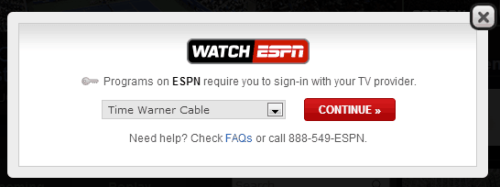
Once you have all the requirements ready, visit WatchESPN website, login with your TWC or Comcast login, and start watching any of the live shows. [Read: How to setup Chromecast using your phone or tablet?]
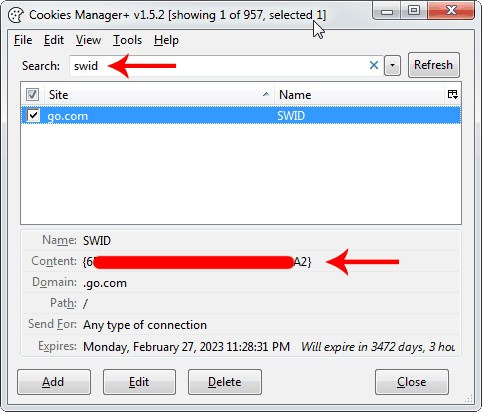
Once the show starts playing, close the browser window and reopen browser. Go to Tools->Cookie Manager to open the Cookie Manager. You should know see a list of all the cookies that have been set in your browser.
Search for "swid" and you should only see one entry show up. Note down (or copy / save) everything that is listed under "Content", including { and }. The whole thing should look something like this (your numbers / characters may vary):
{6xxxx-xxxxxxx-xxxxxx-xxxxxxxxx-xxxxxxxxxxxx2}
You will need this in the next step.
Best Android TV Boxes:
- NVIDIA SHIELD TV Pro Home Media Server - $199.99
- Amazon Fire TV Streaming Media Player - $89.99
- WeTek Play 2 Hybrid Media Center - $134.00
- Kukele Octacore Android TV Box - $179.99
- U2C Android TV Box - $95.99
3. Install the XBMC ESPN3 Addon
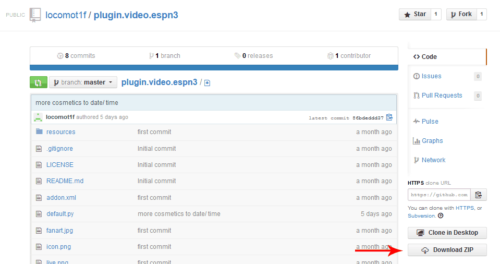
Kudos to Locomot1f for modifying the plugin to work with ESPN again. Visit the ESPN3 addon development page on GitHub and download the latest plugin as a zip file as shown in the picture below. [Read: 5 Best XBMC skins for Raspberry Pi]
After download, extract the zip file, and rename the "plugin.video.espn3-master" folder to "plugin.video.espn3". Then move the "plugin.video.espn3" folder to the following location:
Windows:
C:/Users/UserName/AppData/Roaming/XBMC/addons/

Linux:
/home/UserName/.xbmc/addons/
You have now installed the new XBMC ESPN3 plugin. Alternatively, you could choose to install the zip file through XBMC interface. Open and run the addon through XBMC once and try to play any video. The script may error out but that's fine. [Read: 15 XBMC keyboard shortcuts you should know]
4. Create userdata.xml File
Next, navigate and find the XBMC ESPN addon data folder. Below are the typical locations in Windows and Linux platforms:
Windows:
C:/Users/UserName/AppData/Roaming/XBMC/userdata/addon_data/plugin.video.espn3

Linux:
/home/UserName/.xbmc/userdata/addon_data/plugin.video.espn3
Continued in next page...
Ignore the settings.xml or videocache.xml files. This file will be automatically modified based on your configuration (described below). If userdata.xml already exists, rename it to userdata.backup.xml or something else. Then create a new userdata.xml file and copy the contents below to it. I suggest using Notepad++.
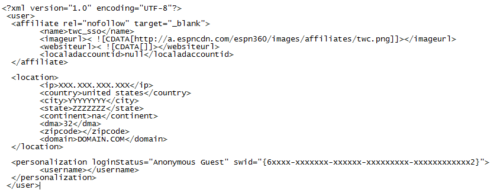
The above code is for TWC login. For Comcast login, replace the content between the affiliate tags (lines 3 to 8) with the following:

Here are the things that need to be changed:
- XXX.XXX.XXX.XXX - Replace with your current IP Address
- YYYYYYYY - Replace with your current city name (eg: chicago)
- ZZZZZZZ - Replace with your current state name (eg: illinois)
- DOMAIN.COM - Replace with your current internet provider's domain. For TWC's road runner internet it is
rr.com. If you do not know your provider's domain then visit this page and search by IP Address:You can find your domain in the results the display results. [Read: 10 of the Best XBMC Addons in 2014]
- {6xxxx-xxxxxxx-xxxxxx-xxxxxxxxx-xxxxxxxxxxxx2} - Replace with your SWID determined in Step 1.
Note that you internet does not have to be from the same provider as the cable provider whose login details you used in Step 1. Consequently, in <affiliate rel="nofollow" target="_blank"></affiliate> you may have one provider (the cable provider whose login you used) and in <location></location> you may have the details from a different provider (current internet provider).
Save the userdata.xml file and exit. Again, ignore other files/folders, including settings.xml.
5. Configure ESPN Addon
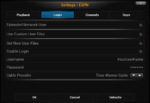
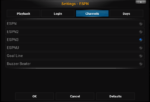
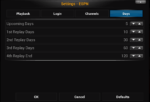
Next configure the XBMC ESPN Addon properly to avoid the "script failed!: plugin.video.espn3" error. It is important that you finish configuring the XBMC ESPN plugin before you open the addon or else your userdata.xml file may be overwritten by the addon. Go to Addon Settings and configure it as shown in the pictures below.
You may provide the login details under Login but you will not need to use it (notice that Login is disabled). Save and exit XBMC ESPN Addon Settings. Your settings.xml will be updated with the changes you made.
Best Android TV Boxes:
- NVIDIA SHIELD TV Pro Home Media Server - $199.99
- Amazon Fire TV Streaming Media Player - $89.99
- WeTek Play 2 Hybrid Media Center - $134.00
- Kukele Octacore Android TV Box - $179.99
- U2C Android TV Box - $95.99
6. Enjoy Watching ESPN on XBMC
You you may open the addon browse live events or go back and replay past content (based on your replay settings above).
Conclusions
Searching the internet, you will find that a lot of users have expressed difficulty getting this XBMC ESPN plugin to work. The most common issue is the "Script Failed!: plugin.video.espn3" error. Hopefully this post provided you with clear instructions on how to get the plugin to work. Understand that even though plugin offers login options and more ESPN channel options (ESPN, ESPN2, ESPNU, etc.) they do not work and all my attempts so far have been futile. But ESPN3 works very well and you should have no problems watching Live content or replaying old content. So there you go. Enjoy watching ESPN using the XBMC ESPN addon.
Update (12/01/2013): Thanks to Lukeshow for sharing the latest fix for the XBMC ESPN Addon's script failed error with me. I have tested the new fix and the addon now works perfectly for ESPN3 content.





![Watch College Football Online FREE [2022]- 25+ WORKING websites 2022 Watch College Football Online Free](https://www.smarthomebeginner.com/images/2022/08/2022-watch-college-football-online-free.jpg)
![Watch College Football Online FREE [2023]: 🏈 23+ WORKING websites Watch College Football 2023](https://www.smarthomebeginner.com/images/2023/08/college-football-2023-e1692045798880.jpg)
![20 Working websites to watch March Madness online FREE [2022] Watch March Madness Online Free](https://www.smarthomebeginner.com/images/2022/03/march_maddness-scaled.jpg)
![15 Best Jellyfin Plugins [2023] - Supercharge your Media Server Jellyfin Intros Plugin Preview Pre-Roll](https://www.smarthomebeginner.com/images/2022/08/jellyfin-intros-preroll-preview.jpg)
