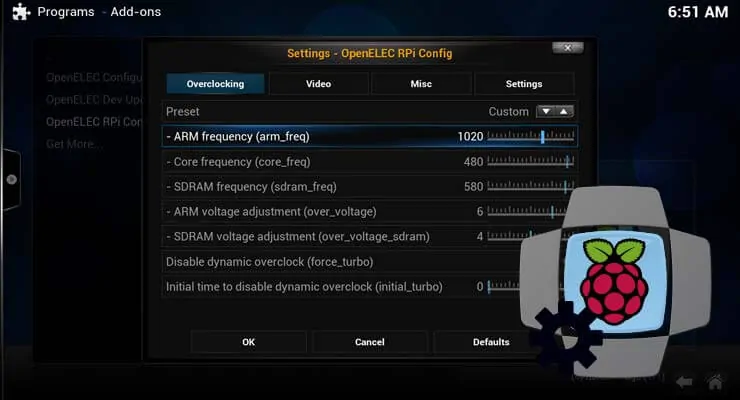
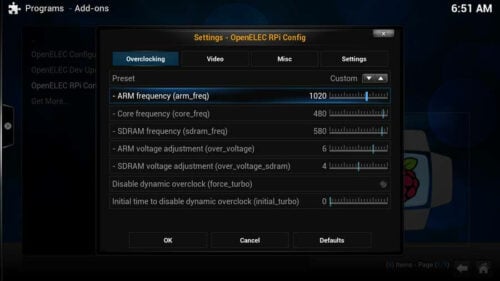
Overclocking Raspberry Pi on OpenELEC requires one to edit OpenELEC config files. Overclocking can bring, along with these Kodi performance improvement tips, can bring the best out of RaspberryPi. In fact, in my comparison, overclocked OpenELEC was better than Xbian or Raspbmc. It is one of the most common tweaks done to speed up RPi. However, overclocking can be challenging for some folks as it requires them to edit OpenELEC config.txt, which requires SSH and commandline activity. While Raspbmc and Xbian make it easy to overclock Raspberry Pi, OpenELEC purposefully makes it difficult for stability reasons. Not anymore. With the OpenELEC RPi Config addon, you can easily edit OpenELEC config parameters, more specifically config.txt from within Kodi interface.
Recommended HTPC / Home Server Builds:
- Best Home Theater PC Build 2017 to do it all (Plex, Kodi, NAS, Gaming)
- Best Emby Server builds 2018 – Pre-built and DIY options
- Medium Budget 4K HTPC Build 2017 for Kodi, Plex and Gaming
- Cheap 4K HTPC Build for Kodi, OpenELEC, and LibreELEC 2017
- Low Power Home Server Build 2017 for Network File and Media Storage
- Best HTPC for Kodi with 4K on a Medium Budget 2017 (~$400)
- Energy efficient budget HTPC-NAS combo build 2016
Install OpenELEC Raspberry Pi Config Addon
You can download the latest zip file from OpenELEC RPi Config addon page, and install the addon from within XBMC. However, I recommend installing the leapold repository first and then installing the addon from it. This way you can get the latest updates when they are available. [Read: 10 of the Best XBMC Addons in 2014]
First, download the Leapold Kodi repository and save it to a known location. Then fire up Kodi and navigate to System -> Addons -> Install from zip file.

After the repository is installed, navigate to System -> Addons -> Get Add-ons and select Leapold's Add-ons -> Services -> OpenELEC RPi Config. This OpenELEC configuration editor addon will now allow you to edit OpenELEC config.txt file simplify overclocking, over-volting, and other tasks. [Read: How to install OpenELEC on USB stick for Raspberry Pi?]
Edit OpenELEC Configuration
Once installed, navigate and select OpenELEC RPi Config addon and just follow the simple and intuitive onscreen information. Read and understand the potential problems and risks with Overclocking. These settings cannot be set randomly. Use the settings in our Raspberry Pi OpenELEC overclocking guide as starting points.
In addition to overclocking settings, you may also edit OpenELEC configuration parameters listed in the table below. Be sure to read up and understand what these parameters mean before tweaking them. [Read: Enable and configure OpenELEC Samba share on Raspberry Pi]
| Overclocking | Video | Misc |
|---|---|---|
| arm_freq core_freq sdram_freq over_voltage over_voltage_sdram force_turbo initial_turbo | gpu_mem hdmi_force_hotplug hdmi_drive hdmi_force_edid_audio hdmi_pixel_encoding hdmi_ignore_hotplug sdtv_mode sdtv_aspect disable_overscan overscan_scale overscan_left overscan_right overscan_top overscan_bottom | decode_MPG2 decode_WVC1 hdmi_ignore_cec hdmi_ignore_cec_init disable_splash |
There you go, with OpenELEC configuration editor plugin it is a lot more easier to edit OpenELEC config files. But keep in mind that with great power comes great responsibility. While this OpenELEC configuration addon makes overclocking and other tweaks easy you could easily mess up your system if your settings are incompatible. You could also end up corrupting your SD card, so for this reason I suggest running OpenELEC from USB. Go ahead install the addon, edit OpenELEC config.txt and supercharge your Raspberry Pi.


![8 Amazing Raspberry Pi Ideas [2022]: Beginners and Enthusiasts Raspberry Pi ideas](https://www.smarthomebeginner.com/images/2021/09/raspberry-pi-4-dev-board.jpg)
![Wireguard Android Client Setup [2022] - Simple and Secure VPN Wireguard android setup](https://www.smarthomebeginner.com/images/2021/09/wireguard-android-setup-header.webp)


