Hands up if you've ever been faced with a computer containing a corrupted operating system. You boot up the machine only to be faced with a black screen displaying some form of error. That's where Puppy Linux comes in as one of its many uses is the ability to fix hard drive partitions.
Puppy Linux is an easy to use, lightweight Linux distribution capable of being booted from a variety of media including CD's and USB sticks. The entire operating system can be run from RAM which allows removal of the boot disk once the operating system has started. A unique advantage of Puppy Linux is that it never connects to the host's hard drive thus preventing the possibility of corrupted data. [Read: Video: Install lightweight Gnome desktop on Ubuntu Server 14.04 Trusty Tahr]
From my personal experience a Puppy Linux live CD has been indispensable when fixing machines with broken operating systems or partitions. As long as the disc drive is still working then Puppy Linux is able to boot, that's the beauty of it.
Table of Contents
Creating a Puppy Linux Live CD
For this tutorial you are going to need access to a disc drive with the ability to write to disc and a writable CD. This task can be performed using either Windows or Linux, both operating systems make it a breeze.
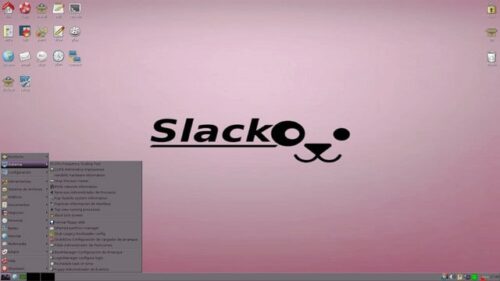
Firstly you are going to need a recent version of a Puppy Linux ISO file which are available at their download page. As well as the official releases there are many other community maintained versions of Puppy Linux called "Puplets". More often than not these are built for a specific purpose, for example there is a Puplet focused purely on the task of running old arcade games. [Read: Force Ubuntu boot into terminal by default]
Once you have downloaded a suitable version you are ready to create your Puppy Linux live CD.
Burning an iso File on Linux
Burning an iso file on Linux is easy but does require the use of terminal commands. To create a Puppy Linux live cd you firstly need to install the latest 'libburn' software package using your package manager. The terminal command for this on Ubuntu is:
sudo apt-get install libburn4
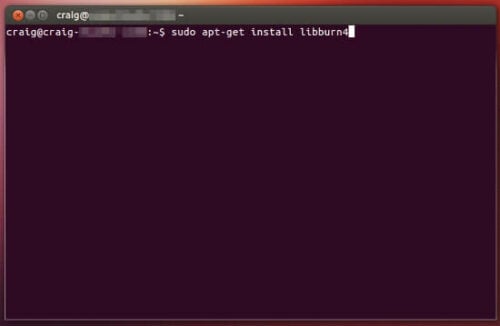
Now that's finished it is time to continue with burning the CD. Grab your disc and insert it into the drive. Open up the terminal again and enter the following command:
burniso <file.iso>
Replace 'file.iso' with the name of the file you wish to burn to disc, the Puppy Linux iso will now be written.
Congratulations your disc is now ready, easy wasn't it? I prefer to do it this way therefore eliminating the need for extra software.
Burning an iso File on Windows
Windows has a GUI program built-in for CD burning. There are other third-party options available as well such as Infrarecorder which also gets the job done, but today we will be using the 'Windows Disc Image Burner'. First insert a CD, which will be your Puppy Linux live CD, into your disc burner. [Read: The easiest way to install Ubuntu Server from USB]
Use the file manager to locate your disc image file (iso) and then double-click it.
I recommended ticking the check box named 'Verify disc after burning' this is critical for burning ISOs because they contain so much information and if they are corrupted you operating system will not install.
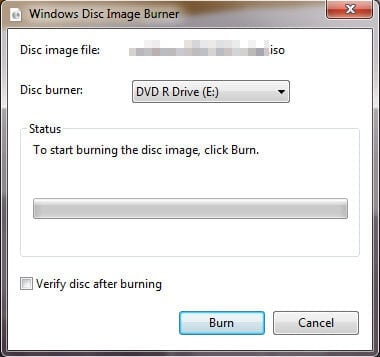
Click 'burn' to create your disc.
Booting From Your Puppy Linux Live CD
Now you have created your boot disc it is time to put it to work and boot up Puppy Linux.
- Insert the CD into the disc drive and then shut down the computer.
- When you switch on the computer you will be required to press one of the 'F' keys to access the boot menu of the BIOS.
- This is usually 'F2 or 'F12' but check with the manufacturer if you are unsure.
- Once the boot menu has loaded select the 'boot from disc' option.
- The Puppy Linux Live CD will now be loaded.
It's as simple as that to boot your operating system from CD. This ensures no corruption of the hard drive is possible as everything is loaded into the RAM of the computer.
Conclusion
The possibilities are endless now you have created a Puppy Linux Live CD from here the operating system can be installed straight to the hard drive or kept as a live CD in case of emergencies. Further articles will be released by us in the future including the Puppy Linux Windows Installer which allows Puppy to be executed within Windows itself!
Are you already a user of Puppy Linux? Let me know in the comments of any thoughts or experiences you may have. Alternatively, reach us on Facebook or Twitter.

