The LibreELEC version of Kodi media center embedded in Linux is amazing. LibreELEC remains a versatile Kodi embedded Linux distro. I installed it onto a USB flash drive just to give it a test run and decided to keep it. Learn how to install LibreELEC create a LibreELEC live USB for a portable LibreELEC version.
Table of Contents
LibreELEC USB install: Make Kodi portable
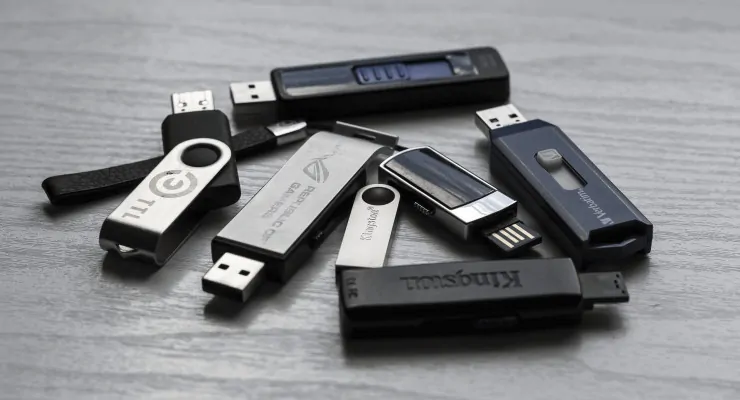
An easy way for making Kodi portable is by installing it and running it on live USB. This is not only easier than you think, but it is fun booting up your personal LibreELEC desktop anywhere. Allowing you to share songs and play videos away from home with Kodi. Making your files easy to store in a convenient medium, LibreELEC is much fancier than storing your media in plain, ordinary folders.
The items required for installation are only basic.
- USB flash drive (8 GB or more recommended) x2
- LibreELEC disk image
- Computer with a compatible processor
Just enough OS for Kodi
LibreELEC boasts just enough OS for Kodi, allowing it to run smoothly and efficiently using a live USB. Creating a live USB installation is as easy as burning the full disk image with the installer onto CD or USB. Installing LibreELEC onto the destination drive using the installer CD or USB, requires installation media with less storage capacity. Even only a CD or 4 GB USB contains more than enough storage.
If you want a bit of a buffer in storage capacity, 8 GB for the USB drive for LibreELEC usually contains enough. If you plan on storing libraries on the stick, 8 GB easily becomes consumed by add-ons and storage data. Consider a USB flash drive of at least 64 GB as a better option.
Using a microSD card in place of a USB flash drive is optionally up to you, but make sure to use class 8 instead of 10 if that is your choice. LibreELEC needs a microSD with random write capability, but the newer class 10 uses sustained writes. If it is your plan to use microSD, it is recommendable you consult the Raspberry Pi Dramble page.
1. Burning a disc with Brasero
Burn the image to CD using any number of applications available for Linux, if that's your platform. Many tools exist for this purpose in the Software Center for most distros. I recommend Brasero on Linux if you wish to avoid opening a terminal. Windows and Mac possess native support for burning .IMG files. Coincidentally, the .DMG file extension came as an upgraded version of the .IMG file extension popularly implemented by Apple on Mac.
I use the command line.
2. Using the live USB installer
For using the live USB installer on the LibreELEC website, earlier we posted a convenient reference. This process creates the installer with the LibreELEC installer image, allowing you to use your own image file if you prefer. [Read: How to install LibreELEC on HTPC – A lightweight Kodi operating system]
3. Choosing the LibreELEC image file
Navigate to the specific page section you need. Be sure you choose an image made for the processor installed on the LibreELEC live USB host machine. The image for AMD-compatible processors like Intel runs on standard HTPC-ready computers. If you plan running LibreELEC live USB on Pi, download the image for ARM processors. Similarly, use a specific image for Amlogic.
Now navigate to the LibreELEC download page, and scroll to Direct Downloads section lower on the page. Remember to use the dropdown menu to download the appropriate disk image. The menu displays when you click the dropdown menu arrow to see the items.
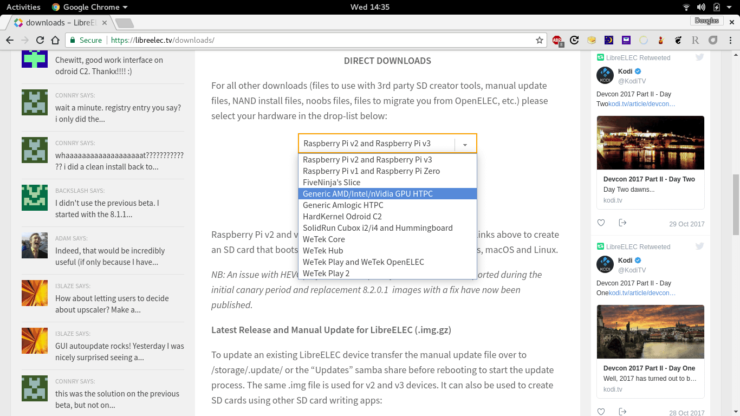
An array of possibilities displays in the menu. This lets you choose the image compatible with the processor inside the device you want to boot and run the USB flash drive on. Download the appropriate image.
4. Downloading LibreELEC with wget
For terminal users downloading and installing the image onto USB happens by opening a terminal window and navigating to your Downloads directory. If you wish to download this file from the command line, right-click copy the image link address on your browser's context menu.
Using the wget command with the link in the terminal makes your download faster.
# wget stands for "web get"
wget http://releases.libreelec.tv/LibreELEC-Generic.x86_64-8.2.0.img.gz
Windows users interested in using wget want to go to the Wget for Windows page to download and install from the GnuWin32 website.
5. Decompress the disk image file
Now it is time for us to decompress the image.
We can decompress the file and leave no trace of a compressed version of the file with gunzip, or keep the compressed file intact by utilizing the tar command.
#"x" extracts the file#"z" indicates the file is compressed in .gz or .tgz format#"f" reads the content of the file
tar xzf LibreELEC-Generic.x86_64-8.2.0.img.gz
If you use Windows, download and install tar.
The gunzip command leaves no compressed version of the file.
gunzip LibreELEC-Generic.x86_64-8.2.0.img.gz
Also there is an option for using the gunzip command on Windows by installing gzip from the developer website.
The many tools available to decompress tar and gzip files include 7-zip and WinZip. WinZip works on the command line in Windows.
6. Unmount the USB drive
With the image already decompressed, now find the USB flash drive with fdisk -l inside the terminal.
The USB live drive here typically displays as /dev/sdb or /dev/sdc with more than one USB drive attached.
Be certain to carefully make sure the installer uses the correct USB.
If the final USB flash drive for LibreELEC is attached, we use fdisk to find this information on the command line.
# This command shows only the partitions
fdisk -l
# This command shows partitions, mountpoints and the device UUID
blkid -o list
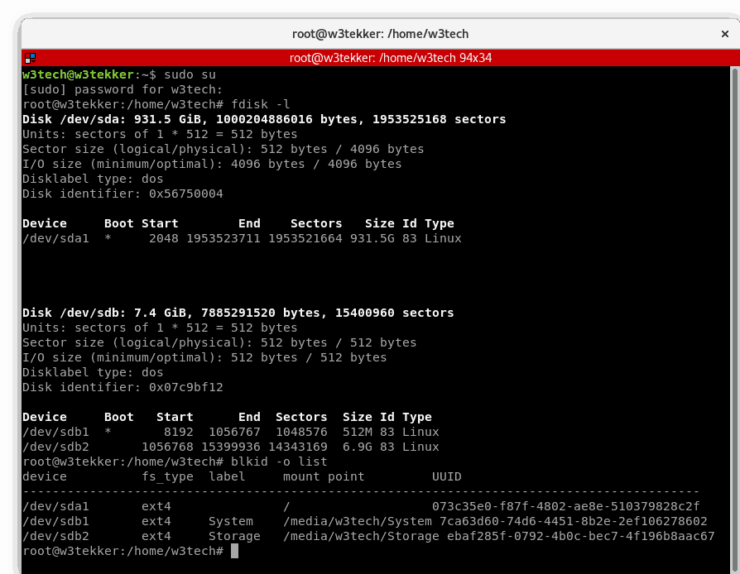
With a USB flash drive attached the system creates a process for running it in the background. Whether or not the user navigates into it at all, it is always in use when mounted and is considered busy by the system. The device shows busy if someone tries making any big changes, because it is running. We only have permission for browsing and editing its contents. For the purpose of partitioning and writing to it, we first unmount it.
7. Unmounting the target USB
# If there is no partition and nothing on the USB,# the command probably looks like this..
umount /dev/sdb
# With one or more partitions on the drive# a number is appended to the end
umount /dev/sdb1
# More than one partiton means you need to unmount all
umount /dev/sdb1
umount /dev/sdb2
Clone the LibreELEC disk image
At this point, we clone the image to USB on the command line with the dd command.
# When there is no partition on the drive use
dd if=LibreELEC-Generic.x86_64-8.2.0.img of=/dev/sdb
# When there is a partition the command is
dd if=LibreELEC-Generic.x86_64-8.2.0.img of=/dev/sdb1
Burning the image to USB without the command line becomes easy with third-party software. Particularly, the bootloader UNetbootin works well on Linux, OS X, and Windows.
Booting the LibreELEC installer
Once you finish creating the installer, reboot the computer and utilize the appropriate "F" or function key (i.e. F8,F12) to enter the boot menu on BIOS. On the boot menu, choose your USB device with attention to selecting the USB partition instead of the computer's hard drive.
Check the documentation for your BIOS online for how to permanently boot USB first. All BIOS have a setting for boot order. Adjusting the USB higher or to the top, gives it priority. Optionally, the boot menu provides a way for manually booting the USB, instead of changing the boot order.
Starting the computer up, BIOS displays the version. This information helps you lookup support documentation for modifying the BIOS settings. It is not necessary for BIOS settings to be modified to boot live USB, if the user prefers using the boot menu each time. Manually choosing to boot from USB on the BIOS boot menu works for me.
1. Removable media and boot order
Always put a removable media boot option before the hard drive (disc or USB), in case the hard drive fails. When an optical DVD drive or USB port fails, choosing one of these before the hard drive allows restoring from removable media. If the hard drive one day crashes, replacing the drive for using the computer again becomes your only real option.
2. Booting into the installer
Booting into the LibreELEC installer, it begins performing the installation onto the other USB by prompting the user for language, region, keyboard, and time settings. Prompting the user which hard drive to use, the main hard drive typically displays as /dev/sda/.
The USB displays as /dev/sdb or /dev/sdc/ with another USB drive connected. Connecting the Wi-Fi during installation allows updates while installing. After the installer finishes the computer reboots, and the familiar Kodi splash screen displays. Now you setup LibreELEC again. This time within.
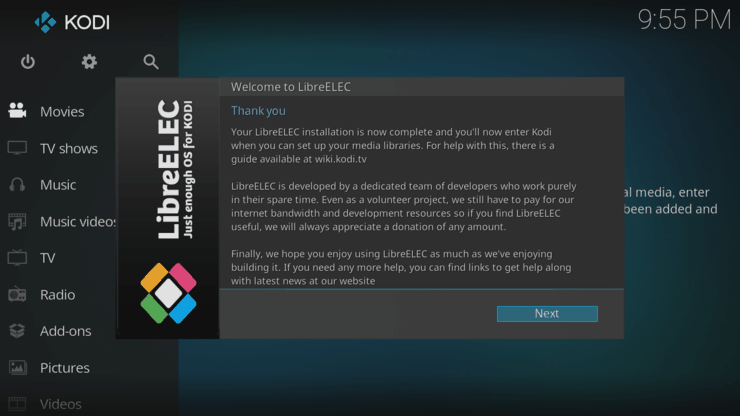
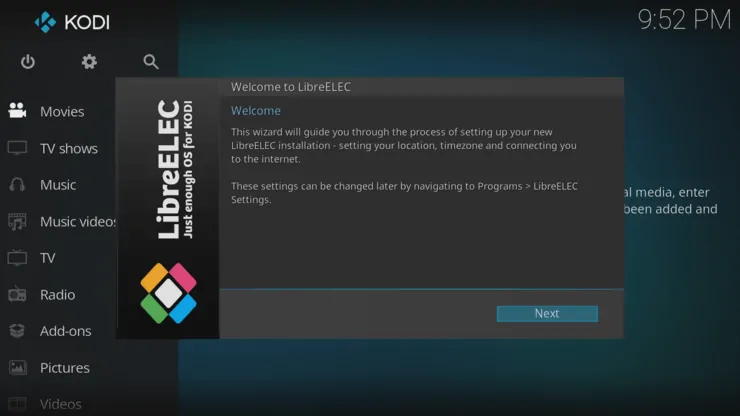
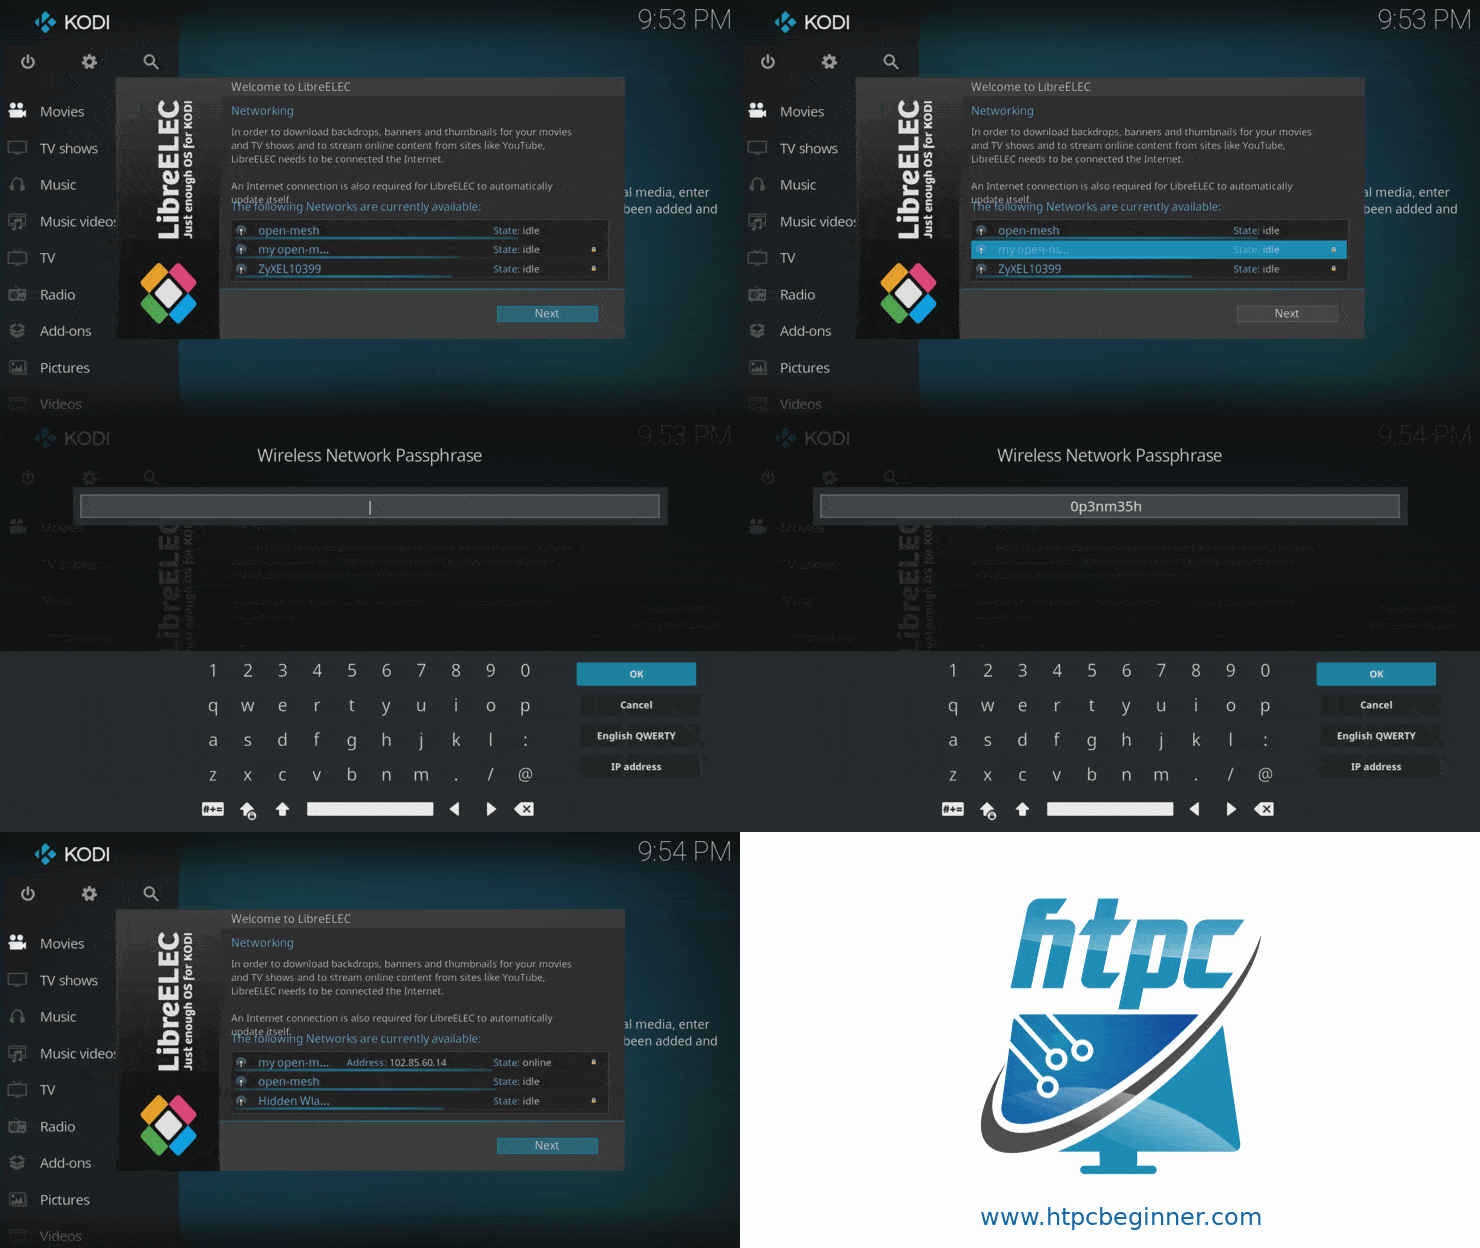
Next appears the warm welcome. Enter Next and open the next screen.
Welcome to LibreELEC!
After the welcome page the dialogue displays the screen for the hostname setting.
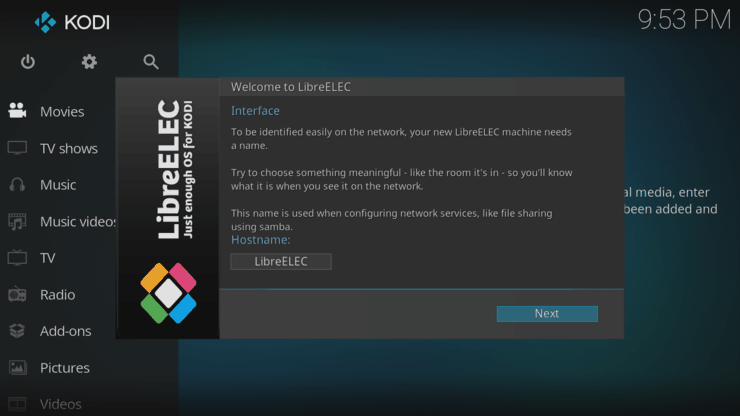
The default hostname "LibreELEC" shows in the hostname field.
Connecting Wi-Fi
The next screen prompts the user for Wi-Fi settings again, because now we are inside the new installation. The information provided earlier for the installer only worked with the installer during installation. LibreELEC needs authentication again on the Wi-Fi in the initial setup.
Demonstrating on my home network, I connect here with an Open Mesh router using the router's out-of-the-box default password.
Once selecting a network the dialogue prompts for an action, allowing the user to make an Internet connection.
Choose Connect.
The dialogue appears, asking for the passphrase.
All Open Mesh routers use "0p3nm35h" as the default password.
Configuring SSH and Samba
The next step displays configuration settings for SSH and Samba, if you plan on using either of these services for remote access.
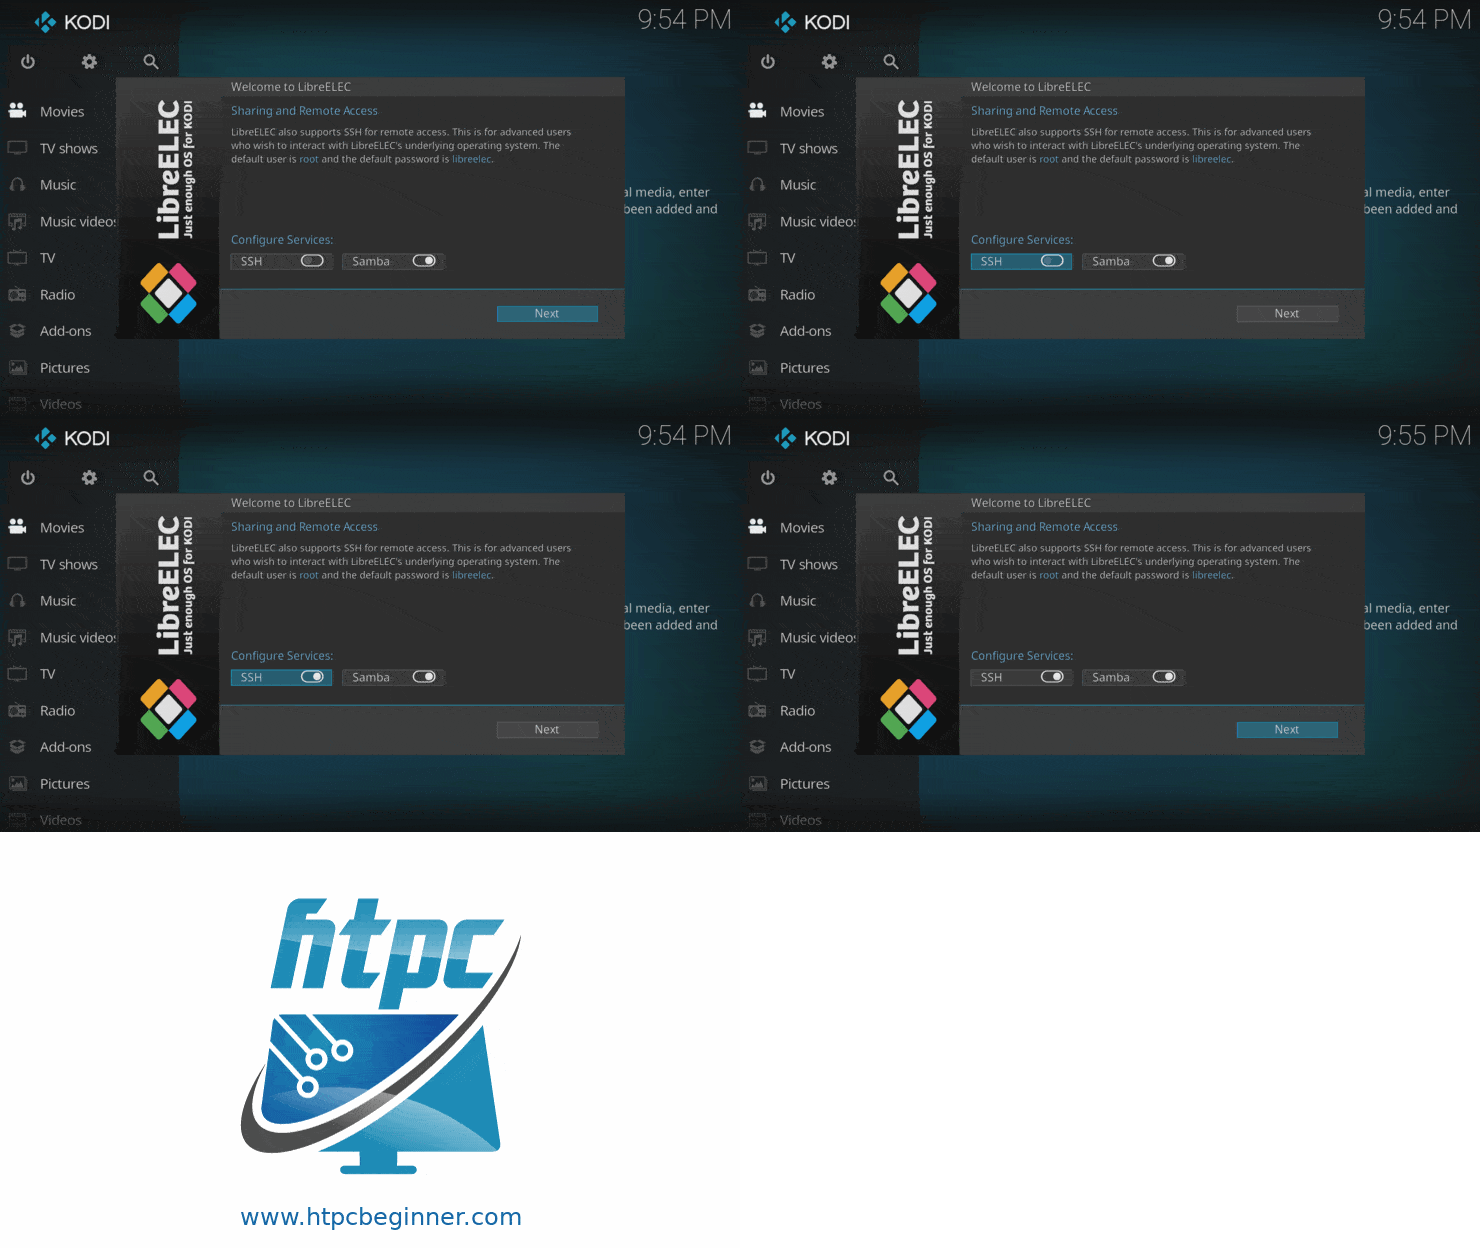
LibreELEC thanks you!
At the end of setup LibreELEC wants to thank you.
LibreELEC live as a storage device
When you create a LibreELEC live USB, mounting it as storage happens automatically when you go into your operating system normally with it plugged into the USB port. This makes it possible to go into the folders and play around with your media as you normally would any other directory. A new drive directory named Storage appears after booting into your usual operating system on your computer with the USB connected.
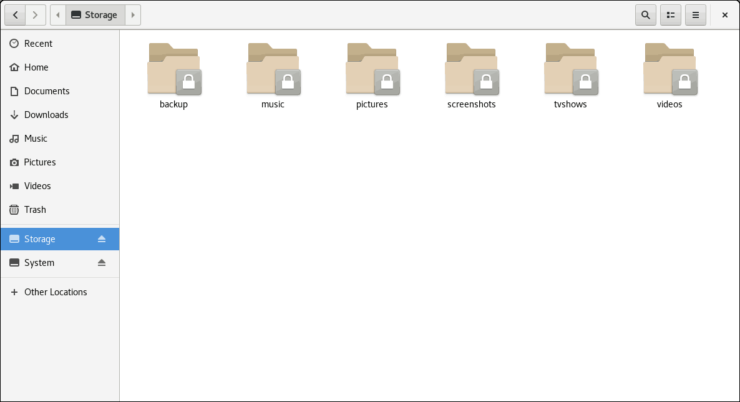
In the uncommon event your strain of Linux displays nothing, we add the drive manually and optionally configure it to mount automatically in the future.
Add the drive to fstab
If it is not mounted we retrieve the hardware information from the USB, adding the drive to fstab.
Using the same command as before displays the drives by UUID for the purpose of right-copying and pasting them inside the fstab file.
blkid -o list
The Universal Unique Identifier
Add the drive to the fstab file with the Universal Unique Identifier, or UUID.
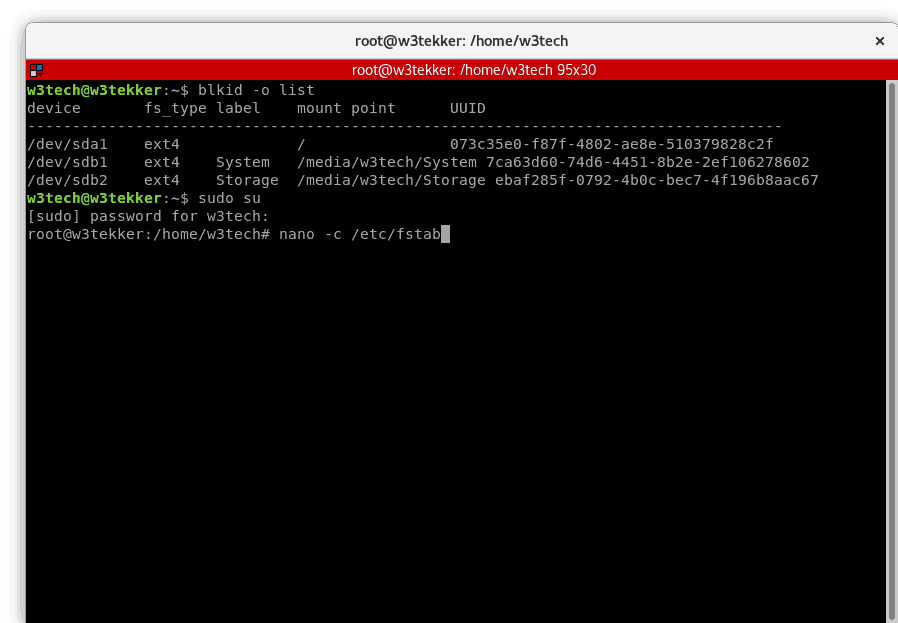
The 128-bit UUID identifier of a specific device differs from that of the UUID on any other device. This system for identifying devices lasts till 3400 A.D., if used for that long by hardware vendors. The system outlasts its own need. No one that far out in A.D. carries today's USB.
Adding values for LibreELEC live
The mountpoint for the drive, displays as /media/w3tech/Storage/ in my case. The only thing that we specifically make different here becomes the user.
We add these values to the file.
# Adding the -c option shows line rows and numbers
nano -c /etc/fstab
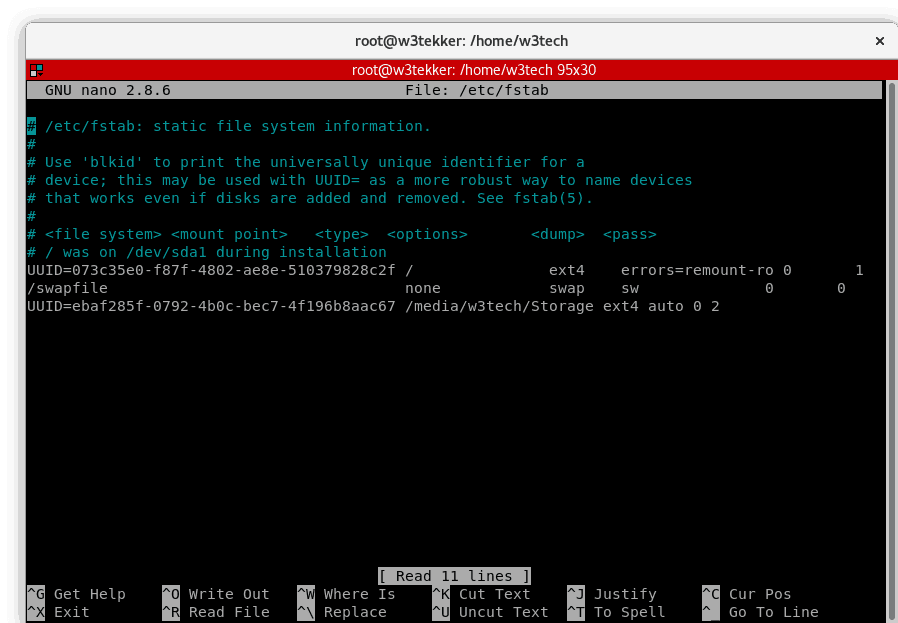
Configuring LibreELEC live auto bootmount
Especially notice this row in the terminal window inside the fstab file.
<file system> <mount point> <type> <options> <dump> <pass>
Here we see where we specify the file system type, which shows ext4 on the USB.
If for some crazy reason you want to use the dump utility, the value is 1. Otherwise, it is 0.
Where it shows the value for pass, implicitly keep this set as 1 for the primary partition of the main operating system on the computer itself.
The USB flash drive and any other drives and partitions you want to mount at boot by contrast use a value of 2. If a value of 2 is not set it defaults to zero, and the drive is ignored at boot. You can also set it to 0 to make it this way, and the USB will not boot unless it has higher boot priority.
The command to automount mount -a any partition or drive only applies to drives configured in fstab.
To be sure your USB flash drive is ignored and does not have to be connected for the computer to boot, it is important you make your configuration look like this!
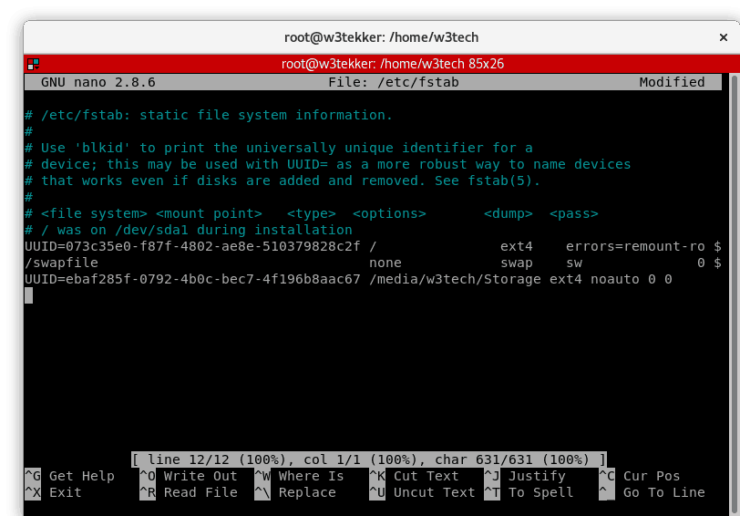
Once done editing, now save your file entering CTRL + "0" + Enter + "x".
In nano, "0" + Enter overwrites the file, and "x" exits.
Mounting and unmounting the new partition
The drive finally now ready, we mount it.
# To mount manually using
mount /media/w3tech/Storage
# To mount automatically using
mount -a /media/w3tech/Storage
# Undo automount
umount -a /media/w3tech/Storage
# Never run umount -a without specifying a partition
umount -a
# Removes automount on all partitions in fstab
Switching the owner of LibreELEC live
Switching to root to set your user account as the owner, most users usually use chown in Linux in combination with a graphical means in UI.
chown w3tech /media/w3tech/Storage
Changing permisions for LibreELEC live
Changing permissions now and periodically for you and other users occurs with use of the chmod command.
# Owner, Group and Other is represented by three numbers.# 7 = read, write and execute# 6 = read and write# 5 = read and execute# 4 = read-only
chmod 754 /media/w3tech/Storage
# Here the owner permissions become read, write, execute# Local user permissions become read and execute# Other (non-user permissions) become read
Dragging and dropping all your media into the new window especially allows you the opportunity for playing it at home and on the go. Booting ordinarily on any compatible computer with a USB port lets all your friends and family also enjoy the media you are eager to share. With great music and videos on the new LibreELEC in the same pocket as your car keys, you need not worry about installing the right media player for your files. If there is USB support in your car, you also now more easily plug into the port in your car to use the drive as storage.
Install Libreelec on USB: Final thoughts
By all means feel free to leave your comments for how well the LibreELEC flash drive connects to your model of vehicle, and the hardware installed on the dashboard. Now you can impress your friends everywhere you go with Kodi-on-a-stick!
Now that you learned this LibreELEC USB install, learn how to install LibreELEC on PC for a lightweight Kodi operating system. You can also install LibreELEC on Raspberry Pi 3 for a Kodi media center experience. Need a new rig? Consider this inexpensive 4K HTPC build for Kodi, OpenELEC, LibreELEC, and more.
Resources
How to mount USB drive in Linux
Linux 2.6 - man page for umount
Redhat customer portal 13.2.3. Add to /etc/fstab
Understanding and Using File Permissions
Additional resources for reading
Manually Mounting a USB Flash Drive in Linux
Boot From USB
Manage Disc Images



![8 Amazing Raspberry Pi Ideas [2022]: Beginners and Enthusiasts Raspberry Pi ideas](https://www.smarthomebeginner.com/images/2021/09/raspberry-pi-4-dev-board.jpg)
![15 Best Plex Alternatives [2022] - FREE and BETTER Options Best Plex Alternatives feature image](https://www.smarthomebeginner.com/images/2022/08/best-plex-alternatives-feature-image.gif)
![10 Best Plex Client Devices [2022] - STUTTER-free Streaming Best Plex Client Devices](https://www.smarthomebeginner.com/images/2022/02/best-nas-for-plex-server-featured-images-from-pexels-photography-maghradze-ph-3764958-e1648542743772.jpg)
![15 Best Jellyfin Plugins [2023] - Supercharge your Media Server Jellyfin Intros Plugin Preview Pre-Roll](https://www.smarthomebeginner.com/images/2022/08/jellyfin-intros-preroll-preview.jpg)