Few days back, I published a post describing how to configure the Chinavision MCE USB remote to work with XBMC and Logitech Harmony Remote. I did further research and reading after this and ended up improving my setup.
Since XBMC Dharma, the "keymap.xml" file no longer exists. It now called "keyboard.xml". The location, however, has not changed. This according to the XBMC Wiki. Therefore, in this post "keymap.xml" has been renamed to "keyboard.xml".
The Remote Control Reviews section of XBMC Wiki has details on the Chinavision CVSB-983 model remote. it is referred to as "Unbranded MCE remote". Work is continuously being done on this remote and details are provided to make almost all keys (except power button) to work on the Chinavision remote. I however, have not experimented with this yet and decided to follow this post as stated in my previous post.
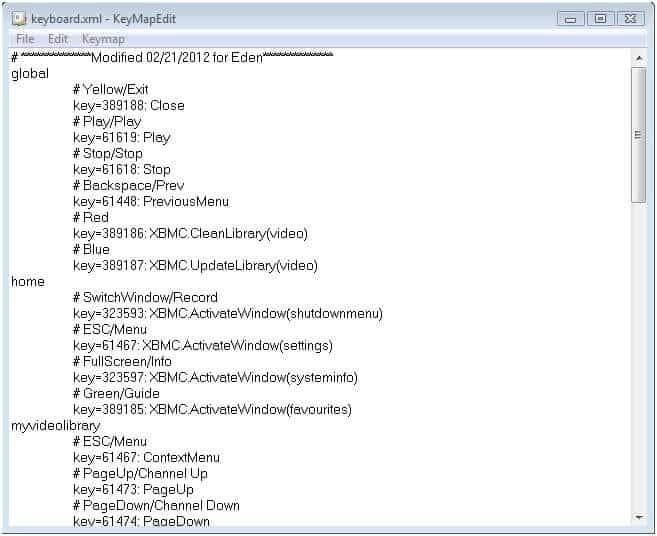
There is a great little windows utility called KeyMapEdit that you can use to edit your keyboard.xml (or keymap.xml). It provides you with a nice interface and several of the XBMC functions are available from a drop down menu to be assigned to various keys. It helped me great to fine tune my keyboard.xml.
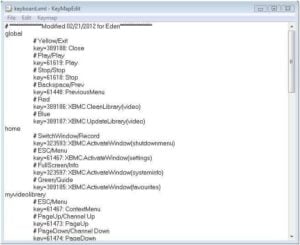
Below is my new/modified keyboard.xml (previously keymap.xml):
<!--**************Modified 02/21/2012 for Eden**************-->
<keymap>
  <global>
    <keyboard>
      <!--Yellow/Exit-->
      <key id="389188">Close</key>
      <!--Play/Play-->
      <key id="61619">Play</key>
      <!--Stop/Stop-->
      <key id="61618">Stop</key>
      <!--Backspace/Prev-->
      <key id="61448">PreviousMenu</key>
      <!--Red-->
      <key id="389186">XBMC.CleanLibrary(video)</key>
      <!--Blue-->
      <key id="389187">XBMC.UpdateLibrary(video)</key>
    </keyboard>
  </global>
  <home>
    <keyboard>
      <!--SwitchWindow/Record-->
      <key id="323593">XBMC.ActivateWindow(shutdownmenu)</key>
      <!--ESC/Menu-->
      <key id="61467">XBMC.ActivateWindow(settings)</key>
      <!--FullScreen/Info-->
      <key id="323597">XBMC.ActivateWindow(systeminfo)</key>
      <!--Green/Guide-->
      <key id="389185">XBMC.ActivateWindow(favourites)</key>
    </keyboard>
  </home>
  <myvideolibrary>
    <keyboard>
      <!--ESC/Menu-->
      <key id="61467">ContextMenu</key>
      <!--PageUp/Channel Up-->
      <key id="61473">PageUp</key>
      <!--PageDown/Channel Down-->
      <key id="61474">PageDown</key>
      <!--Green/Guide-->
      <key id="389185">togglewatched</key>
    </keyboard>
  </myvideolibrary>
  <myvideofiles>
    <keyboard>
      <!--ESC/Menu-->
      <key id="61467">ContextMenu</key>
      <!--PageUp/Channel Up-->
      <key id="61473">PageUp</key>
      <!--PageDown/Channel Down-->
      <key id="61474">PageDown</key>
      <!--Green/Guide-->
      <key id="389185">togglewatched</key>
    </keyboard>
  </myvideofiles>
  <mymusiclibrary>
    <keyboard>
      <!--ESC/Menu-->
      <key id="61467">ContextMenu</key>
      <!--PageUp/ChapterUp-->
      <key id="61473">PageUp</key>
      <!--PageDown/ChapterDown-->
      <key id="61474">PageDown</key>
    </keyboard>
  </mymusiclibrary>
  <mymusicfiles>
    <keyboard>
      <!--ESC/Menu-->
      <key id="61467">ContextMenu</key>
      <!--PageUp/ChapterUp-->
      <key id="61473">PageUp</key>
      <!--PageDown/ChapterDown-->
      <key id="61474">PageDown</key>
    </keyboard>
  </mymusicfiles>
  <myfiles>
    <keyboard>
      <!--ESC/Menu-->
      <key id="61467">ContextMenu</key>
      <!--PageUp/ChannelUp-->
      <key id="61473">PageUp</key>
      <!--PageDown/ChannelDown-->
      <key id="61474">PageDown</key>
    </keyboard>
  </myfiles>
  <fullscreenvideo>
    <keyboard>
      <!--Green/Guide-->
      <key id="389185">CodecInfo</key>
      <!--ESC/Menu-->
      <key id="61467">XBMC.ActivateWindow(osdaudiosettings)</key>
      <!--FullScreen/Info-->
      <key id="323597">XBMC.ActivateWindow(movieinformation)</key>
      <!--Track Left/Previous Track-->
      <key id="61617">smallstepback</key>
      <!--Track Right/Next Track-->
      <key id="61616">stepforward</key>
      <!--PageUp/Channel Up-->
      <key id="61473">subtitledelayplus</key>
      <!--PageDown/Channel Down-->
      <key id="61474">subtitledelayminus</key>
      <!--SwitchWindow/Record-->
      <key id="5323593">showsubtitles</key>
    </keyboard>
  </fullscreenvideo>
  <visualisation>
    <keyboard>
      <!--Esc/Menu-->
      <key id="61467">ActivateWindow(musicosd)</key>
      <!--FullScreen/Info-->
      <key id="323597">XBMC.ActivateWindow(musicinformation)</key>
      <!--SwitchWindow/Record-->
      <key id="5323593">XBMC.RunScript(script.cu.lyrics)</key>
    </keyboard>
  </visualisation>
  <slideshow>
    <keyboard>
      <!--PageUp/Channel Up-->
      <key id="61473">ZoomIn</key>
      <!--PageDown/Channel Down-->
      <key id="61474">ZoomOut</key>
      <!--FullScreen/Info-->
      <key id="323597">XBMC.ActivateWindow(pictureinfo)</key>
    </keyboard>
  </slideshow>
</keymap>
If you want to further customize the above keyboard.xml to your liking then refer to XBMC Wiki pages: Keyboard.xml, List of Built-in functions, and Opening Windows and Dialogs. My revised Logitech Harmony->Chinavision Remote mappings are given below:
| Logitech Harmony Key | Chinavision Remote | Function |
|---|---|---|
| Channel Down | PageDown | For faster scrolling down through media lists. Zoom out during picture slideshow. |
| Channel Up | PageUp | For faster scrolling up through media lists. Zoom in during picture slideshow. |
| Prev | Backspace | Back to previous menu or Home Screen. |
| OK | Enter | To select by pressing Enter key |
| Logitech Harmony Key | Chinavision Remote | Function |
|---|---|---|
| Menu | ESC | Home Screen -> opens Settings window Video Library -> opens Context Menu Files List -> opens Context Menu Fullscreen Video -> opens Audio Settings Music Visualization -> opens OSD |
| Exit | Yellow | Exit from a menu or a window |
| Info | Fullscreen | Home Screen -> opens System Info window Fullscreen Video -> opens Video Info Visualization -> opens Music Info Slideshow -> opens Picture Info |
| Record | SwitchWindow | Home Screen -> opens Shutdown menu Fullscreen Video -> enables/disables subtitles Visualization -> enables/disables song lyrics |
| Guide | Green | Home Screen -> opens Favorites Video Library -> toggles Watched Fullscreen Video -> displays Codec Info |
| Additional Button | Red | Cleans video library |
| Additional Button | Blue | Updates video library |
There are few other minor functions/mappings in the above keyboard.xml that are most self-explanatory.
Screenshots of my Logitech Harmony button customizations were shown in my previous post. The new button customizations are essentially same except:
- The record button of Harmony remote is now mapped to SwitchWindow button of Chinavision remote
- The guide button of Harmony remote is now mapped to Green button of Chinavision remote
- The Tab key of Chinavision remote (to return to video) is now added as an additional button called "VideoReturn" on Harmony remote
- A new "Shutdown" (mapped to Record button as described above) additional button was added to Harmony Remote
I have to say that I am very pleased with the current setup. But I am insatiable when it comes to messing with my setup. So I may end up changing everything again.
UPDATE:
Thanks to Wooderson for pointing out that SmallStepBack, StepFoward, SubtitleDelayPlus, SubtitleDelayMinux, and ShowSubtitles are not working. I have not been able to find a fix for those. However, you may use your direction left and direction right while on Fullscreen Video to perform SmallStepBack and SmallStepForward (no mapping needed). You may customize the length of the skip (in seconds) using this code in your advancedsettings.xml in userdata folder:
<video>
 <timeseekforward>10</timeseekforward> <!-- Time to seek forward in sec - short seek. Defaults to 30. -->
 <timeseekbackward>-10</timeseekbackward> <!-- Time to seek backward in sec - short seek. Defaults to -30. -->
</video>


![10 Best Plex Client Devices [2022] - STUTTER-free Streaming Best Plex Client Devices](https://www.smarthomebeginner.com/images/2022/02/best-nas-for-plex-server-featured-images-from-pexels-photography-maghradze-ph-3764958-e1648542743772.jpg)
