I have been an active user of Proxmox Virtual Environment for the last 6 months. Linux server has been a key part of my smart home setup. In fact, my original docker media server guide and the Traefik 2 guide are all based on Ubuntu and are used by many readers.
I have had my share for trysts with Hypervisors and have an entire series of articles on VirtualBox for beginners. Late in 2020, I stumbled upon Proxmox and and have been amazed at how it took my setup to a new level. Backups have made destroying and recreating virtual machines, almost as simple as what docker has done to containerized apps. [Read: Proxmox vs ESXi: 9 Compelling reasons why my choice was clear]
The Intel NUC 8 system that used to run Ubuntu/Debian-based host OS now runs Proxmox with my docker media server running in a Ubuntu VM. But enough about my setup. Let us move on to what you are here for and that is adding your Synology NAS as a storage on Proxmox for backups and more.
Table of Contents
Adding Synology to Proxmox VE
My Intel NUC has a 1 TB NVMe disk and a 2 TB SATA III SSD. Typically for a homelab, this is more than enough. But never say no to more storage. And if you already have a Synology NAS, then why invest hundreds of dollars in larger capacity SSDs for your Proxmox server?
You can use your Synology NAS to store all your Proxmox backups (dump), images, snippets, templates, and more. You can even save your virtual disks and containers on your NAS and run your VM from it.
There are two protocols you can use to add Synology to Proxmox for additional storage: SMB or CIFS and NFS. Both of these protocols are the most common protocols for sharing storage. In this post, I will show you how to add Synology NAS to Proxmox using the common SMB (Server Message Block) / CIFS (Common Internet File System) protocol.
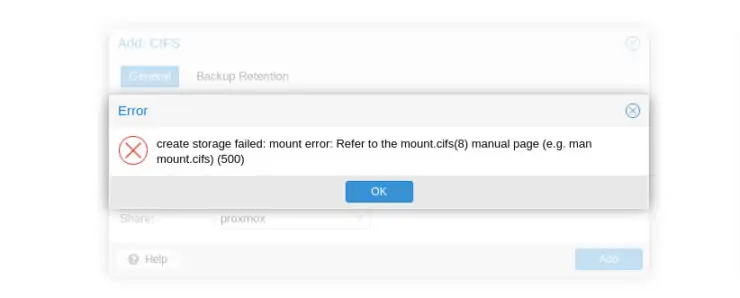
If you have already tried adding a SMB share from Synology to Proxmox, then you might have encountered the "create storage failed: mount error" message shown above. I will show you how to properly add Synology SMB share to Proxmox so you do not encounter the mount error. [Read: Synology Docker Media Server with Traefik, Docker Compose, and Cloudflare]
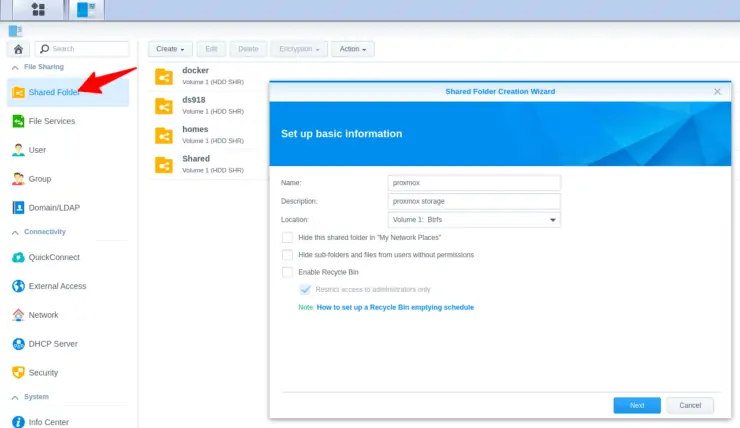
First, I recommend creating a new shared folder for Proxmox. You could use an existing SMB share but Proxmox is going to create a bunch of folders in the share's root: dump, templates, etc. I personally do not like to clutter my existing shared folders. So let's keep things clean.
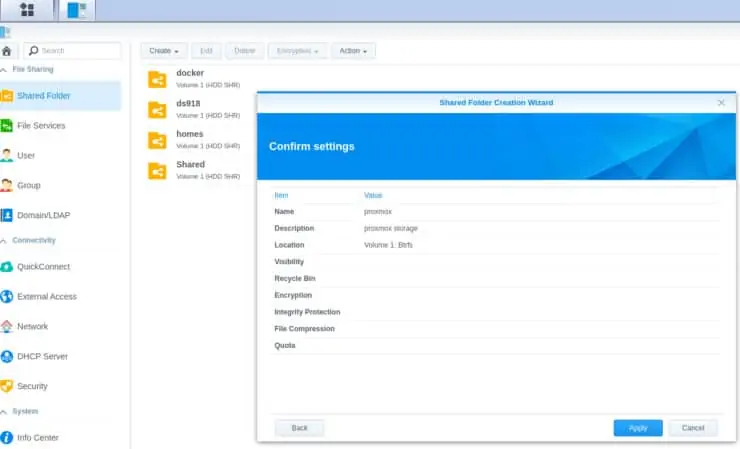
Open DSM Control Panel and create a new Synology Proxmox shared folder. Let's call it proxmox. Put in whatever for description and the leave the rest as is.
Next, we are going to choose to leave the shared folder unencrypted.
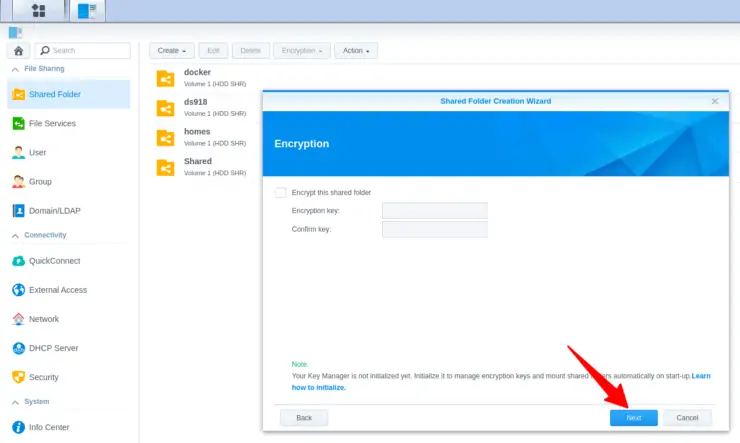
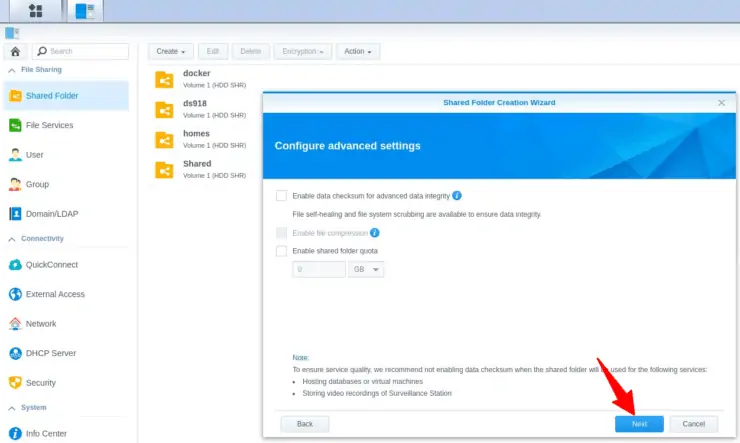
In the following advanced settings window, you do not need to customize anything.
Verify the shared folder settings and apply to create the Synology folder for Proxmox backups, disks, containers, VMs, and more.
You will be presented with one final screen to configure permissions for the folder.
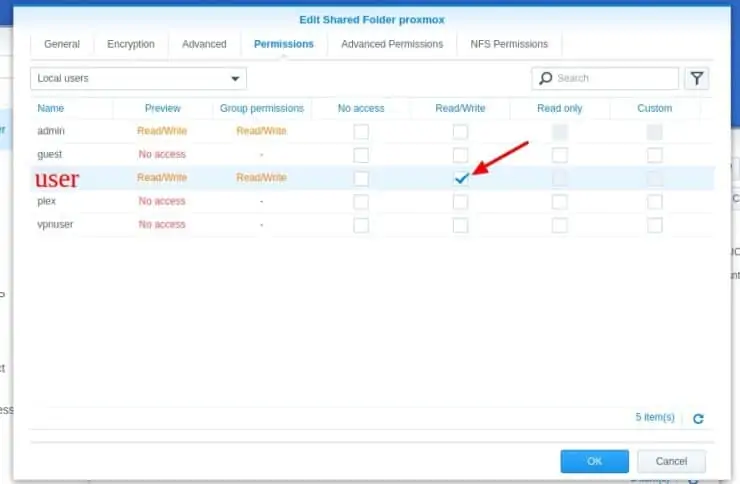
Ensure that "read/write" permissions are enabled for the SMB share user and click OK.
Be the 1 in 200,000. Help us sustain what we do.You will gain benefits such as Deployarr access, discord roles, exclusive content, ad-free browsing, and more.🔥 Holiday Sale! 25% Off Platinum Membership$399.99$299.99 (ends December 31).Join the Geek Army (starting from just $1.67/month)
2. Create Storage Failed: Mount Error - Fix
Usually, this step 2 is skipped and this is what causes the infamous "create storage failed: mount error" error.
What causes the "create storage failed: mount error" error on Proxmox?
This error happens because of the SMB protocol version mismatch between Proxmox and Synology. Synology DSM defaults to a maximum supported SMB protocol version of 2 while Proxmox defaults to version 3.
There are two ways to address this.
A. Explicitly Specify SMB2 on Proxmox
You can specify which version of SMB protocol to use while adding Synology to Proxmox. However, at this time Proxmox (version 6.4-4) does not have the option to specify SMB version in the GUI. So you will have to use the Proxmox node shell to add the Synology NAS storage to Proxmox.
Highlight the node and go to the Shell tab. Use the following to manually add Synology to Proxmox using SMB 2 protocol.
pvesm add cifs ds918_cifs --server 192.168.1.254 --share proxmox --username USERNAME --password PASSWORD --smbversion 2.0
Detailed descriptions of the fields/parameters are provided later in this guide. ds918_cifs is the ID. 192.168.1.254 is the Server. proxmox is the Share. USERNAME and PASSWORD are credentials for the Synology user. Finally, in the command above we are specifying SMB2 protocol.
This should now add the Synology SMB Share to Proxmox storage backend. You are done and may skip the rest of the steps. But I recommend going more step ahead to take advantage of the latest SMB version 3.
B. Increase Max SMB Protocol Version
To change Synology to accept SMB connections using the SMB3 (latest) protocol, open Control Panel and go to File Services. Then go to Advanced Settings under SMB.
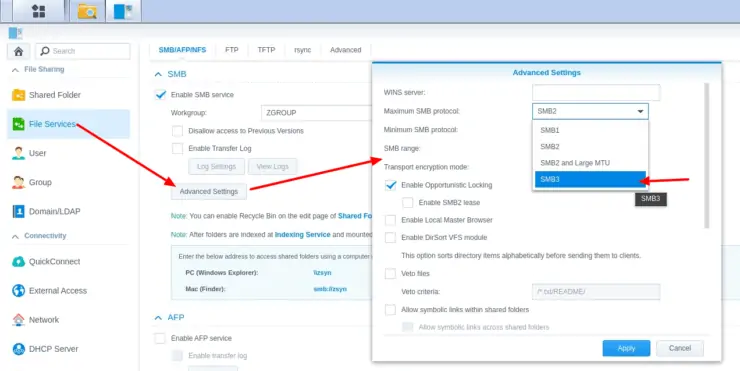
Change Maximum SMB Protocol to SMB3 as shown above.

Apply the changes to restart SMB server on Synology.
At this point, you can use the command provided above to manually add the Samba share to Proxmox. You can either leave out --smbversion 2.0, leave it as is (Proxmox would default to SMB3), or change it to --smbversion 3.0 because your Synology NAS should now support both SMB2 and SMB3.
Alternatively, you can add the CIFS share on Proxmox using the Proxmox GUI. Go to Datacenter -> Storage and click on Add, as shown below.
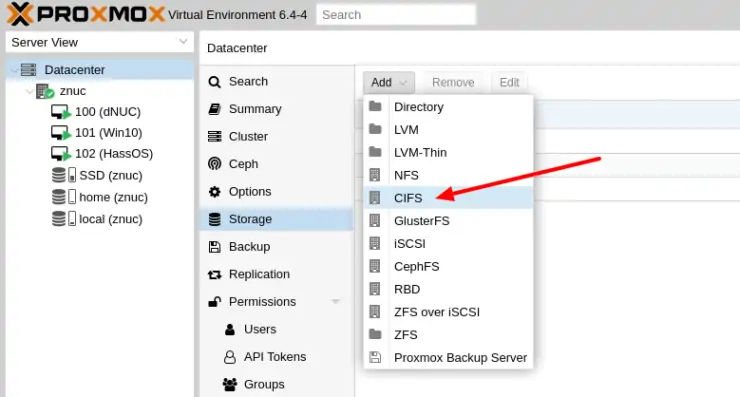
Next, fill out the SMB share details:
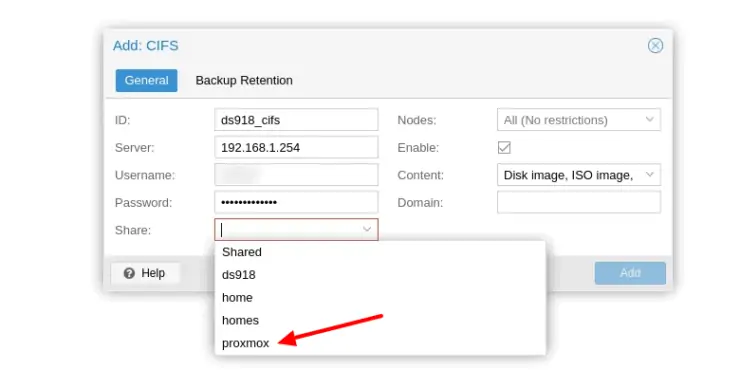
- ID: is a name for your share on Proxmox. This is how you will identify your Synology storage on Proxmox GUI and elsewhere.
- Server: Server is the IP address of your Synology NAS.
- Username: The user that was given read/write access to the share in the steps above.
- Password: Password of the Synology user.
- Share: When you click on the drop down, if your access credentials are correct, you will see a list of all your shared folders that the user has access to. We are going to choose proxmox share that was created previously.
- Nodes: You may choose the nodes that you want to share this storage with. By default, a CIFS storage is shared with all nodes.
- Enable: This should be checked by default. If not, check it to activate the storage.
- Content: This is where people struggle a little bit. I recommend that you select all options (you will have to click on each of the options in the drop down): Disk image, ISO image, Container image, VZDump backup file, Container, and Snippets. You can change this later in Datacenter.
- Domain: You can leave the Domain field empty.
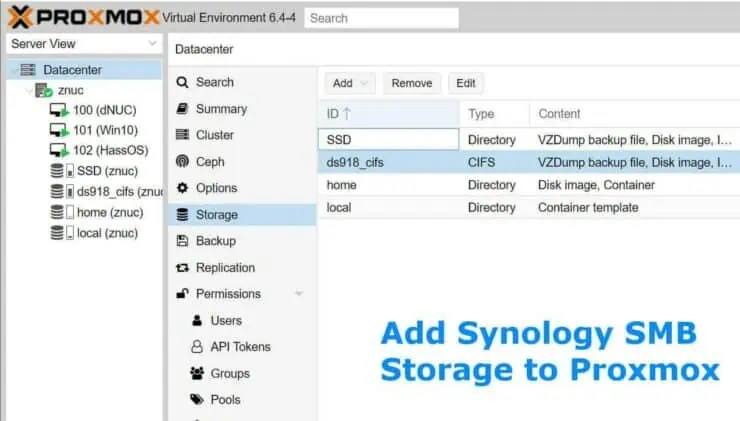
Once you click Add, the Synology NAS storage should appear on Proxmox GUI.

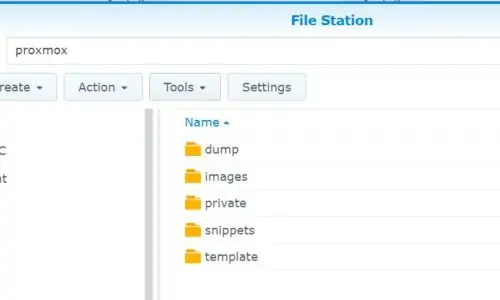
Once the SMB share from Synology is added successfully on Proxmox, you should see the following folders created by Proxmox.
Concluding Remarks
If you have an existing Synology storage, it is quite simple to add NAS to Proxmox for not only backups but also to store images and containers.
Personally, I only use my Synology to store backups of VMs and containers. Although possible, I am not a proponent of running production VMs and containers from a remote/shared storage such as SMB.
I struggled with the create storage failed: mount error message for a while. So I hope that the solution presented here saves you time.
In a future post, I will show you how to add Synology to Proxmox using the NFS protocol. So stay tuned.

![Ultimate Docker Server: Getting Started with OS Preparation [Part 1] Docker Server Tutorials 1 OS Preparation](https://www.smarthomebeginner.com/images/2024/01/Docker-Series-01-Intro-and-OS-Prep.png)
