With the availability of low cost WordPress hosting, numerous WordPress blogs have sprung up in the recent years. StudioPress's Genesis Theme Framework offer some of the professionally designed WordPress themes and templates. I wanted to change the header section title to an image logo on one of my StudioPress sites. I searched several hours without a definitive guide that worked for me. So I took upon myself to find a way to edit WordPress header logo and add Genesis theme custom logo image.
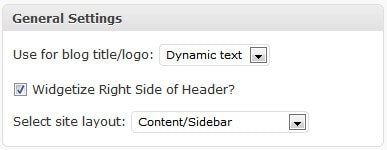
To set Genesis theme custom logo, most of the available tutorials ask you change "Use for blog title/logo" from "Dynamic Text" to "Image Logo" under Genesis Theme Settings (shown below).
However, in my case, the above option was not available under Genesis Theme Settings. But I did find out that I could achieve the same result by adding the following code to the functions.php located in the theme folder (SiteRoot/wp-content/themes/ThemeName). The code should be added after require_once(TEMPLATEPATH.'/lib/init.php');.
// Define Genesis Options
add_filter('genesis_options', 'define_genesis_setting_custom', 10, 2);
function define_genesis_setting_custom($options, $setting) {
  if($setting == GENESIS_SETTINGS_FIELD) {
    $options['blog_title'] = 'text';
    }
  return $options;
}
You may try the above and skip to Step 2. Either way, the method described below should work for most of you.
You may also like: Change WordPress login logo
Table of Contents
Step 1: Remove Default Header Image
Header image is the default background image in the header area. Unless you want to have your own image header background image (which you may upload to replace the current background image) or you would like to stick with the default header background image, remove it. You may do this with or without a plugin:
Using a Plugin
Install and activate the Genesis Simple Headers WordPress plugin.
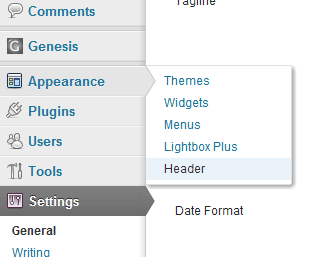
Go to Appearance->Header.
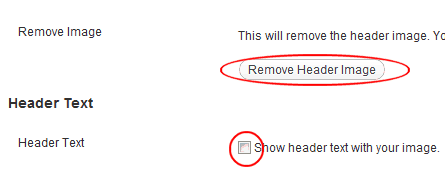
Click on "Remove Header Image" and uncheck "Show header text with your image". Save the changes.
Without Plugin
You can remove the header image and header text by adding the following code to your functions.php located in the theme folder (SiteRoot/wp-content/themes/ThemeName). The code should be added after require_once(TEMPLATEPATH.'/lib/init.php');.
/** Remove Header */
remove_action( 'genesis_header', 'genesis_do_header' );

/** Remove Title & Description */
remove_action( 'genesis_site_title', 'genesis_seo_site_title' );
remove_action( 'genesis_site_description', 'genesis_seo_site_description' );
Step 2: Enable Custom Header
By default, custom headers are disabled in Genesis. You can enable them by adding the following likes to the functions.php located in the folder: SiteRoot/wp-content/themes/ThemeName. The code should be added after require_once(TEMPLATEPATH.'/lib/init.php');.
/** Add support for custom header **/
add_theme_support( 'genesis-custom-header', array( 'width' => 960, 'height' => 100 ) );
Step 3: Copy the Custom Logo to Images Folder
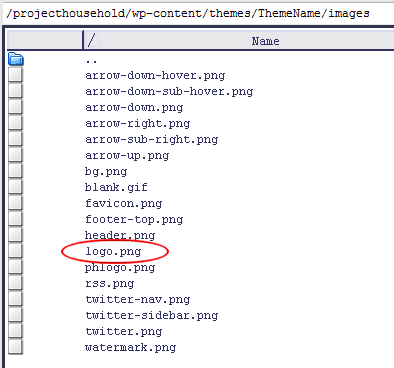
Navigate to the theme's images folder (normally SiteRoot/wp-content/themes/ThemeName/images). Replace the existing logo.png with your custom logo image.
Step 4: Customizing the Logo
If for some reason you do not want to replace the existing default logo.pn and would like to name your logo different, then you will have to modify the style.css located in the theme folder (SiteRoot/wp-content/themes/ThemeName). Change the highlighted code from logo.png to the name of your logo file.
If your logo dimensions are pretty much same as the default logo and you are satisfied with the new look (logo position etc.), skip this step. But if your logo is of a different dimension and ends up not fitting perfectly in the header section then you will have to modify the style.css located in the theme folder (SiteRoot/wp-content/themes/ThemeName).
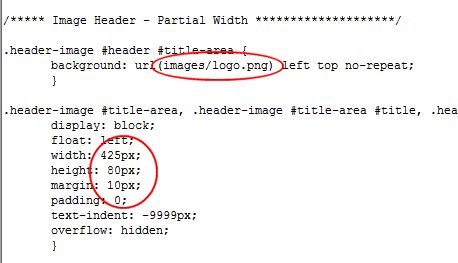
You may also play around with the margin, padding, dimensions, etc. to customize the logo position in the header area. You can specify the margin and padding as pixels (example: 10px) or top right bottom and left (example: 10px 0 10px 5px).
Recommended Guides on WordPress:
Final Result: Genesis Theme Custom Logo
After following the above procedure, I successfully replaced the header title text to a custom image logo.


Hope this helps!.


