Docker can help you build a Home Media Server in just minutes without complex setups. In this post, I will show you how to build a perfect home server for a smart home using Docker and Ubuntu. This all-in-one Docker media server will automate media download, streaming, and satisfy your home automation needs. Docker can make your Smart Home, smarter. [Read: My Smart Home setup – All gadgets and apps I use in my automated home]
Note that this a "basic" level post on how to setup a perfect home server using Docker. My advanced level post covers setting up Traefik reverse proxy with SSL for Docker (Traefik v2 (current) and Traefik v1). With Traefik, you can even add Google OAuth for your docker services for single-sign on. This post is written with a lot of details to help newbies. It may look long but the process itself should take less than an hour. [Read: What is a smart home and what can smart home automation do for you?]
Changelog:
- May 18, 2018 - Tested and updated instructions for Ubuntu 18.04 Bionic Beaver. Added troubleshooting section. Added phpMyAdmin.
- May 7, 2018 - Added MariaDB. Replaced PlexPy with Tautulli. Reorganized containers into several sections. Replaced PlexPy with Tautulli.
- March 15, 2018 - Made Radarr and Sonarr as the recommended apps in place of CouchPotato and SickRage, respectively. Added Transmission Bittorrent with VPN Support.
- March 14, 2018 - Initial Publication.
Table of Contents
- What is a Home Media Server?
- Objectives of this Docker Home Media Server
- What is Docker?
- Preparation
- Basic Docker and Docker Compose Primer
- Build Docker Home Media Server 2018
- Troubleshooting
- Conclusions
What is a Home Media Server?
A Home Media Server is a server located in your home network that acts as a central data storage and serving device. Typically, a home server is always on, has tons of storage capacity and ready to serve files (including media) when the need arises. We have covered several home server topics in great detail in the past. If you do not yet have a home server or are considering building one, then read this summary on the most common NAS or Home Server uses. If you are sold, then consider this low power home server build for your home media server. If you are tight on budget then you may want to consider our budget headless home server build. If you have multiple storage drives, this guide assumes that your RAID is already setup.
Recommended HTPC / Home Server Builds:
- Best Home Theater PC Build 2017 to do it all (Plex, Kodi, NAS, Gaming)
- Best Emby Server builds 2018 – Pre-built and DIY options
- Medium Budget 4K HTPC Build 2017 for Kodi, Plex and Gaming
- Cheap 4K HTPC Build for Kodi, OpenELEC, and LibreELEC 2017
- Low Power Home Server Build 2017 for Network File and Media Storage
- Best HTPC for Kodi with 4K on a Medium Budget 2017 (~$400)
- Energy efficient budget HTPC-NAS combo build 2016
Once you have hardware figured out, next big question is the operating system. In my opinion, Linux is the best operating system to build your home media server on. But then, there are several Linux home server distros available, which offer stability and performance. So which one to use? I always recommend Ubuntu Server, more specifically the LTS (Long Term Support Releases), which are supported for 5 years. Once you build your server you can let it run for 5 years with all security updates from the Ubuntu team. I have tested this guide on both Ubuntu Server 16.04 LTS and 18.04. The next long-term release 18.04 is just around the corner. I will update this guide shortly after it is released.

Objectives of this Docker Home Media Server
One of the big tasks of a completely automated Media server is a media aggregation. For example, when a TV show episode becomes available, automatically download it, collect its poster, fanart, subtitle, etc., put them all in a folder of your choice (eg. inside your TV Shows folder), update your media library (eg. on Plex) and then send a notification to you (eg. Email, Mobile notification, etc.) saying your episode is ready to watch. Sounds awesome right? There are several apps that can do such tasks and we have compiled them in our list of best home server apps. Add to that, an awesome open source software such as Home Assistant that can convert your home server into a smart home automation hub. So here is a list of functions I want on my basic level perfect Docker Media Server to do:
- Automated TV Show download and organization
- Automated Movie download and organization
- On-demand or automated torrent download
- On-demand or automated NZB (Usenet) download
- Serve and Stream Media to Devices in the house and outside through internet
- On demand torrent and NZB search interface
- Run home automation software
- Act as a personal cloud server with secure file access anywhere
- Provide a unified interface to access all the apps
- Update all the apps automatically
Some apps are optional and you will find details below on how to pick and choose what you want. It may seem like a complex setup, but trust me, docker can make installation and maintenance of these home server apps easier. There are a lot more cools things you can do with docker, which will be discussed in future posts. So watch out for that. [Read: Ultimate Docker Home Server with Traefik 2, LetsEncrypt, and OAuth [2020]]
What is Docker?
Before we get started with building a docker media server, it only makes sense to touch on Docker. We have already covered What is Docker and how it compares to a Virtual Machine such as VirtualBox. Therefore, we won't go into much detail here.
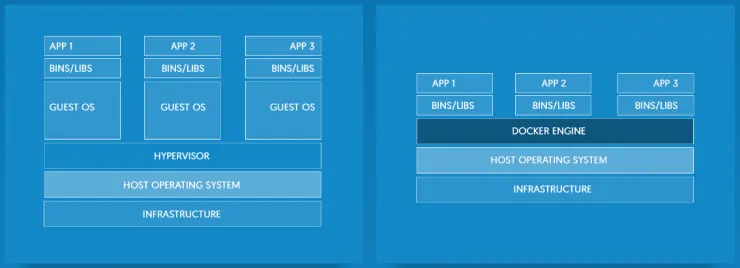
Briefly, Docker allows for operating-system-level virtualization. What this means is that applications can be installed inside virtual "containers", completed isolated from the host operating system. Since each application/container is self-contained, they can be created and destroyed at will without any impact on the host operating system. The containers share the host system resources and use much less compared to a virtual machine. Unlike a virtual machine, which needs guest OS for each of the virtual machines, a Docker container does not need a separate Operating system. So docker containers can be created and destroyed in seconds. The containers also boot in seconds and so your app is ready to roll very quickly.
Docker works natively on Linux, but is also available for Mac and Windows.
Recommended Guides on Docker:
OK Great, but why build a Docker Media Server?
The traditional way of building a Home Media Server involves setting up the operating system, adding repositories, downloading the apps, installing the pre-requisites/dependencies, installing the app, and configuring the app. This is cumbersome on Linux and requires extensive commandline work. Some Linux users swear by this traditional method but most newbies are intimidated by this. It is for this reason that we created AtoMiC ToolKit, which automates installation and maintenance of home server apps on Linux. Even with this, one can run into problems during installation.
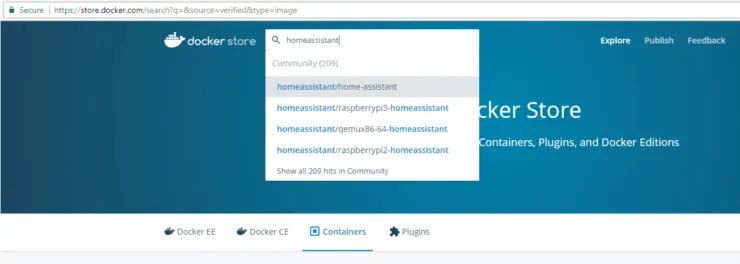
In Docker, home server apps such as SickRage, CouchPotato, Plex, etc. can be installed with ease without worrying about pre-requisites or incompatibilities. All requirements are already pre-packaged with each container. Most well-known apps are already containerized by the Docker community and available through the Docker Store.
Most reputable Docker containers on Docker hub have extensive documentation to help you configure and start the container. Don't worry, it is basically a single line of command with few configuration parameters. But wait, it gets even better. With Docker Compose, you can edit the compose file to set some configuration parameters (eg. download directory, seed ratio, etc.) and run the file and all your containerized apps can be configured and started with just one command. This is what I do and this is what I am going to explain in this post. If you know what I am talking about, then here is my basic docker compose file. You can use my Docker compose file and get started in minutes. If not, read on and I will walk you through the entire process.
Preparation
If you are sold, let start preparing for building a docker home server for a smarter home. As said before, Docker runs natively on Linux. My choice of operating system for a home server is Ubuntu. While this guide is for Ubuntu users it should work on most Debian-based Linux distributions.
We have already covered the installation of several home server apps using Docker in several individual posts. You may follow those. But this post is more than enough to get you started and more.
What about us Windows and Mac users?
Docker is packaged with Windows Server 2016 and later. On Windows 7, 8, and 10 (non-Pro and Non-Ent), docker can be installed using VirtualBox and Docker Toolbox. Docker is now only available using Windows Hyper-V and not VirtualBox. On Windows 10 Pro, Ent, and Edu editions, Docker can be installed directly and run using Windows Hyper-V. Also, there is a tool called Kitematic that provides an awesome GUI to search, install, and manage Docker containers. These posts should be good enough to help you get started with Docker on Windows. If you need more information, you can refer to getting started with Docker on Windows Docker Wiki.
A similar setup can also be done on Mac OS. Please refer to the Docker Wiki on getting started with Docker on Mac OS.
Install Ubuntu Server
Having a Ubuntu or Debian system ready is a basic requirement of this guide. Explaining how to install and setup Ubuntu Server is outside the scope of this post. We have covered this extensively in our post on how to install Ubuntu Server and Ubuntu Server disk partitioning guide. Headover to Ubuntu Download page and download the ISO file. For this guide, I am using Ubuntu Server but you could install any flavor of Ubuntu. I recommend installing Ubuntu using a USB drive and the downloaded ISO file.
Recommended Guides for Ubuntu:
Follow the on-screen installation process. Ubuntu server installation will offer to install certain server packages during the installation process, as shown below. At bare minimum, I recommend OpenSSH server and SAMBA file server. Since this is a guide to build a home server that will be always on, the assumption is that it is located somewhere in your house and you connect to it remotely through SSH.
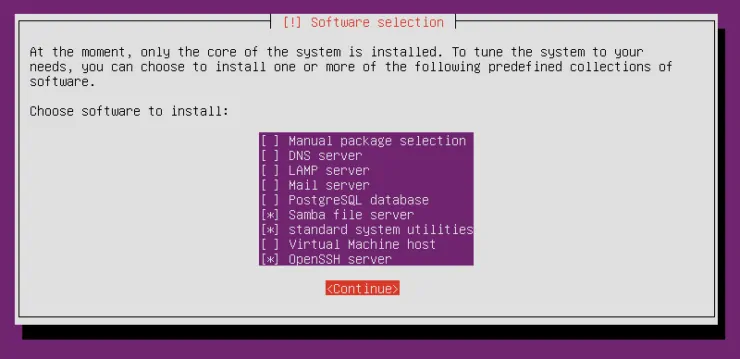
If you are converting an existing Ubuntu non-server edition system to a 24/7 home server or repurposing old PC as a server, you will have to manually install OpenSSH Server and SAMBA server. [Read: How to simplify SSH access by using SSH config file on remote server]
Install Docker on Ubuntu
Now we are all set to start building our ultimate Docker home media server. We have already shown you how to install Docker and Docker Compose:
- Install Docker and Docker Compose on Ubuntu 22.04 Jammy Jellyfish
- Install Docker and Docker Compose on Ubuntu 20.04 Focal Fossa
Furthermore, this topic is covered in detail here and here. There are multiple ways to install Docker. There are automated bash scripts that can make installation easier as well. But the brief guide below should be sufficient.
For simplicity, we will install Docker and Docker Compose from the repository. Ubuntu has Docker in the official repository. However, this is can be several versions old. So we are going to install them from Docker repositories. First, prepare to add Docker repository using the following command:
sudo apt-get install apt-transport-https ca-certificates curl software-properties-common
Then, add the Docker repository's GPG key for verification of repository:
curl -fsSL https://download.docker.com/linux/ubuntu/gpg | sudo apt-key add -
Next, add the Docker repository:
Docker Repository for Ubuntu 16.04:
sudo add-apt-repository "deb [arch=amd64] https://download.docker.com/linux/ubuntu $(lsb_release -cs) stable"
Docker Repository for Ubuntu 18.04:
Stable repository for Bionic Beaver is not yet available. At this point you will have to use the nightly builds. While nightlies can be unstable, my current home server runs on this without any problems. When stable builds become available here, you can replace nightly with stable in the command below.
sudo add-apt-repository "deb [arch=amd64] https://download.docker.com/linux/ubuntu $(lsb_release -cs) stable"
Then, refresh Ubuntu packages list:
sudo apt-get update
If you did not encounter any errors (you won't if you follow the steps above correctly) during the above steps you should be good to install Docker and Docker Compose on Ubuntu using the following command:
sudo apt-get install docker-ce
You can check the installed version using the command docker --version. Finally, test your docker setup using the following command.
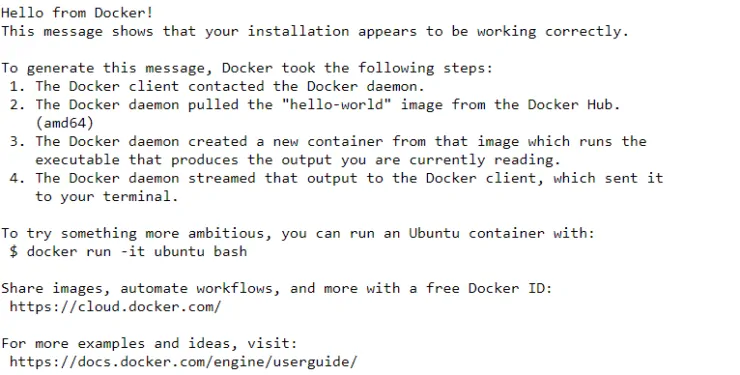
sudo docker run hello-world
It will download a test container and run it. You should see an out similar to the one below:
Install Docker Compose on Ubuntu
As I said previously, in this guide I am going to use Docker compose to simplify installation of home server apps and reduce commandline work. Docker compose is in the Ubuntu repositories but it is quite old, as is the case most of the time. So let's install the latest version of Docker compose on Ubuntu.
First, find out the latest version of Docker compose that is now available. Current version is 1.23.2 as you can see from the screenshot below.
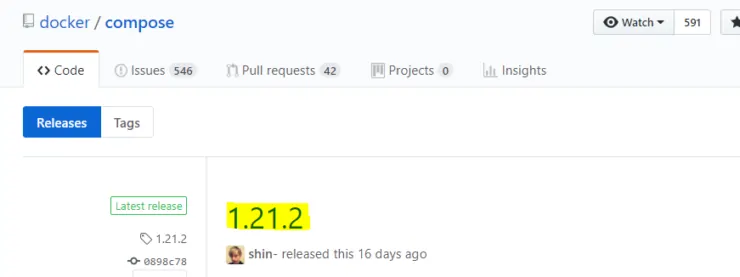
Next, install the latest version of Docker compose using the following command:
sudo curl -L https://github.com/docker/compose/releases/download/1.23.2/docker-compose-`uname -s`-`uname -m` -o /usr/local/bin/docker-compose
Replace 1.23.2 with the currently available version as determined above. Finally, provide execute permissions to Docker Compose using the following command:
sudo chmod +x /usr/local/bin/docker-compose
If correctly installed you should see the version number as output for this command: docker-compose --version.
Add Linux User to Docker Group
Running and managing docker containers requires sudo privileges. So this means you will have to type sudo for every command or switch to the root user account. But you can get around this by adding the current user to the docker group using the following command:
sudo usermod -aG docker ${USER}
While this can be a minor security risk, the chances are very less and this is not an enterprise level setup but a home setup. So I recommend doing this for convenience.
Setup Environmental Variables for Docker
Next, we are going to set some environmental variables such as timezone, user id, user group, etc. that docker containers should use. Create / edit the environmental variables file using the following command:
sudo nano /etc/environment
Add the following as separate lines at the end of the file:
PUID=1000
PGID=140
TZ="America/New_York"
USERDIR="/home/USER"
MYSQL_ROOT_PASSWORD="passsword"
Replace/Configure:
PUIDandPGID- the user ID of the linux user, who we want to run the home server apps as, and group ID of docker. Both of these can be obtained using theidcommand as shown below.In this guide, we are going to use 1000 for PUID, which is the user id of user and 140, which is the group id of docker group.
TZ- the timezone that you want to set for your containers. Get your TZ from this timezone database.USERDIR- the path to the path to the home folder of the current user. You can also get this using the following command:cd ~ ; pwd
MYSQL_ROOT_PASSWORD- MySQL administrator password for MariaDB and phpMyAdmin.
These environmental variables will be referred using {} throughout the docker compose file. You do not need to replace them. Their values will be automatically pulled from the environment file that we created / edited above.
That's it, the basic prep work to build our docker home server is done.
Basic Docker and Docker Compose Primer
Now let us start with a basic intro to Docker and Docker Compose. This is very important so you know what we are doing, when/how to stop and test, and when/how to start again. Then we are going to setup our docker-compose.yml file. Once our compose file is completely built, we will run it and you will see how in minutes your docker based home media server will be built. You can use any text editor to create your compose file. Make sure to follow yml syntax thoroughly as even differences in character spacing can throw errors. If you copy-paste from this guide, you should be fine. I am going to use nano editor.
Docker Folder and Permissions
For simplicity, I created a folder called docker in my home folder. All my docker stuff, apps, app data will be stored in this container:
mkdir ~/docker
Next, let us setup appropriate permissions to the docker folder to avoid any permission error issues. Use the following commands in sequence:
sudo setfacl -Rdm g:docker:rwx ~/docker
sudo chmod -R 775 ~/docker
The above command forces any new sub-folders within the docker folder to inherit permissions from the docker folder. Some may disagree with the liberal permissions above but again this is for home use and it is restrictive enough.
Starting Docker Compose File
Finally, let us start creating our docker-compose.yml file:
nano ~/docker/docker-compose.yml
Add the following two lines to it:
version: "3.6"
services:
At any time, you can save and exit by pressing Ctrl + X -> y -> Enter and reopen for editing with the above nano command.
Starting Containers using Docker Compose
This section is an intro to some of the commands you will use later in this guide. Running them at this point in the guide will throw errors. After adding compose options for each container (note that we have not added these yet), I recommend saving, exiting, and running the compose file using the following command to check if the container app starts correctly.
docker-compose -f ~/docker/docker-compose.yml up -d
The -d option daemonizes it in the background. Without it, you will see real-time logs, which is another way of making sure no errors are thrown. Press Ctrl + C to exit out of the real-time logs.
NOTE: At this point, you do not have any services.
See Docker Containers
At any time, you can check all the docker containers you have on your system (both running and stopped) using the following command:
docker ps -a
As an example here is a list of my containers for now. "STATUS" column shows whether a container is running (for how long) or exited. The last column shows the friendly name of the container.
Check Docker Container Logs
If you want to check the real-time logs while the container starts you can use the following command:
docker-compose logs
In addition, you can also specify the name of the specific container at the end of the previous command if you want to see logs of a specific container. Here is a screenshot of the docker logs for my transmission-vpn container that was generated using the following command:
docker-compose logs transmission-vpn

At any time, you can exit from the real-time logs screen by pressing Ctrl + C.
Stopping / Restarting Containers using Docker Compose
To stop any running docker container, use the following command:
docker-compose stop CONTAINER-NAME
Replace CONTAINER-NAME with the friendly name of the container. You can also replace stop with restart. To completely stop and remove containers, images, volumes, and networks (go back to how it was before running docker compose file), use the following command:
docker-compose -f ~/docker/docker-compose.yml down
Docker Cleanup
Remember, one of the biggest benefits of Docker is that it is extremely hard to mess up your host operating system. So you can create and destroy containers at will. But over time leftover Docker images, containers, and volumes can take several GBs of space. So at any time you can run the following clean up scripts and re-run your docker-compose as described above.
docker system prune
docker image prune
docker volume prune
These commands will remove any stray containers, volumes, and images that are not running or are not associated with any containers. Remember, even if you remove something that was needed you can always recreate them by just running the docker compose file.
Build Docker Home Media Server 2018
Now that all the basic setup is done we can start with the easy part: setting up apps through containers. I have broken this section down into few different categories. What apps you choose for each category is a matter of personal preference. I have shown the setup instruction for the apps I recommend. Where possible I have also provided some popular alternatives.
It is very important that you pay attention to the blank spaces in the code snippets below. You will have to define a port number for many of the web apps below. If a port is already used you will get an error when you run docker-compose.yml file. You can also manually see all the ports that are currently listening/taken using the following command:
sudo netstat -tulpn | grep LISTEN
Before we start adding containers, I recommend making a list of 10-12 free ports that you can remember easily. For example, 9100 to 9112, if you find that they are free.
Note that ${$USERDIR}, ${PUID}, ${PGID}, ${TZ}, ${MYSQL_ROOT_PASSWORD}, etc. in the docker compose example code blocks will be automatically filled by the compose file from the environment file we created / edited previously. If you did not set environmental variables, you can replace them with actual values in the code blocks below.
In the docker compose snippets below you will notice that ${USERDIR}/docker/shared is setup as a volume in almost all of the containers. The idea is to use this a shared folder between all of the containers for things like SSL certificates etc. if you have them. If you do not have them, nothing wrong in leaving the line as is. In the advanced guide, we will see how to add your SSL certificates for secure and trusted connection to your apps.
Frontends Apps
Portainer - Web UI for Containers

We have covered Portainer installation previously. Portainer provides a WebUI to manage all your docker containers. I strongly recommend this for newbies. Here is the code to add (copy-paste) in the docker-compose file (pay attention to blank spaces at the beginning of each line):
  portainer:
    image: portainer/portainer
    container_name: portainer
    restart: always
    command: -H unix:///var/run/docker.sock
    ports:
      - "XXXX:9000"
    volumes:
      - /var/run/docker.sock:/var/run/docker.sock
      - ${USERDIR}/docker/portainer/data:/data
      - ${USERDIR}/docker/shared:/shared
    environment:
      - TZ=${TZ}
Replace/Configure:
XXXX- port number on which you want the portainer Webui to be available at. It could be the same port as the container: 9000 (must be free).
After saving the docker-compose.yml file, run the following command to start the container and check if the app is accessible:
docker-compose -f ~/docker/docker-compose.yml up -d
Portainer WebUI should be available at http://SERVER-IP:XXXX. Repeat the above command after each container is added to docker-compose.yml file and ensure that the app works.
Organizr - Unified HTPC/Home Server Web Interface
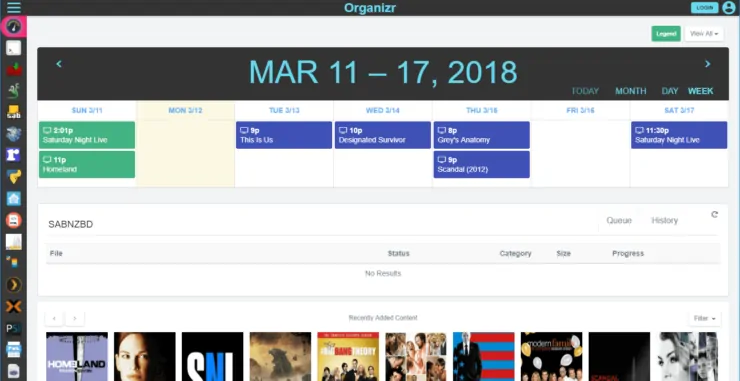
A home media server with several apps may be cool but now you will have to remember all the different port numbers to access them. That is where Organizr comes in. Organizr provides a unified interface to access all your home server apps so you do not have to remember them individually. The tabbed interface allows you to work on your server with ease. You can even setup users and give them access to specific apps. The calendar provides an overview of what TV show episodes are coming soon. In essence, Organizr is similar to HTPC Manager or Muximux. But I like the features of Organizr better. Docker makes it easier to install. Here is the code to add in the docker-compose file (pay attention to blank spaces at the beginning of each line):
  organizr:
    container_name: organizr
    restart: always
    image: lsiocommunity/organizr
    volumes:
      - ${USERDIR}/docker/organizr:/config
      - ${USERDIR}/docker/shared:/shared
    ports:
      - "XXXX:80"
    environment:
      - PUID=${PUID}
      - PGID=${PGID}
      - TZ=${TZ}
Replace/Configure:
XXXX- port number on which you want the Organizr Webui to be available at. It could be the same port as the container: 80 (must be free). Port 80 is the default webserver port. So you do not need to specify the:80at the end of the IP Address or Domain Name.
Save and run the docker-compose.yml file as described previously and check if the app is working. Organizr WebUI should be available at http://SERVER-IP:XXXX (:XXXX not needed if port 80 is used).
phpMyAdmin - WebUI for Managing MariaDB
phpMyAdmin is a free, open-source tool developed in PHP and intended to handle the administration of MySQL database management system (DBMS). It is designed to perform a wide range of operations on MySQL over the web. It offers the user-friendly web interface, support for most MySQL features, management of MySQL users and privileges, management of stored procedures and triggers, import and export of data from various sources, administration of multiple servers and much more. Having this tool can make it easier for you to create and manage databases for apps such as Home Assistant, NextCloud, and Kodi.
  phpmyadmin:
    hostname: phpmyadmin
    container_name: phpmyadmin
    image: phpmyadmin/phpmyadmin
    restart: always
    links:
      - mariadb:db
    ports:
      - XXXX:80
    environment:
      - PMA_HOST=mariadb
      - MYSQL_ROOT_PASSWORD=${MYSQL_ROOT_PASSWORD}
Replace/Configure:
${MYSQL_ROOT_PASSWORD}- Filled in automatically from the environment file we created previously.
Save and run the docker-compose.yml file as described previously and check if the container is working.
Docker Related Apps
Watchtower - Automatic Update of Containers/Apps
So we have built a kickass docker media server but it would be a pain if we have to watch each of the containers and update them manually. This is where Watchtower comes in. Watchtower monitors your Docker containers. If their images in the Docker Store change, then watchtower will pull the new image, shutdown the running container and restart with the new image and the options you originally set for the container while deploying. You can specify the frequency of update check as time interval or as cron time. Here is the code to add in the docker-compose file (pay attention to blank spaces at the beginning of each line):
  watchtower:
    container_name: watchtower
    restart: always
    image: v2tec/watchtower
    volumes:
      - /var/run/docker.sock:/var/run/docker.sock
    command: --schedule "0 0 4 * * *" --cleanup
Replace/Configure:
--schedule "0 0 4 * * *"- containers are checked for updates at 4 am everyday. You can use the 6-digit cron schedule or you can specify time interval:--interval 30for checking every 30 seconds. Daily check is good enough for home use in my opinion. If you want weekly, then use0 0 23 * * SUNfor every update at 11 pm on Sundays.
Save and run the docker-compose.yml file as described previously and check if the container is working. No need to do check or see anything with Watchtower. It just runs in the background and does its job.
Smart Home Apps
Home Assistant - Smart Home Hub
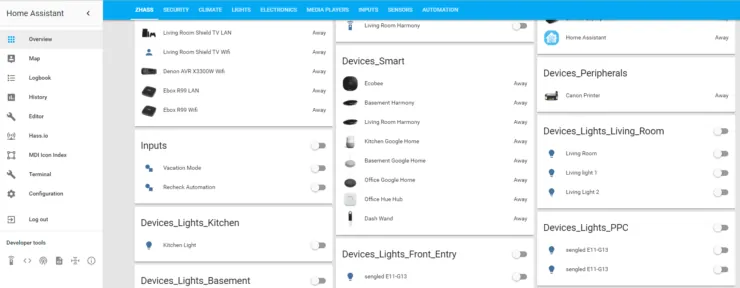
Home Assistant is, in my opinion, the best open source Smart Home Hub software there is, period. With a compatible USB Z-wave Stick, you can convert any computer into a Smart Home Hub. With integration for nearly 1000 smart home services and components, its compatibility is unmatched. It also has very powerful automation capabilities. Only drawback is that it has a steep learning curve. There are other dockerized options such as OpenHAB and Domoticz, but I recommend Home Assistant. Here is the code to add in the docker-compose file (pay attention to blank spaces at the beginning of each line):
  homeassistant:
    container_name: homeassistant
    restart: always
    image: homeassistant/home-assistant
    devices:
      - /dev/ttyUSB0:/dev/ttyUSB0
      - /dev/ttyUSB1:/dev/ttyUSB1
      - /dev/ttyACM0:/dev/ttyACM0
    volumes:
      - ${USERDIR}/docker/homeassistant:/config
      - /etc/localtime:/etc/localtime:ro
      - ${USERDIR}/docker/shared:/shared
    ports:
      - "XXXX:8123"
    privileged: true
    environment:
      - PUID=${PUID}
      - PGID=${PGID}
      - TZ=${TZ}
Replace/Configure:
XXXX- port number on which you want the Home Assistant Webui to be available at. It could be the same port as the container: 9091 (must be free).- Devices List - This list will make USB devices available to home assistant inside the docker container. If you have a USB Z-wave stick then you will need to find out its device address. Typically, it should be
/dev/ttyACM0but you can find out the correct address using one of the following commands:ls -ltr /dev/tty*|tail -n 1 ls /dev
Save and run the docker-compose.yml file as described previously and check if the app is working. Home Assistant should be available at http://SERVER-IP:XXXX. The first time you start Home Assistant, it can take several minutes to an hour to boot up as it compiles and creates several files during the process. Alternatively, you may follow the real-time logs for homeassistant container to see when the first startup completes. Subsequent startups should be faster.
Downloaders
Transmission with VPN - Bittorrent Downloader
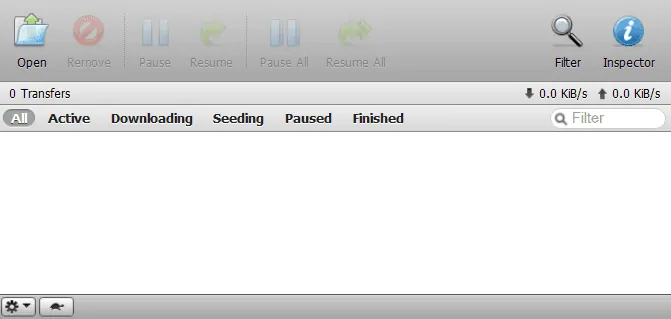
Transmission is one of the most commonly used bittorrent download client on Linux. It is lightwieght, multiplatform, and has all the bells and whistles of a torrent client. We have covered transmission installation on ubuntu and it is also part of our AtoMiC ToolKit. We have also described how to install it using Docker and Kitematic. Again, installing it with Docker is much simpler.
As you may already know privacy is very important while using torrents. Your ISP and others may be able to sniff your activities. Therefore, it is very important to protect yourself with a VPN.
Surfshark VPN Exclusive Offer - 82% off ($2.39/month):
♦ Hide your browsing (no logs), Anonymize Streaming and Downloads
♦ Wireguard Protocol support for VPN.
♦ Circumvent Geo/Country Restrictions and access worldwide content
♦ Works on Windows, Mac, Linux, Android, iOS, Router, and more
♦ 1 TB Encrypted Storage
♦ Money back guarantee - Sign Up Now
For this home server we are going to use this awesome Transmission-OpenVPN build. The beauty of this build is that it supports several VPN Providers, including IPVanish. If VPN connection is lost, Transmission would stop downloading/uploading. If you do not have a VPN account yet, go ahead and get one from IPVanish with this discounted link. Once done, add the following code to your docker-compose file (pay attention to blank spaces at the beginning of each line):
  transmission-vpn:
    container_name: transmission-vpn
    image: haugene/transmission-openvpn
    cap_add:
      - NET_ADMIN
    devices:
      - /dev/net/tun
    restart: always
    ports:
    - "XXXX:9091"
    dns:
      - 1.1.1.1
      - 1.0.0.1
    volumes:
      - /etc/localtime:/etc/localtime:ro
      - ${USERDIR}/docker/transmission-vpn:/data
      - ${USERDIR}/docker/shared:/shared
      - ${USERDIR}/Downloads:/data/watch
      - ${USERDIR}/Downloads/completed:/data/completed
      - ${USERDIR}/Downloads/incomplete:/data/incomplete
    environment:
      - OPENVPN_PROVIDER=IPVANISH
      - OPENVPN_USERNAME=ipvanish_username
      - OPENVPN_PASSWORD=ipvanish_password
      - OPENVPN_CONFIG="YYYYYYYYYYY"
      - OPENVPN_OPTS=--inactive 3600 --ping 10 --ping-exit 60
      - LOCAL_NETWORK=192.168.1.0/24
      - PUID=${PUID}
      - PGID=${PGID}
      - TZ=${TZ}
      - TRANSMISSION_RPC_AUTHENTICATION_REQUIRED=true
      - TRANSMISSION_RPC_HOST_WHITELIST="127.0.0.1,192.168.*.*"
      - TRANSMISSION_RPC_PASSWORD=webui_password
      - TRANSMISSION_RPC_USERNAME=webui_username
      - TRANSMISSION_UMASK=002
      - TRANSMISSION_RATIO_LIMIT=1.00
      - TRANSMISSION_RATIO_LIMIT_ENABLED=true
Any settings changes you will make through the web interface will not stick. Therefore, you will have to pass transmission settings as environmental variables. Whole list of variables is available here. I have added a few important ones already in the docker compose code above.
Replace/Configure:
XXXX- port number on which you want the Transmission Webui to be available at. It could be the same port as the container: 9091 (must be free).OPENVPN_PROVIDER- Desired VPN Provider. I have shown IPVanish. Check here for other provider names.OPENVPN_USERNAME- VPN provider username.OPENVPN_PASSWORD- VPN provider password.OPENVPN_CONFIG- Optional (you may remove this line). If you like a specific VPN server you may add it here. For example,ipvanish-CA-Montreal-yul-c04in place ofYYYYYYYYYYY.LOCAL_NETWORK- This is important. Since Transmission traffic goes through VPN, you won't be able to access the web UI unless local network is specified correctly. Typically, it is 192.168.1.0/24 or 192.168.0.0/24. With your network listed here you should be able to access WebUI from your home network.TRANSMISSION_RPC_HOST_WHITELIST- Specify the hosts from which you can connect to Transmission WebUI. This typically includes server on which Transmission is running (127.0.0.1) and your local network IPs (192.168.*.*).TRANSMISSION_RPC_PASSWORD- Desired Transmission WebUI password.TRANSMISSION_RPC_USERNAME- Desired Transmission WebUI username.TRANSMISSION_UMASK- Recommended is 022. But for home use I prefer 002 to avoid permission issues.
Save and run the docker-compose.yml file as described previously and check if the app is working. Transmission WebUI will be available at http://SERVER-IP:XXXX. You can check the real-time logs using docker-compose logs transmission-vpn for errors.
qBittorrent without VPN - Bittorrent Downloader (Alternative)
If you would rather have a bittorrent client without VPN (not recommended), qBittorrent is an option. Or you run both Transmission-VPN and qBittorrent. Here is the code to add in the docker-compose file (pay attention to blank spaces at the beginning of each line):
  qbittorrent:
    image: "linuxserver/qbittorrent"
    container_name: "qbittorrent"
    volumes:
      - ${USERDIR}/docker/qbittorrent:/config
      - ${USERDIR}/Downloads/completed:/downloads
      - ${USERDIR}/docker/shared:/shared
    ports:
      - "XXXX:XXXX"
      - "6881:6881"
      - "6881:6881/udp"
    restart: always
    environment:
      - PUID=${PUID}
      - PGID=${PGID}
      - TZ=${TZ}
      - UMASK_SET=002
      - WEBUI_PORT=XXXX
Replace/Configure:
${USERDIR}/Downloads/completed- Path where to save downloaded files.${USERDIR}is filled automatically from the environment file we created previously.XXXX- port number on which you want the qBittorent Webui to be available at. Replace in all 3 locations in the code.UMASK_SET- 022 is recommended. But I prefer 002 to avoid permission issues.
Save and run the docker-compose.yml file as described previously and check if the app is working. qBittorent WebUI will be available at http://SERVER-IP:XXXX.
SABnzbd - Usenet (NZB) Downloader
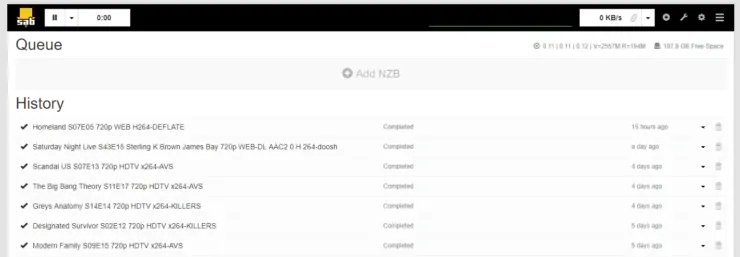
SABnzbd is my favorite NZB newsgrabber client. If you do not know what this is, then I suggest you review our post on Usenet vs Torrents. We have covered SABnzbd installation on Ubuntu and Windows. It is also available as Docker container. Here is the code to add in the docker-compose file (pay attention to blank spaces at the beginning of each line):
  sabnzbd:
    image: "linuxserver/sabnzbd"
    container_name: "sabnzbd"
    volumes:
      - ${USERDIR}/docker/sabnzbd:/config
      - ${USERDIR}/Downloads/completed:/downloads
      - ${USERDIR}/Downloads/incomplete:/incomplete-downloads
      - ${USERDIR}/docker/shared:/shared
    ports:
        - "XXXX:8080"
    restart: always
    environment:
      - PUID=${PUID}
      - PGID=${PGID}
      - TZ=${TZ}
Replace/Configure:
${USERDIR}/Downloads/completed- Path where to save downloaded files.${USERDIR}is filled automatically from the environment file we created previously.${USERDIR}/Downloads/incomplete- Path where to save currently downloading files.${USERDIR}is filled automatically from the environment file we created previously.XXXX- port number on which you want the SABnzbd Webui to be available at. It could be the same port as the container: 8080 (must be free).
Save and run the docker-compose.yml file as described previously and check if the app is working. SABnzbd WebUI should be available at http://SERVER-IP:XXXX.
Usenet is Better Than Torrents:
For apps like Sonarr, Radarr, SickRage, and CouchPotato, Usenet is better than Torrents. Unlimited plans from Newshosting (US Servers), Eweka (EU Servers), or UsenetServer, which offer >3000 days retention, SSL for privacy, and VPN for anonymity, are better for HD content.
NZBGet - Usenet (NZB) Downloader (Alternative)
Many people like NZBGet instead of SABnzbd as a Usenet downloader (you only need one of them). If you are one of them, here is the docker compose code for NZBget (pay attention to blank spaces at the beginning of each line):
  nzbget:
    image: "linuxserver/nzbget"
    container_name: "nzbget"
    volumes:
      - ${USERDIR}/docker/nzbget:/config
      - ${USERDIR}/Downloads:/downloads
      - ${USERDIR}/Downloads/incomplete:/incomplete-downloads
      - ${USERDIR}/docker/shared:/shared
    ports:
      - "XXXX:6789"
    restart: always
    environment:
      - PUID=${PUID}
      - PGID=${PGID}
      - TZ=${TZ}
Replace/Configure:
${USERDIR}/Downloads/completed- Path where to save downloaded files.${USERDIR}is filled automatically from the environment file we created previously.XXXX- port number on which you want the NZBGet Webui to be available at. It could be the same port as the container: 6789 (must be free).
Save and run the docker-compose.yml file as described previously and check if the app is working. NZBGet WebUI should be available at http://SERVER-IP:XXXX.
Personal Video Recorders
Radarr - Movie Download and Management
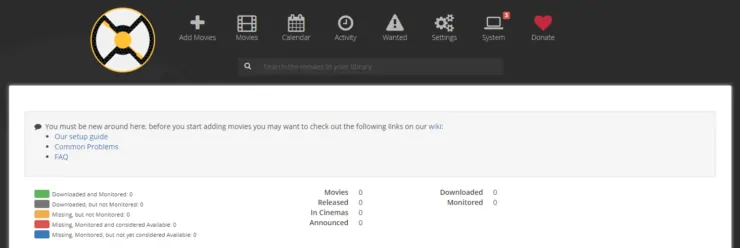
Radarr is a Movie PVR. You add the movies you want to see to Radarr and it will search various bittorrent and Usenet providers for the movie. If it is available it will grab the index file and send it to your bittorrent client or NZB client for downloading. Once the download is complete it can rename your movie to a specified format and move it to a folder of your choice (movie library). It can even update your Kodi library or notify you when a new movie is ready for you to watch. [Read: CouchPotato vs SickBeard, SickRage, or Sonarr for beginners]
We have already covered Radarr installation on Ubuntu, as well as, using docker and Kitematic. Docker makes it easier to install. Here is the code to add in the docker-compose file (pay attention to blank spaces at the beginning of each line):
  radarr:
    image: "linuxserver/radarr"
    container_name: "radarr"
    volumes:
      - ${USERDIR}/docker/radarr:/config
      - ${USERDIR}/Downloads/completed:/downloads
      - ${USERDIR}/media/movies:/movies
      - "/etc/localtime:/etc/localtime:ro"
      - ${USERDIR}/docker/shared:/shared
    ports:
      - "XXXX:7878"
    restart: always
    environment:
      - PUID=${PUID}
      - PGID=${PGID}
      - TZ=${TZ}
Replace/Configure:
${USERDIR}/Downloads/completed- Path where to save downloaded files.${USERDIR}is filled automatically from the environment file we created previously.${USERDIR}/media/movies- Path where to your movie library.${USERDIR}is filled automatically from the environment file we created previously.XXXX- port number on which you want the Radarr Webui to be available at. It could be the same port as the container: 7878 (must be free).
Save and run the docker-compose.yml file as described previously and check if the app is working. Radarr WebUI should be available at http://SERVER-IP:XXXX.
Usenet is Better Than Torrents:
For apps like Sonarr, Radarr, SickRage, and CouchPotato, Usenet is better than Torrents. Unlimited plans from Newshosting (US Servers), Eweka (EU Servers), or UsenetServer, which offer >3000 days retention, SSL for privacy, and VPN for anonymity, are better for HD content.
CouchPotato - Movie Download and Management (Alternative)
CouchPotato is an alterantive to Radarr. During my switch to Docker, I moved from CouchPotato to Radarr and I am very happy with it. We have previously covered CouchPotato installation on Ubuntu and Windows. If you prefer CouchPotato over Radarr (you only need one of them), here is the code to add in the docker-compose file (pay attention to blank spaces at the beginning of each line):
  couchpotato:
    image: "linuxserver/couchpotato"
    container_name: "couchpotato"
    volumes:
      - ${USERDIR}/docker/couchpotato:/config
      - ${USERDIR}/Downloads/completed:/downloads
      - ${USERDIR}/media/movies:/movies
      - ${USERDIR}/docker/shared:/shared
    ports:
      - "XXXX:5050"
    restart: always
    environment:
      - PUID=${PUID}
      - PGID=${PGID}
      - UMASK_SET=002
      - TZ=${TZ}
Replace/Configure:
${USERDIR}/Downloads/completed- Path where to save downloaded files.${USERDIR}is filled automatically from the environment file we created previously.${USERDIR}/media/movies- Path where to your movie library.${USERDIR}is filled automatically from the environment file we created previously.XXXX- port number on which you want the CouchPotato Webui to be available at. It could be the same port as the container: 5050 (must be free).UMASK_SET- 022 is recommended. But I prefer 002 to avoid permission issues.
Save and run the docker-compose.yml file as described previously and check if the app is working. CouchPotato WebUI should be available at http://SERVER-IP:XXXX.
Sonarr - TV Show Download and Management

Sonarr is a PVR for TV Shows. You add the shows you want to see to Sonarr and it will search various bittorrent and Usenet providers for the show episodes. If it is available it will grab the index file and send it to your bitorrent client or NZB client for downloading. Once the download is complete it can rename your episode to a specified format and move it to a folder of your choice (TV Show library). It can even update your Kodi library or notify you when a new episode is ready for you to watch. We have previously covered Sonarr installation on Ubuntu, Windows, using Docker, and using Kitematic. Docker makes it easier to install. Here is the code to add in the docker-compose file (pay attention to blank spaces at the beginning of each line):
  sonarr:
    image: "linuxserver/sonarr"
    container_name: "sonarr"
    volumes:
      - ${USERDIR}/docker/sonarr:/config
      - ${USERDIR}/Downloads/completed:/downloads
      - ${USERDIR}/media/tvshows:/tv
      - "/etc/localtime:/etc/localtime:ro"
      - ${USERDIR}/docker/shared:/shared
    ports:
        - "XXXX:8989"
    restart: always
    environment:
      - PUID=${PUID}
      - PGID=${PGID}
      - TZ=${TZ}
Replace/Configure:
${USERDIR}/Downloads/completed- Path where to save downloaded files.${USERDIR}is filled automatically from the environment file we created previously.${USERDIR}/media/tvshows- Path where to your movie library.${USERDIR}is filled automatically from the environment file we created previously.XXXX- port number on which you want the Sonarr Webui to be available at. It could be the same port as the container: 8989 (must be free).
Save and run the docker-compose.yml file as described previously and check if the app is working. Sonarr WebUI should be available at http://SERVER-IP:XXXX.
Usenet is Better Than Torrents:
For apps like Sonarr, Radarr, SickRage, and CouchPotato, Usenet is better than Torrents. Unlimited plans from Newshosting (US Servers), Eweka (EU Servers), or UsenetServer, which offer >3000 days retention, SSL for privacy, and VPN for anonymity, are better for HD content.
SickRage - TV Show Download and Management (Alternative)
SickRage is an alterantive to Sonarr. During my switch to Docker, I moved from SickRage to Sonarr and I am very happy with it. We have previously covered SickRage installation on Ubuntu and Windows. If you prefer SickRage over Sonarr (you only need one of them), here is the code to add in the docker-compose file (pay attention to blank spaces at the beginning of each line):
  sickrage:
    image: "linuxserver/sickrage"
    container_name: "sickrage"
    volumes:
      - ${USERDIR}/docker/sickrage:/config
      - ${USERDIR}/Downloads/completed:/downloads
      - ${USERDIR}/media/tvshows:/tv
      - ${USERDIR}/docker/shared:/shared
    ports:
      - "XXXX:8081"
    restart: always
    environment:
      - PUID=${PUID}
      - PGID=${PGID}
      - TZ=${TZ}
Replace/Configure:
${USERDIR}/Downloads/completed- Path where to save downloaded files.${USERDIR}is filled automatically from the environment file we created previously.${USERDIR}/media/tvshows- Path where to your movie library.${USERDIR}is filled automatically from the environment file we created previously.XXXX- port number on which you want the SickRage Webui to be available at. It could be the same port as the container: 8081 (must be free).
Save and run the docker-compose.yml file as described previously and check if the app is working. SickRage WebUI should be available at http://SERVER-IP:XXXX.
Media Server Apps
There are several options available for a media server. We have previous covered many media server apps and music server apps in detail. Among all, Plex is the most common one and that is what I will use in this Docker media server guide.
Plex Media Server
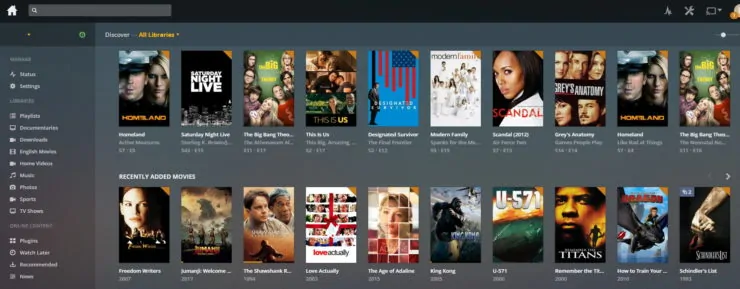
Plex media server is a free media server that can stream local and internet content to you several of your devices. It has a server component that catalogs your media (movies, tv shows, photos, videos, music, etc.). To stream, you need the client app installed on compatible Plex client devices. With the introduction of Plex News it can now stream News content. Plexamp music player enhances music listening experience.
Best Plex Client Devices:
- NVIDIA SHIELD TV Pro Home Media Server - $199.99
- Amazon Fire TV Streaming Media Player - $89.99
- Roku Premiere+ 4K UHD - $83.99
- CanaKit Raspberry Pi 3 Complete Starter Kit - $69.99
- Xbox One 500 GB Console - $264.99
We have covered plex in detail, including comparing Plex and Kodi and installation of Plex on various platforms: XBox One, PS4, Windows Server, and Ubuntu Server. We have even described Plex docker setup. Docker compose makes installation of Plex easier and here is the docker-compose code for it (pay attention to blank spaces at the beginning of each line):
  plexms:
    container_name: plexms
    restart: always
    image: plexinc/pms-docker
    volumes:
      - ${USERDIR}/docker/plexms:/config
      - ${USERDIR}/Downloads/plex_tmp:/transcode
      - /media/media:/media
      - ${USERDIR}/docker/shared:/shared
    ports:
      - "32400:32400/tcp"
      - "3005:3005/tcp"
      - "8324:8324/tcp"
      - "32469:32469/tcp"
      - "1900:1900/udp"
      - "32410:32410/udp"
      - "32412:32412/udp"
      - "32413:32413/udp"
      - "32414:32414/udp"
    environment:
      - TZ=${TZ}
      - HOSTNAME="Docker Plex"
      - PLEX_CLAIM="claim-YYYYYYYYY"
      - PLEX_UID=${PUID}
      - PLEX_GID=${PGID}
      - ADVERTISE_IP="http://SERVER-IP:32400/"
Replace/Configure:
${USERDIR}/Downloads/plex_tmp- Path temporary dolder for transcoding.${USERDIR}is filled automatically from the environment file we created previously./media/media- Path where to your media library.HOSTNAME- Name your plex server.PLEX_CLAIM- Your Plex access claim code from here. The word "claim" in front of the code must be in lower case.ADVERTISE_IP- IP Address of your server (eg. 192.168.1.100) - you can get this from your router admin page or runifconfigin terminal.
Save and run the docker-compose.yml file as described previously and check if the app is working. Plex WebUI should be available at http://SERVER-IP:32400. First time you access Plex media server, ensure that you are connected to your home network. If you have streaming issues then take a look at our solutions for Plex buffering issues.
Tautulli (aka PlexPy) - Monitoring Plex Usage
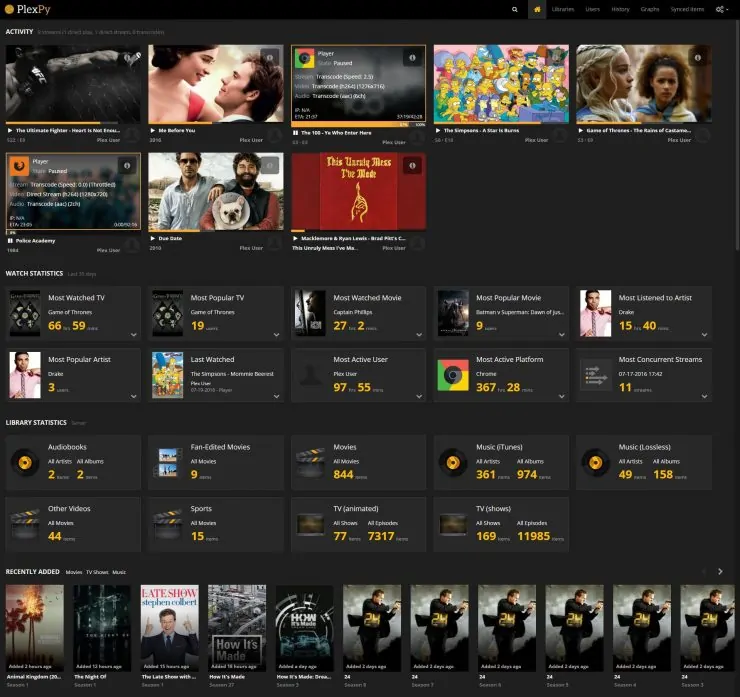
Tautulli / PlexPy is covered in detail in our PlexPy setup guide. Briefly, it is a web based application based on python that allows you to monitor Plex usage. Specifically, it will allow you to see the number of plays for each user, the time when the server was most used, the server usage and other useful information. You can also receive customized notifications on stream activity and recently added media and get complete library statistics and media file information. We have previously covered PlexPy setup on Ubuntu, Windows, and using Docker. Docker compose makes it even easier and here is the code for it (pay attention to blank spaces at the beginning of each line):
  tautulli:
    container_name: tautulli
    restart: always
    image: linuxserver/tautulli
    volumes:
      - ${USERDIR}/docker/tautulli/config:/config
      - ${USERDIR}/docker/tautulli/logs:/logs:ro
      - ${USERDIR}/docker/shared:/shared
    ports:
      - "XXXX:8181"
    environment:
      - PUID=${PUID}
      - PGID=${PGID}
      - TZ=${TZ}
Replace/Configure:
XXXX- port number on which you want the Tautulli Webui to be available at. It could be the same port as the container: 8181 (must be free).
Save and run the docker-compose.yml file as described previously and check if the app is working. PlexPy should will be available at http://SERVER-IP:XXXX.
Ombi - Accept Requests for your Media Server
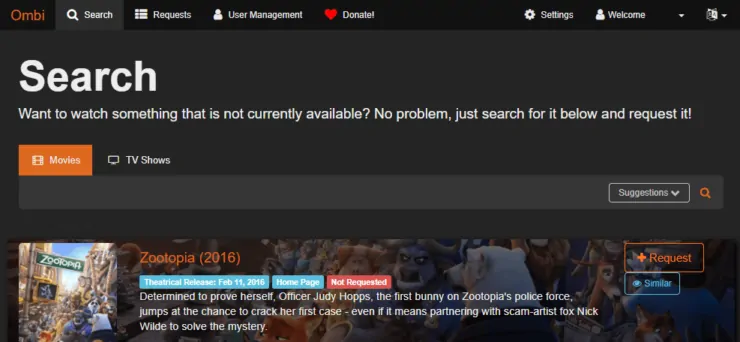
If you share your media server with friends and family, you may have heard of Plex Requests. Ombi is similar to that but better. Ombi allows you to accept Movie or TV Show requests from friends and family. When a request comes in, it can automatically add to integrated apps such as sonarr, radarr, couchpotato, etc. The request can be automatically downloaded and added to your library. Ombi is compatible with both Plex and Emby. Docker makes it easier to install Ombi and here is the code for it (pay attention to blank spaces at the beginning of each line):
  ombi:
    container_name: ombi
    restart: always
    image: linuxserver/ombi
    volumes:
      - ${USERDIR}/docker/ombi:/config
      - ${USERDIR}/docker/shared:/shared
    ports:
      - "XXXX:3579"
    environment:
      - PUID=${PUID}
      - PGID=${PGID}
      - TZ=${TZ}
Replace/Configure:
XXXX- port number on which you want the Ombi Webui to be available at. It could be the same port as the container: 3579 (must be free).
Save and run the docker-compose.yml file as described previously and check if the app is working. Ombi should will be available at http://SERVER-IP:XXXX.
Searchers
NZBHydra - NZB Meta Search
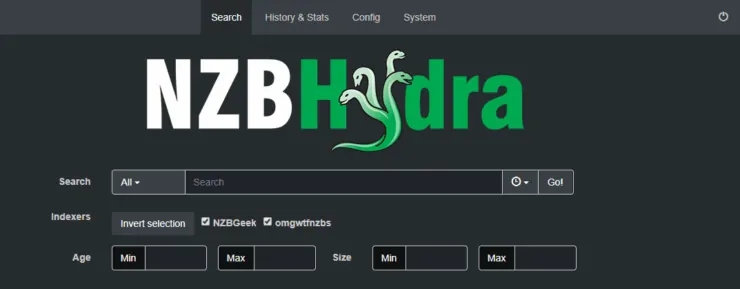
NZBHydra is a meta search for NZB indexers with easy access to a number of raw and newznab based indexers. It provides a unified interface to search all of your indexers from one place and also use it as indexer source for apps like Sickrage, Sonarr, and CouchPotato. If you are looking an indexer, you may want to review our list of best Usenet index sites. note that NZBHydra is not related to nzbhydra.com, which is an indexing service. We added NZBHydra to AtoMiC ToolKit for Ubuntu. While it is not that difficult to install and get started, Docker makes it easier. Here is the code for it (pay attention to blank spaces at the beginning of each line):
  hydra:
    image: "linuxserver/hydra"
    container_name: "hydra"
    volumes:
      - ${USERDIR}/docker/hydra:/config
      - ${USERDIR}/Downloads:/downloads
      - ${USERDIR}/docker/shared:/shared
    ports:
      - "XXXX:5075"
    restart: always
    environment:
      - PUID=${PUID}
      - PGID=${PGID}
      - TZ=${TZ}
Replace/Configure:
${USERDIR}/Downloads- Path where to save downloaded files.${USERDIR}is filled automatically from the environment file we created previously.XXXX- port number on which you want the NZBHydra Webui to be available at. It could be the same port as the container: 5076 (must be free).
Save and run the docker-compose.yml file as described previously and check if the app is working. NZBHydra WebUI should be available at http://SERVER-IP:XXXX.
Jackett - Torrent Proxy
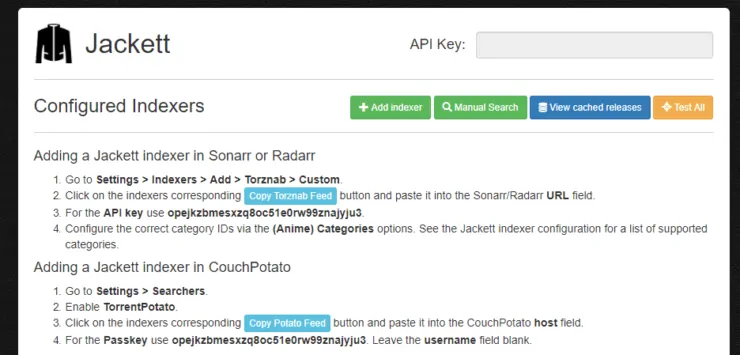
Jackett is a proxy server that translates search queries from apps such as SickRage, CouchPotato, Sonarr, Mylar, Radarr, etc. into torrent tracker-site-specific HTTP queries. When HTML response is received from tracker site, Jackett sends it back to the requesting app. Jackett is a great companion to have as it extends the torrent capabilities of the above apps. Jackett enables getting RSS uploads and performing searches from a single source, taken the burden away from the apps. Jackett is one of the best home server apps and it is also available through AtoMiC Toolkit.
Surfshark VPN Exclusive Offer - 82% off ($2.39/month):
♦ Hide your browsing (no logs), Anonymize Streaming and Downloads
♦ Wireguard Protocol support for VPN.
♦ Circumvent Geo/Country Restrictions and access worldwide content
♦ Works on Windows, Mac, Linux, Android, iOS, Router, and more
♦ 1 TB Encrypted Storage
♦ Money back guarantee - Sign Up Now
We have already covered Jackett installation on Windows, using Docker, and using Kitematic. Here is the docker-compose code for it, which will make it, even more, easier (pay attention to blank spaces at the beginning of each line):
  jackett:
    image: "linuxserver/jackett"
    container_name: "jackett"
    volumes:
      - ${USERDIR}/docker/jackett:/config
      - ${USERDIR}/Downloads/completed:/downloads
      - "/etc/localtime:/etc/localtime:ro"
      - ${USERDIR}/docker/shared:/shared
    ports:
      - "XXXX:9117"
    restart: always
    environment:
      - PUID=${PUID}
      - PGID=${PGID}
      - TZ=${TZ}
Replace/Configure:
${USERDIR}/Downloads- Path where to save downloaded files.${USERDIR}is filled automatically from the environment file we created previously.XXXX- port number on which you want the Jackett Webui to be available at. It could be the same port as the container: 9117 (must be free).
Save and run the docker-compose.yml file as described previously and check if the app is working. Jackett WebUI should be available at http://SERVER-IP:XXXX.
Utilities
These are some good to have apps that will make using and managing your home server much easier.
MariaDB - Database Server for your Apps
MariaDB is a community-developed fork of MySQL database system. It can serve as the central data location for all your apps that support it. In addition, for apps that save huge amount of data, a database such as MySQL can significantly improve performance over a file-based database such as SQLite (eg. Home Assistant, NextCloud). In addition, you can even use this database server to setup a shared library for your Kodi boxes.
  mariadb:
    image: "linuxserver/mariadb"
    container_name: "mariadb"
    hostname: mariadb
    volumes:
        - ${USERDIR}/docker/mariadb:/config
    ports:
      - target: 3306
        published: 3306
        protocol: tcp
        mode: host
    restart: always
    environment:
      - MYSQL_ROOT_PASSWORD=${MYSQL_ROOT_PASSWORD}
      - PUID=${PUID}
      - PGID=${PGID}
      - TZ=${TZ}
Replace/Configure:
${USERDIR}/docker/mariadb- Path to you want to save your database files.${USERDIR}is filled automatically from the environment file we created previously.Ports- I recommend leaving the default port 3306 as is unless you know what you are doing.MYSQL_ROOT_PASSWORD- Filled in automatically from the environment file we created previously.
Save and run the docker-compose.yml file as described previously and check if the container is working.
NextCloud - Your Own Cloud Storage
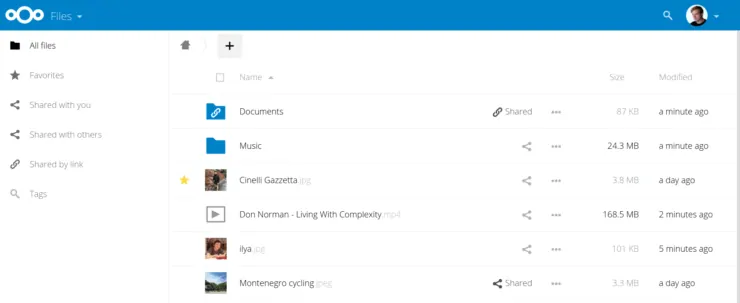
Nextcloud allows you to run your own cloud storage service on your home server. It is an alternative to Owncloud and created by the former founder of Owncloud. In many ways both services are similar. Nextcloud runs on your server, protects your files, and gives you secure access to your files from desktop or mobile devices from anywhere. You can also sync and share your data across devices.
  nextcloud:
    container_name: nextcloud
    restart: always
    image: linuxserver/nextcloud
    volumes:
      - ${USERDIR}/docker/nextcloud:/config
      - ${USERDIR}/shared_data:/data
      - ${USERDIR}/docker/shared:/shared
    ports:
      - "XXXX:443"
    environment:
      - PUID=${PUID}
      - PGID=${PGID}
Replace/Configure:
${USERDIR}/shared_data- Path to data you want to share/sync.${USERDIR}is filled automatically from the environment file we created previously.XXXX- port number on which you want the Nextcloud Webui to be available at. It could be the same port as the container: 443 (must be free). 443 is the default HTTPS port. So if you do not have a webserver listening at 443 you can access Nextcloud without specifying the port number 443 at the end.
Save and run the docker-compose.yml file as described previously and check if the app is working. NextCloud WebUI should be available at http://SERVER-IP:XXXX. Note that this setup does not include a backend database such as MySQL or MariaDB. Therefore, data will be stored as SQLite database. A backend database is recommended for better performance. This will be covered in a separate guide. Briefly, you can use phpMyAdmin to create a database, username, and password for NextCloud and provide that during setup.
Complete Docker Compose File - Basic
That brings us to the end of building the ultimate docker home server for smart home. My entire "basic" level docker compose file is available here. In the end your docker-compose.yml should look very similar but may be fewer apps since my docker compose file contains some apps that perform the same things (eg. NZBGet and SABnzbd, CouchPotato and Radarr, SickRage and Sonarr).
You can also copy-paste the entire contents of the file linked above as a starting point for your docker-compose.yml file.
Starting, Stopping, and Autostarting
Starting and stopping containers using docker compose was described at the beginning of this guide. All the containers above are built with restart: always clause. Therefore, all containers will be automatically started by docker anytime they are not running. So after a reboot, docker will automatically start all the containers. If for some reason you do not want this behavior you can set restart to "no".
Dynamic DNS and Port forwarding
One last topic I want to touch on before concluding is Dynamic DNS and Port Forwarding. Opening your apps in the web browser using http://SERVER-IP:XXXX will probably be Ok if you are opening them from within your home network. To access your apps from outside your home network (aka Internet) then you need to know the WAN IP address of your home. In such situations, a dedicated domain name (paid) or Dynamic DNS (free) can help. There are several free Dynamic DNS services. DuckDNS and Afraid are 2 good examples. While many recommend DuckDNS, I noticed that DuckDNS added some query strings at the end of URL. This caused problems with some setups. Therefore, I recommend using Afraid. Once setup, you can reach your home using myhome.duckdns.org or myhome.crabdance.com (afraid) instead of the WAN IP. You may also want to setup DDNS updater on your internet gateway like a wireless router (most modern ones support this), to automatically update WAN IP (if it changes) in your Dynamic DNS account.
Ok, now you can reach your home IP from the internet. But this is not enough to reach the home server apps. Your home server apps are listening on specific ports. Therefore, you will need to forward requests received on specific ports to the port number on your server where the app is installed. This is called port forwarding and most routers support this. You may check our guide on port forwarding to do this.
With both done, you should be able to reach say CouchPotato running on port 5050 using: http://myhome.crabdance.com:5050. Better yet, if you have Organizr installed you can just visit http://myhome.crabdance.com and access all your docker media server apps from there.
Troubleshooting
When I built my Docker media server on Ubuntu 16.04, I did 100s of trials. But somethings never worked. I opened issues on GitHub and posted on forums. But I never could figure out why some apps were failing to start. This became even more evident when I moved to 18.04. Everything is working great on 18.04 and appears to be even better than on 16.04. During the switch to 18.04 I learned a few things that could potentially cause issues. I am documenting them below help others who may be in similar situations.
PUID and PGID Change
I always clean-install LTS releases and do not upgrade. When I switched from Ubuntu 16.04 to 18.04, I noticed that some apps were not starting correctly. Upon investigating most the folders and files within my Docker folder had a group id of 140, which was the "docker" group id in 16.04. On checking the "docker" group id in 18.04, it was not "140" but "999". I had to edit my /etc/environmment file to ensure PUID was the correct id for my user and PGUID was the correct group ID for "docker" group.
Permission Issues
I could never get some apps to work (eg. phpmyadmin and pihole). Upon searching nobody appeared to have similar problems and I got no support on forums. For example, my PiHole instance kept failing due to the following error:
2018-04-27 13:52:47: (log.c.171) opening errorlog '/var/log/lighttpd/error.log' failed: Permission denied
And my phpMyaAdmin never started due to the following error: couldn't exec php-fpm: EACCES. On a hunch, I stopped docker, deleted the /var/lib/docker folder, rebooted, and rebuilt everything from scratch using my docker compose file. Voila! Both PiHole and phpMyAdmin worked. I am not sure but maybe I had a lot of leftover files from previous trials and errors that messed things up.
Conclusions
Phew! Writing an 8500-word guide is not easy. It took forever to research, test, and write this guide. The length is one reason I decided to split this guide into two: "basic" and "advanced". This was a "basic" docker home server for smart home enthusiasts. But it has all the necessary apps to get up and running for most home media and automation needs. Traefik v2 reverse proxy, as discussed in my advanced guide, can take your Docker home server setup to the next level (For example, adding Google OAuth single-sign-on for Docker).
Few other cool things such as ha-dockermon to monitor docker containers in Home Assistant, Mosquitto and MQTT Bridge to connect with Samsung Smartthings, etc. will be covered in future posts. So stay tuned for those. [Read: Smart Home Protocols: 10-min IoT Protocols Glossary for Beginners]
Length is also the reason why I decided to stick with Docker Compose instead of Docker. Everything on the docker compose file here can also be done using Docker commands. But I believe that Docker Compose makes it a bit easy for newbies.
This guide uses several containers developed and maintained by linuxserver.io. So thanks to them for all the hardwork they have been doing. There are multiple ways to setup what I showed above. I did what I thought was the easiest way for newbies. I am sure there are better ways to do certain things. If you are aware of such things, please do not hesitate to share your thoughts in the comments below. Otherwise, I hope that this Docker Home Media Server guide helped you.

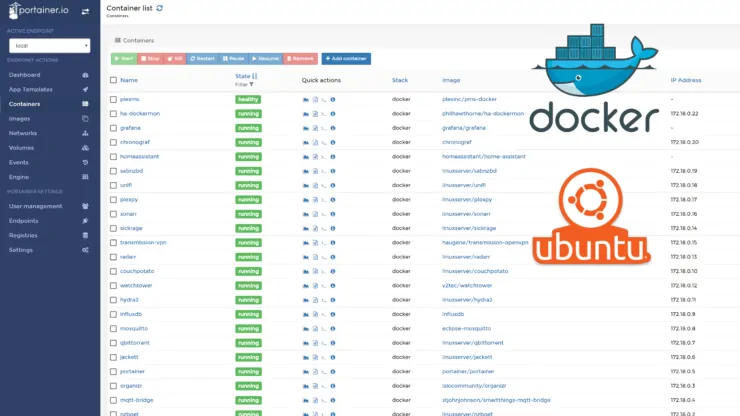




![Ultimate Docker Server: Getting Started with OS Preparation [Part 1] Docker Server Tutorials 1 OS Preparation](https://www.smarthomebeginner.com/images/2024/01/Docker-Series-01-Intro-and-OS-Prep.png)
