CouchPotato is a wonderful set and forget python script to automatically download and pass movie torrent files to torrent downloaders (eg. Transmission) or NZB files to NZB downloaders (e.g. SABNzbd+).
In this post I will describe an easier way to install CouchPotato2 on Windows from Windows binaries. Presiously, I showed to how to install CouchPotato on Windows from source. You can search add movies to download through the CouchPotato web interface or directly from sites like imdb or rottentomatoes. Some of the readers of my posts on how to install CouchPotato on Ubuntu and how to setup CouchPotato Apache reverse proxy requested me to write a post on how to install CouchPotato on Windows. So here it goes.
Table of Contents
CouchPotato Features
 CouchPotato (CP) is an automatic NZB and torrent downloader. You can keep a "movies I want"-list and it will search for NZBs/torrents of these movies every X hours. Once a movie is found, it will send it to SABnzbd or download the torrent to a specified directory. CouchPotato requires python 2.6 or higher.
Features:
- Automatic downloading and sending of NZBs to SABnzbd
- Automatic downloading of torrents files to a specified directory
- Easily add movies via IMDB UserScript
- Movie sorting & renaming
- Trailer downloading
- Quality options to download best available. Overwrite if better is found
- A "Coming Soon" page with soon to be released DVD and Theater info
- Support for NZBs.org, NZBMatrix, Newznab.com and ThePirateBay
- and more in V2
CouchPotato is very similar in operation to Sick Beard except that it works for Movies. If you install CouchPotato correctly, all the above functions should work flawlessly giving you an automatic Usenet downloads and organization of Movies. Without further delay, lets install CouchPotato on Windows. [Read: How to get a free Usenet account with XSUsenet?]
Installation Options: Windows Binaries vs Python Source
Installation is by far the easiest to do with the Windows binaries. Just click the installation file and install as you would install any other program. Running from Python source (described in this post), on the other hand, requires quite a bit of work. The disadvantage in installing from Windows binaries is that it can take some time for the updates to come through due to recompilation of Windows package after each code update. If you want the latest and greatest immediately, then head over to my other post to install CouchPotato on Windows from Python source. If you want an easier method and do not mind waiting for the updates then follow this post.
Step 1: Install CouchPotato on Windows Using Binaries
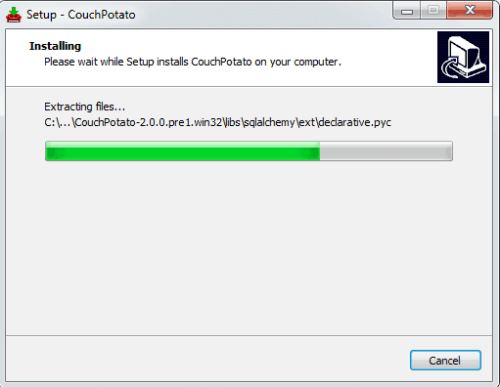
Download the latest Windows installer from here. Open the downloaded file and run it to install CouchPotato on Windows systems. The installation will be the same as installing most programs on Windows.
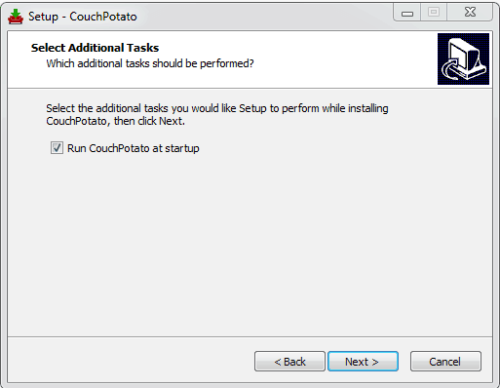
You may be asked if you want to start CouchPotato on Windows startup. Check the box if you would like to start CouchPotato during boot:
Once the installation is complete you are done with CouchPotato Windows installation.
Best Standalone Bittorrent Downloaders:
Step 2: Start CouchPotato
 First time, you will have to manually start CouchPotato from
 Start->All Programs->CouchPotato.
CouchPotato will appear in the system tray. Right-click on it and choose "Open".
The first time CouchPotato starts you may asked by Windows Firewall to allow access to CouchPotato:
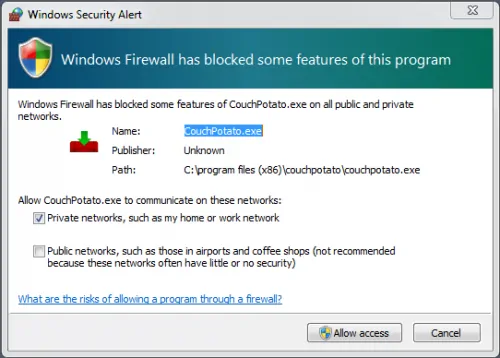
Once to allow access, CouchPotato should start. Unlike CouchPotato V1 (uses port 5000), V2 runs on port 5050 by default. So you can access the CouchPotato web interface by going to:
http://localhost:5050
If your CouchPotato server is on your internal network and doesn't block port 5050 you can also access it through its network IP address (see example below):
http://192.168.0.20:5050
If you have you port forwarding enabled on your router and you have a domain name referring your server running CouchPotato, you may also view your CouchPotato App through the internet using your domain name:
http://domain.com:5050
For now (and most of us), http://localhost:5050 should be enough at this point.
Step 3: Configure CouchPotato
After you install CouchPotato, you can configure it as described in the following post:
How to configure CouchPotato V2?
It explains all the settings in detail with screenshots. After configuring your CouchPotato, you may return to this post and continue.
If you want to manually edit the settings, you may edit the following file (I recommend creating a backup first):
C:\Users\UserName\AppData\Roaming\CouchPotato
Step 4: Update CouchPotato
When updates are available, you can install them by clicking "Update to Latest" from the settings menu or by clicking on the update notification that appears on top of the screen (shown below).

Optional Improvements
- Four free android apps to remotely monitor and control torrent, NZB, and other downloads
- Apache proxy for CouchPotato web interface
Thats it. You are now fully done. Install CouchPotato on Windows and enjoy.


![15 Best Plex Alternatives [2022] - FREE and BETTER Options Best Plex Alternatives feature image](https://www.smarthomebeginner.com/images/2022/08/best-plex-alternatives-feature-image.gif)
![Ultimate Docker Media Server: With 60+ Docker Compose Apps [2024] Ultimate Docker Media Server](https://www.smarthomebeginner.com/images/2024/01/Docker-Series-02-Docker-Stack.png)
