TV Addons is back and with it an entire repository of third-party Kodi addons. Because of its fantastic library of addons for Kodi, TV Addons is a must-have. Likewise, the Fusion Installer is essential for any Kodi users who wish to maximize their Kodi home theatre PC. Learn how to install the Fusion Installer in Kodi. [Read: 5 Best legal Kodi anime addons for your Kodi HTPC]
Table of Contents
- Fusion Installer for Kodi
- 1. Go to Settings
- 2. Navigate to System Settings
- 3. Choose Addons
- 4. Toggle Unknown Sources to on
- 5. Choose Yes
- 6. Backtrack to the earlier menu
- 7. Proceed to File Manager
- 8. Hit Add Source
- 9. Select the <None> field
- 10. Input Fusion URL
- 11. Name the source
- 12. Hit Ok again
- 13. Go back to Kodi main screen
- 14. Select Addons
- 15. Hit the box icon
- 16. Choose Install From Zip File
- 17. Pick the Fusion source
- How to install the Fusion Installer
Fusion Installer for Kodi
The Fusion installer is an addon which makes for simple installation of popular addons. To load the Fusion Installer, you'll need Kodi v17 or higher.
Some addons may contain pirated content. Consider using legal Kodi addons or a VPN ($3.29/mo).
1. Go to Settings
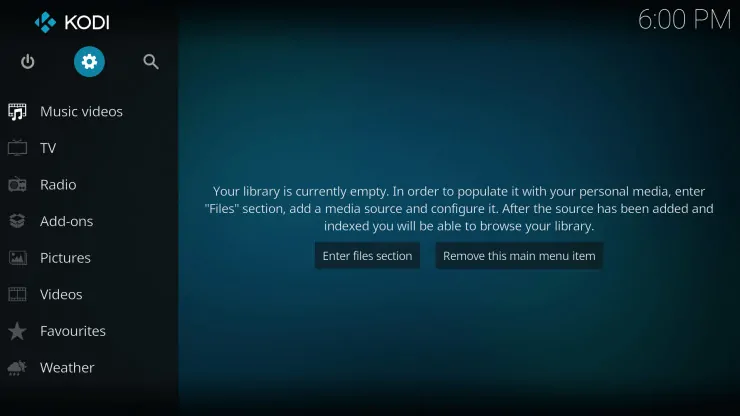
Click on the Settings cog in the top left-hand corner of the Kodi main screen.
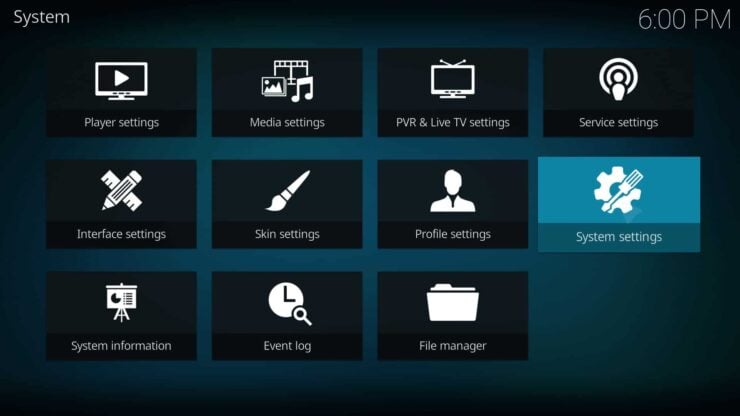
Next, select System Settings under the Settings page.
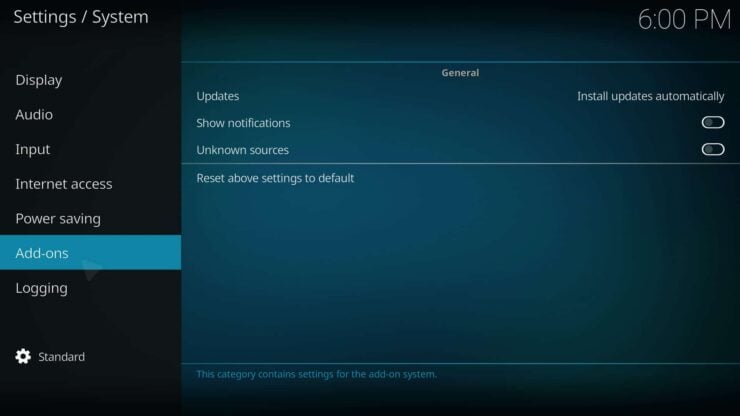
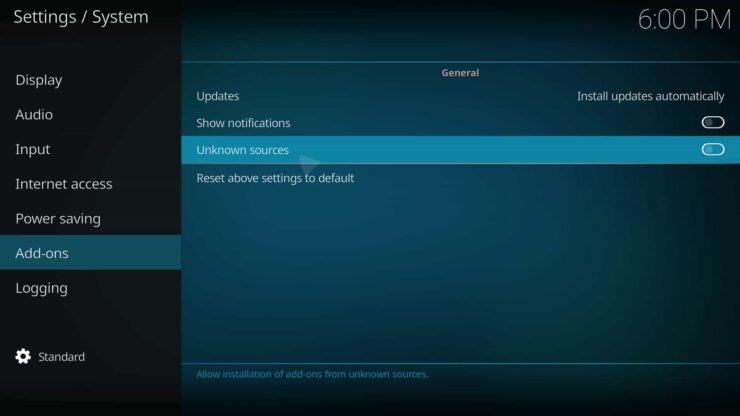
3. Choose Addons
On the right-hand side of the screen, click Addons.
4. Toggle Unknown Sources to on
Now, allow for updates from Unknown Sources
5. Choose Yes
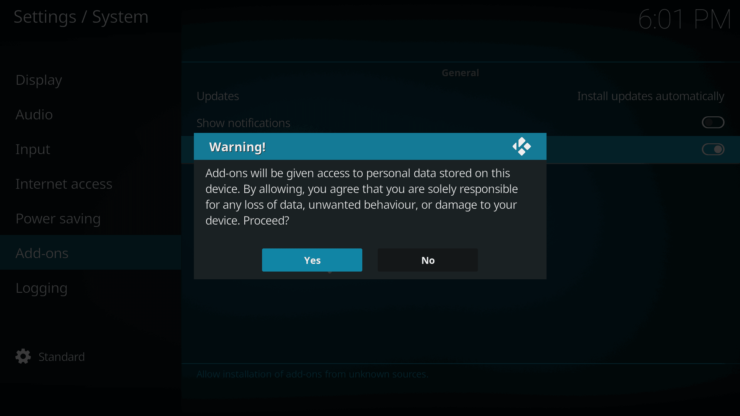
A warning will pop up. Pick Yes to allow Kodi addons from unknown sources.
With Unknown Sources allowed, back up to the previous menu.
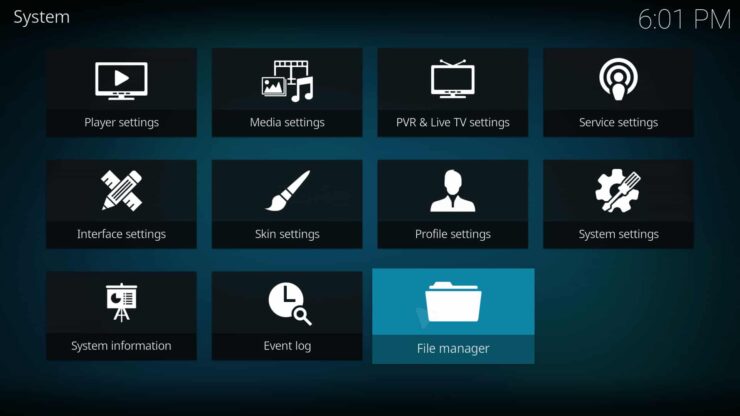
7. Proceed to File Manager
Then, choose the File Manager.
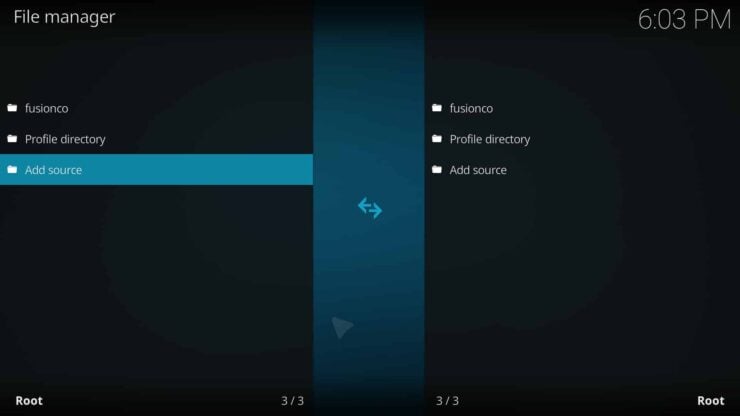
8. Hit Add Source
Next up, click on the Add Source option.
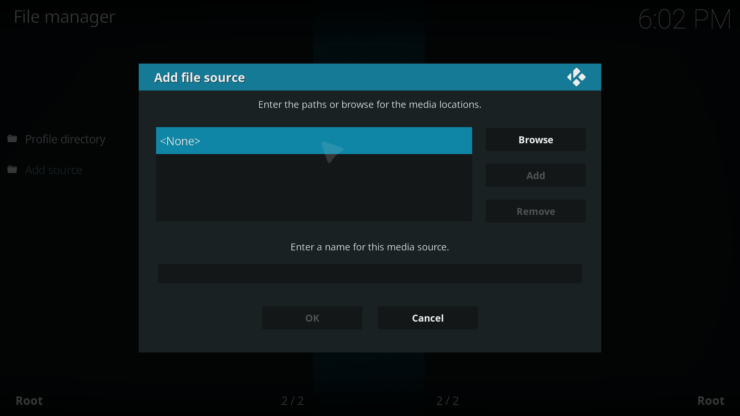
9. Select the <None> field
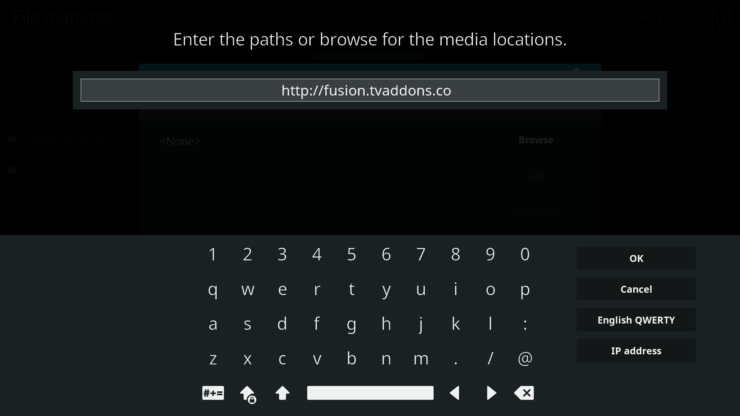
After that, click the <None> field beneath where it reads Enter the Paths of Browse for the Media Locations.
10. Input Fusion URL
Once you've completed that step, enter the Fusion Installer URL:
http://fusion.tvaddons.co
and click Ok.
11. Name the source
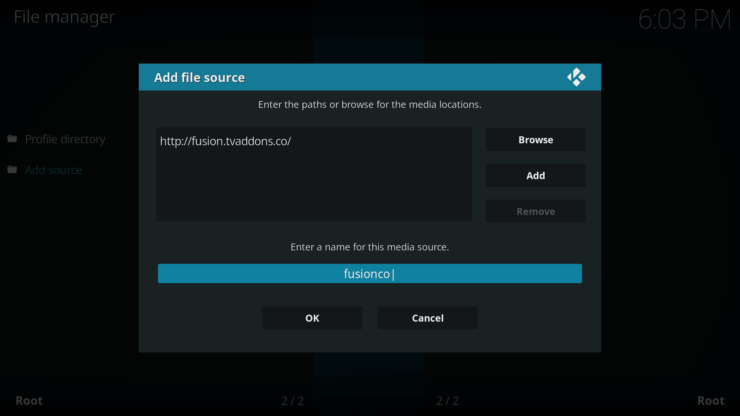
Choose the blank input field under Enter a name for this media source. Use something such as:
Fusion
Then, click Ok.
12. Hit Ok again
Select Ok on the bottom of the Add file source window.
13. Go back to Kodi main screen
With the source added and named properly, go back to the Kodi home screen.
14. Select Addons
In the left-hand sidebar, click the Addons section.
15. Hit the box icon
In the top left-hand corner, click the Box Icon.
16. Choose Install From Zip File
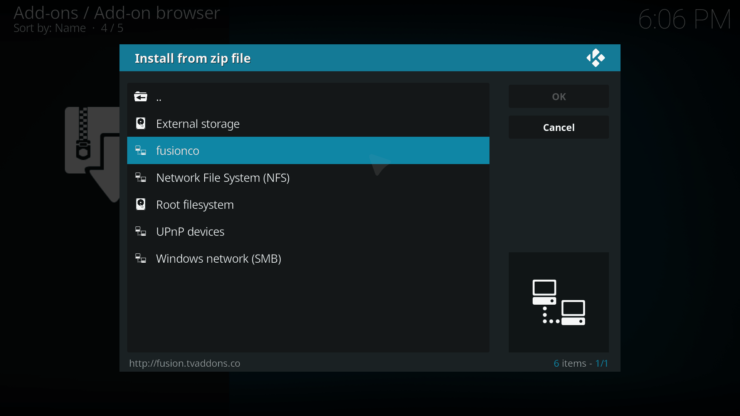
Now, pick the option that states Install From Zip File.
17. Pick the Fusion source
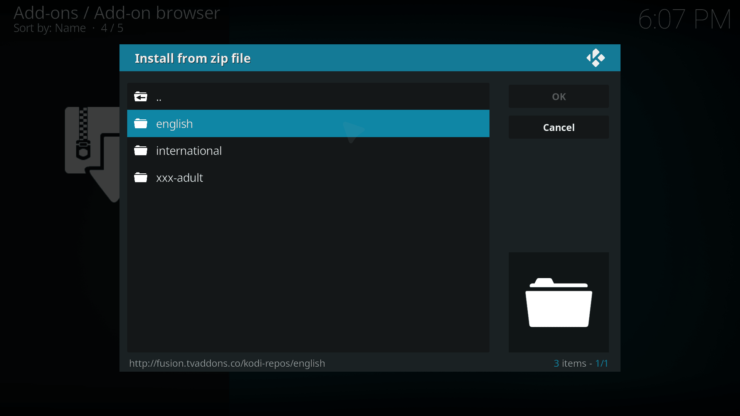
Here, you'll see a list of sources. Opt for the Fusion source from the list.
How to install the Fusion Installer
That's it! Now, you're ready to begin using your HTPC with the Fusion installer for Kodi. It's a pretty simple process, but with a huge gain. Namely, you'll find loads of stellar addons through the Fusion installer which aren't necessarily in the main repository.
With Fusion installed, you can update your TV Addons apps and ensure they continue updating from the repository. Plus, check out the top legal Kodi addons for streaming live, legal broadcast TV.
Which Kodi addons are you using?



![15 Best Jellyfin Plugins [2023] - Supercharge your Media Server Jellyfin Intros Plugin Preview Pre-Roll](https://www.smarthomebeginner.com/images/2022/08/jellyfin-intros-preroll-preview.jpg)
![8 Amazing Raspberry Pi Ideas [2022]: Beginners and Enthusiasts Raspberry Pi ideas](https://www.smarthomebeginner.com/images/2021/09/raspberry-pi-4-dev-board.jpg)
![Watch NFL Games Live FREE 🏈: 23+ WORKING websites [2023] Watch NFL Games Live FREE](https://www.smarthomebeginner.com/images/2023/08/nfl-streaming-1.jpg)
![Watch College Football Online FREE [2022]- 25+ WORKING websites 2022 Watch College Football Online Free](https://www.smarthomebeginner.com/images/2022/08/2022-watch-college-football-online-free.jpg)
![Watch College Football Online FREE [2023]: 🏈 23+ WORKING websites Watch College Football 2023](https://www.smarthomebeginner.com/images/2023/08/college-football-2023-e1692045798880.jpg)
![20 Working websites to watch March Madness online FREE [2022] Watch March Madness Online Free](https://www.smarthomebeginner.com/images/2022/03/march_maddness-scaled.jpg)