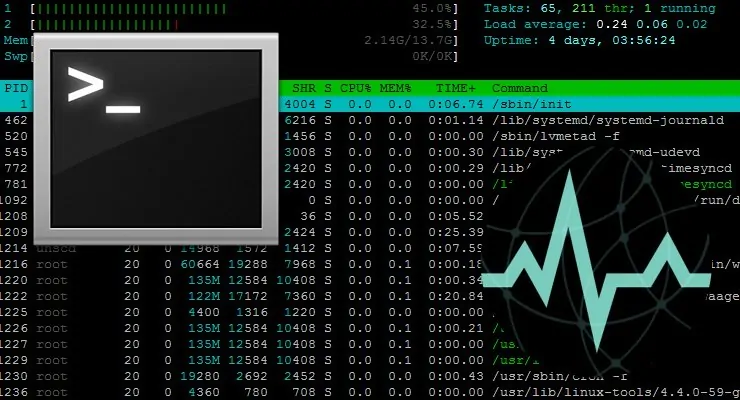
We've often discussed Linux, and if you followed our tutorials, you likely ran a couple of commands using SSH. We will continue covering SSH and Linux server monitoring, so it is a good idea to start with htop. Today you will learn how to install htop for Linux server monitoring, but before we do that, let's recap with a introduction to SSH. [Read: Install SSH server on Ubuntu Linux]
Table of Contents
Introduction to SSH: What is SSH ?
SSH (also known as Secure Shell) is a cryptographic network protocol for operating network services over an unsecured network. Basically, SSH provides an encrypted secure channel between you and the server without the need for a secure network.
The standard port used for SSH is TCP port 22, and SSH is typically used to login to a remote machine such as a server or a Raspberry Pi. But with SSH you can perform various other tasks like tunneling, TCP port forwarding, and X11 connections. You can also transfer files via the SSH File Transfer protocol (SFTP), or secure copy (SCP). For file transfers, my go-to utility is WinSCP.
My personal favorite client for remote SSH sessions in a Windows environments is PuTTY, which is one of the most feature rich SSH and telnet clients made for Windows. PuTTY is a great Windows SSH client that's easy to install. [Read: 10 best SSH Clients for Windows: free alternatives to PuTTY]
What is htop?
htop is an interactive process viewer designed to be an alternative to the old Unix program named Top. Plus, htop offers more functionality and it's the first process viewer used for Linux server monitoring in our introduction to SSH.
Unlike top, htop shows a full list of running processes, as well as resource information about CPU, memory, and swap. [Read: Monit: Home server system load monitoring (CPU, RAM, Swap)]
Another improvement brought by htop is cursor controlled interface and the ability to perform operations without exiting the program. Some of this will be detailed later in this post.
Recommended Guides Secure Shell/SSH:
How to Install htop for Linux Server Monitoring ?
The installation process for htop is really easy and can be completed in under a minute in order to start your Linux server monitoring. I am running Ubuntu Server 16.04, but the installation should work properly on most Linux distributions.
To install htop, enter the following command:
sudo apt-get install htop -y
After the installation is completed, use this command to run htop:
htop
htop Interface
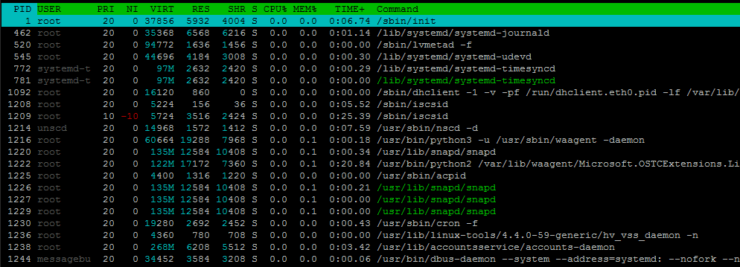
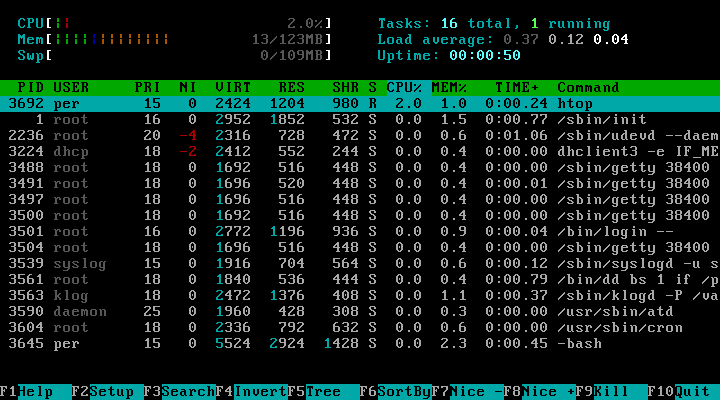
After installing htop, you will be greeted by the interface shown in the following picture. At first glance, it may appear overwhelming but let's beak down each part of its interface. At the top left you will find the CPU, memory, and swap information with animated bars showing you hardware resource consumption. In the top right, you will find information about tasks running on the server, the CPU load average separated for each core, and the system uptime.

In the mid section, htop shows you a list of running processes on the system. For each process you can see lots of information. But the most important is the user owning the process, and the CPU. Additionally, you'll see the memory percentage used by the process and its uptime.
On the bottom, htop lists various options, as shown in the picture below.

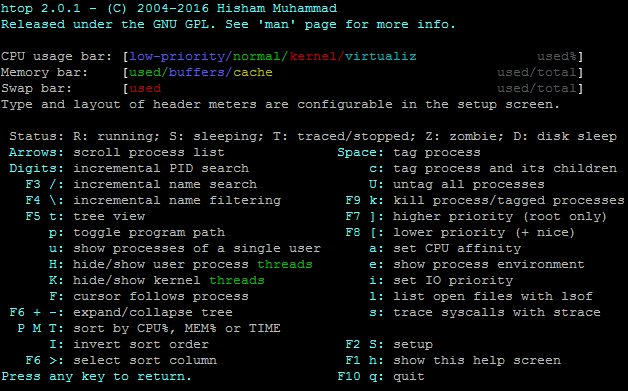
The settings are pretty self-explanatory, but pressing F1 brings up the htop help page.
How to Uninstall htop?
If for any reason, you want to uninstall htop, you can do that by running the following command:
sudo apt-get purge htop -y
SSH is Great, I Want to Learn More!
Congratulations! You managed to install htop, which is one of the first tools you will learn from our introduction to SSH series. After reading our introductory article, you should now know what SSH and htop are, and how these can enable you to connect to a Linux server for monitoring. But SSH can do much more! [Read: Connecting to Ubuntu Server using SSH Keys and Putty]
In our future posts, you will learn how you can connect to a server without using a password by using keys, and how to set up a SOCKS proxy to evade a firewall blocking various resources. Check back soon and learn how to master SSH.



![Ultimate Docker Server: Getting Started with OS Preparation [Part 1] Docker Server Tutorials 1 OS Preparation](https://www.smarthomebeginner.com/images/2024/01/Docker-Series-01-Intro-and-OS-Prep.png)

![30 Best SSH Clients for Windows [2022]: Free and Paid Best SSH Clients for Windows featured image](https://www.smarthomebeginner.com/images/2022/11/image-by-geralt-9301-gerd-altmann-from-pixabay-dotcom-matrix-2883623-1280.jpg)
