If you want to install Headphones music downloader on your Ubuntu server, you have come to the right tutorial. With this guide, we hope to teach you how to get Headphones working in no time in your Ubuntu Server 16.04 installation, with the help of AtoMiC ToolKit. Headphones is a software application that allows you to download music easily from various sources, similar to what CouchPotato does for movies. With the Headphones Ubuntu installation you will be able to download music via your favorite torrent clients or NZB newsgrabbers. [Read: Guide: How to install Kodi MP3 Streams addon]
Usenet is Better Than Torrents:
For apps like Sonarr, Radarr, SickRage, and CouchPotato, Usenet is better than Torrents. Unlimited plans from Newshosting (US Servers), Eweka (EU Servers), or UsenetServer, which offer >3000 days retention, SSL for privacy, and VPN for anonymity, are better for HD content.
| Provider | Rating | Features | Monthly | Yearly |
|---|---|---|---|---|
| Newshosting | >3000 days, unlimited, SSL, VPN | $9.99 | $99.99 ($8.33 / month) | |
| UsenetServer | >3000 days, unlimited, SSL, VPN | $9.99 | $99.99 ($8.33 / month) | |
| Eweka | >3000 days, unlimited, SSL, EU Servers | €7,50 (Special!!!) | ||
| For more plans that may fit your needs please read our Usenet plan selection guide. | ||||
Table of Contents
Install Headphones on Ubuntu Server with AtoMiC ToolKit
It is possible to install Headphones automatically if you use AtoMiC ToolKit. With this application, inexperienced users can get the Headphones application (and several others) installed on their system in no time. This application also allows more experienced users to benefit from an easier method of installation without lots of command line interaction. Install Headphones on Ubuntu with AtoMiC ToolKit, or perhaps try to install Headphones on Debian with this application, which has not been tested, but might be possible.
Using the AtoMiC ToolKit you can also install SickRage on Ubuntu and even Sonarr. If you want to take a look at other tutorials we have written about using AtoMiC ToolKit to install software, read our guide to install SickBeard on Ubuntu - AtoMiC and our guide to get SickRage on Ubuntu - AtoMiC. This tutorial will tell you how to install Headphones on Ubuntu, so let's start with it. [Read: Install CouchPotato on Ubuntu Server – Easy AtoMiC Method]
1. Download and Run AtoMiC ToolKit
To install Headphones on Ubuntu server with the AtoMiC ToolKit, you first have to download and install the tool on your system. After you install AtoMiC ToolKit, you can use it to get more apps on your system via its new GUI. These commands have to be executed one at a time.
sudo apt-get -y install git-core
git clone https://github.com/htpcBeginner/AtoMiC-ToolKit ~/AtoMiC-ToolKit
cd ~/AtoMiC-ToolKit
sudo bash setup.sh
With these commands, you install git-core as superuser. After that, the git-clone command downloads the latest version of AtoMiC ToolKit. Then all the script needs to do is move to the AtoMiC ToolKit folder and run setup.sh. This is done in the last two lines of the script.
2. Agree to Disclaimers and Username
The performance of this script cannot be guaranteed in all environments. This said, the script has worked without problem for many users. It's necessary for you to read the disclaimer and accept it in order to use AtoMiC ToolKit.
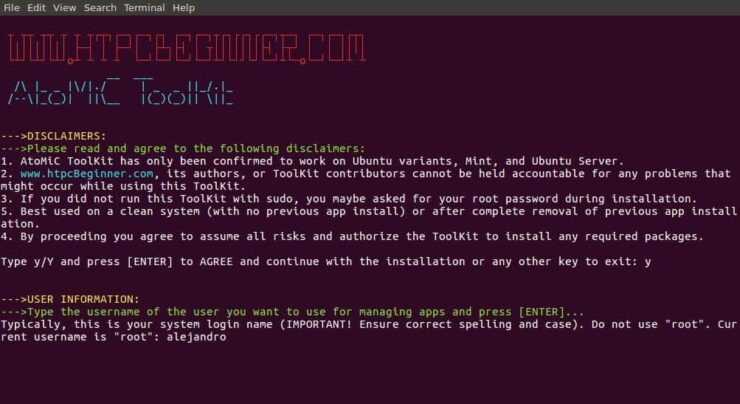
After that, provide an username for you to run the Headphones install. In the picture the username selected is alejandro, which was the username set on the machine. However, you should typically choose your system login name to avoid conflicts. Press enter to continue with the Headphones installation on Ubuntu.
3. Headphones Installation on Ubuntu
From AtoMiC ToolKit main menu, select Headphones. This is done with the arrow keys. After you have selected the appropriate option, press Enter.
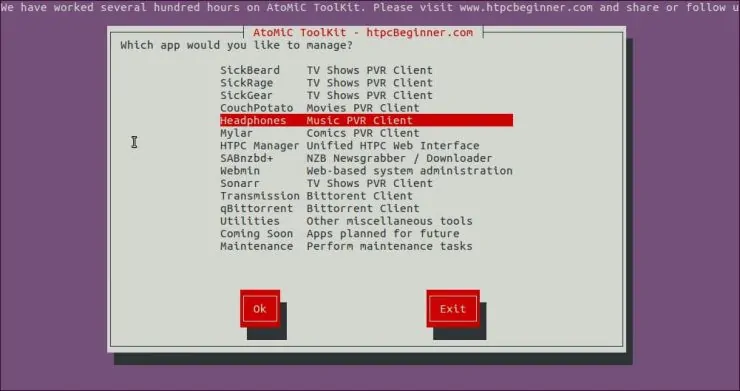
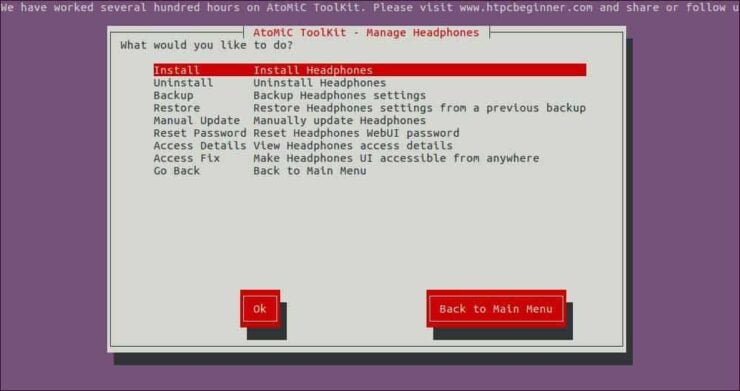
Next, select Install Headphones and press Enter to install Headphones on Ubuntu.
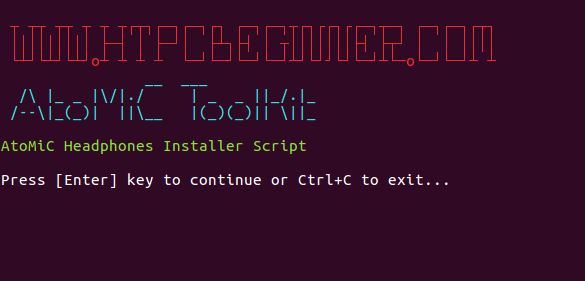
Make sure the correct script is selected. You should see AtoMiC Headphones Installer Script in green letters. Press Enter to confirm your selection.
Wait until the process has been completed and then check if there have been no obvious errors during the installation.
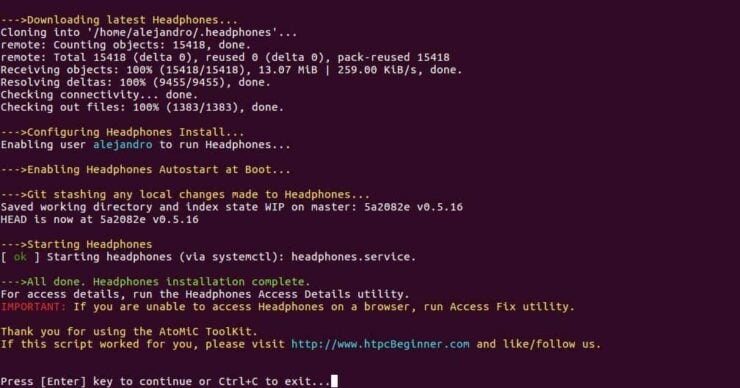
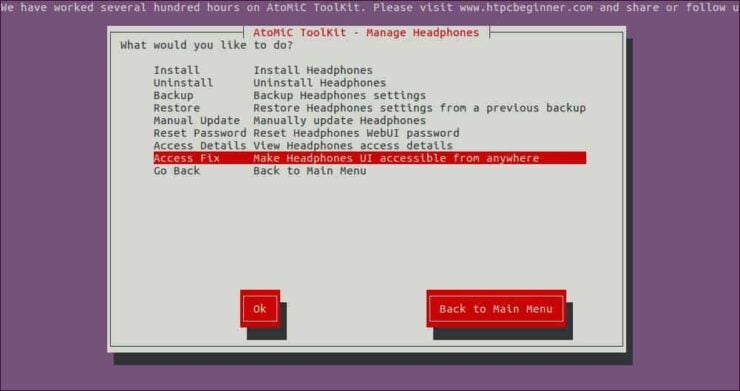
Notice there is a red text about a fix. It is possible that you have to run an extra script before being able to enjoy Headphones on Ubuntu. Luckily, the AtoMiC ToolKit application can help you with this as well. Simply go back to the Headphones app menu, but this time, select Access Fix.
The Access Fix script output should be similar to the one you can see in the following image:
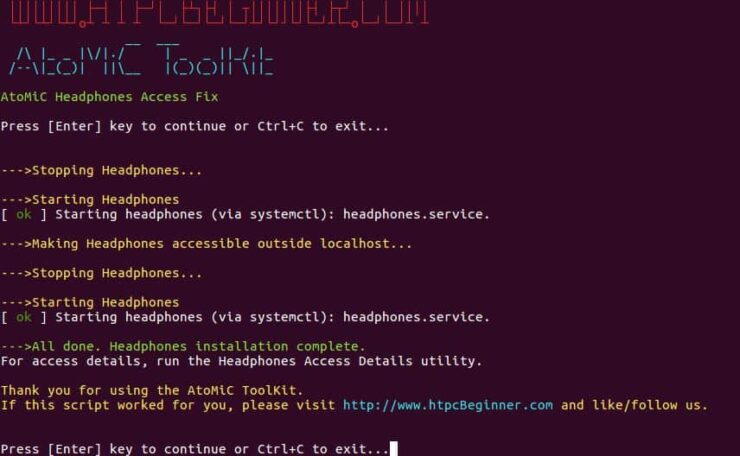
You have successfully completed the process to install Headphones on Ubuntu. Now you can check a few things with the help of AtoMiC ToolKit.
4. Access Headphones
You can access Headphones locally from the URL http://localhost:8181 with any web browser. If you want to know how to access Headphones from any system, AtoMiC ToolKit can help you. It does not matter if it's a local or remote system. Select Access Details from the Headphones submenu in the AtoMiC ToolKit GUI.
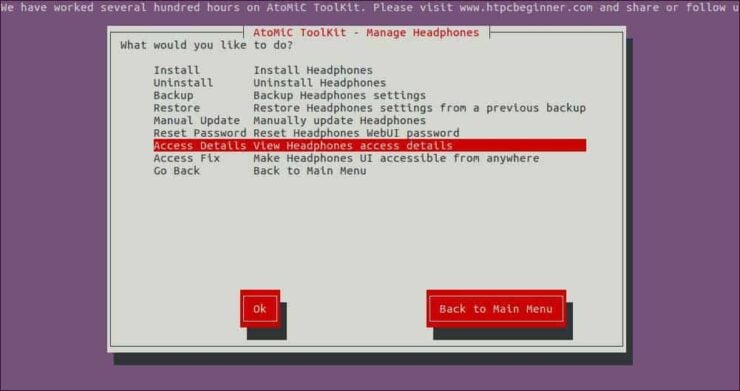
The script will run and then show you the URLs you can use according to your setup on its output. Use one of these suggested URLs depending on your needs in order to access Headphones installation on Ubuntu.
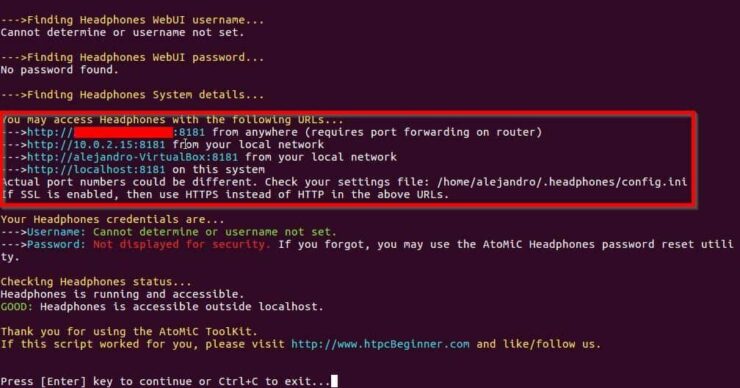
If you want to connect to Headphones remotely from outside of your Local network, and if your system is behind a router or gateway, you will need to configure your ports. Use our guide to setup port forwarding on router and you will also be able to manage Headphones through your smartphone or tablet. [Read: 5 Must have Android apps for HTPC or Home Server control]

5. What to do after you install Headphones on Ubuntu?
Check if the installation was successful. If it was, you should be able to access Headphones from your web browser. You will be greeted by an empty song list. This is OK because you have not downloaded any music yet. As you use Headphones, you will see new songs here. Install new software on your Ubuntu server easily with the help of AtoMiC ToolKit!


![15 Best Jellyfin Plugins [2023] - Supercharge your Media Server Jellyfin Intros Plugin Preview Pre-Roll](https://www.smarthomebeginner.com/images/2022/08/jellyfin-intros-preroll-preview.jpg)


![15 Best Plex Alternatives [2022] - FREE and BETTER Options Best Plex Alternatives feature image](https://www.smarthomebeginner.com/images/2022/08/best-plex-alternatives-feature-image.gif)