If you want to use VPN with your Windows apps to provide you with a secure experience, you're in luck. We presented a tutorial before about installing the OpenVPN client on Windows. While we did not tell you how to configure it then, we are about to amend that. This configuration is easier if you are subscribed to a paid service, such as IPVanish. You probably don't even need to configure the OpenVPN client in this case. You could just install IPVanish client on Windows and select a location from its client. However, if you still want to configure OpenVPN on Windows with IPVanish information, then this tutorial is for you. Most of all, you can also do this with .ovpn files from any provider, or use IPVanish and OpenVPN together. [Read: VPN on Kodi: Should you use it? What does it do?]

Of course, the first requirement to attempt this tutorial would be to have access to IPVanish. Therefore, if you want to use IPVanish and OpenVPN, make sure you have an active subscription as well. Also make sure your OpenVPN client is installed. First of all, go to your account page by clicking the My Account link on the main page of the IPVanish service. Log in, and then click on Server List. Clicking on OpenVPN, on the All OS section on the right sidebar will download a .zip file with lots of .ovpn files. Select the one you want in order to use it with this guide. [Read: Guide: Easy Kodi VPN Ubuntu setup with IPVanish]
Surfshark VPN Exclusive Offer - 82% off ($2.39/month):
♦ Hide your browsing (no logs), Anonymize Streaming and Downloads
♦ Wireguard Protocol support for VPN.
♦ Circumvent Geo/Country Restrictions and access worldwide content
♦ Works on Windows, Mac, Linux, Android, iOS, Router, and more
♦ 1 TB Encrypted Storage
♦ Money back guarantee - Sign Up Now
How to Configure OpenVPN on Windows?
If you want to configure OpenVPN on Windows, and you already have the .ovpn file you want to use, the process is simple. Find the installation directory where you installed OpenVPN. On Windows, it will be C:\Program Files\OpenVPN if you left the default options during installation. You will see several folders. Double click the config one in order to continue to configure OpenVPN on Windows.

You will notice there's only a README file in this folder. Since there are no .ovpn files, we consider this folder empty. If you have the OpenVPN client started, you will see that the context menu on its taskbar tray icon only shows the options Settings... and Exit.
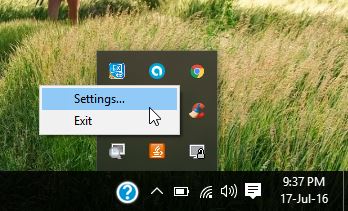
This is about to change, though. In order to configure our VPN connection with an .ovpn file OpenVPN can use, simply place the .ovpn file in the config folder. It will automatically enable an option on the tray taskbar icon for each OpenVPN connection. Besides the .ovpn file, you also need to place in this folder the certificate file, typically with the .crt extension. Only if this file is present along the .ovpn file will you be able to connect. This file is included in the .zip file for IPVanish configurations.
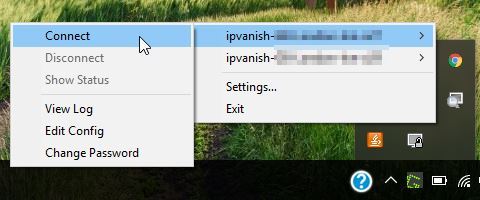
Connecting with IPVanish and OpenVPN
If you click connect on this new configuration, you will be asked for your IPVanish credentials, and then connected to the location configured in the .ovpn file OpenVPN is using, and the process to configure OpenVPN on Windows will be complete.
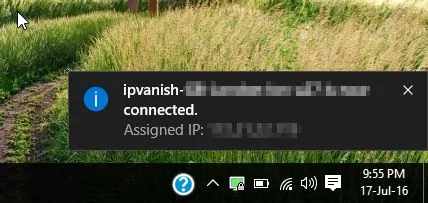
That's it! You can now use this alternative, lightweight client to use your IPVanish and OpenVPN connection or to configure connections with any other providers, as long as they provide you with the .ovpn files. If you want to use IPVanish on an Android box instead, take a look at our guide to use IPVanish on Android. There's also the option to use the Kodi OpenVPN addon, but it requires some extra configuration we may take a look at later. Keep your connections secure and private with a VPN and enjoy all the media Kodi has to offer, with no geographical restrictions!


![8 Amazing Raspberry Pi Ideas [2022]: Beginners and Enthusiasts Raspberry Pi ideas](https://www.smarthomebeginner.com/images/2021/09/raspberry-pi-4-dev-board.jpg)
