If you're setting up your home server, you have several options to organize and manage your media. Particularly, most users who start to plan about their media server debate whether to install Plex or Emby, and each of these apps has their pros and cons. If you have decided to use Plex, and you run an Ubuntu server, this tutorial is for you. To install Plex on Ubuntu server, you don't need specific computer knowledge or being able to perform magic. The procedure to get a Plex Ubuntu server up and running is very straightforward. It is similar to installing other apps on your devices, such as installing Kodi on Ubuntu; though you can install Plex on Ubuntu in a graphical way as well. [Read: Install Plex on Windows 10 media server in minutes]
You should have some means to interact with your server in order for you to install Plex on Ubuntu. For this tutorial we will consider you have a screen hooked up to it, or you are accessing from a computer with a tool that enables you to use remote desktop capabilities. You need also a keyboard, so take a look at wireless HTPC keyboards if you still don't have one.
Best Wireless HTPC and Android TV Box Keyboards:
- Logitech K410 Living-Room Wireless Keyboard with Built-In Touchpad - $37.75
- Logitech Illuminated K830 HTPC Wireless Keyboard and Touchpad - $69.99
- iPazzPort KP-810-10AS Wireless Mini Keyboard Remote with Touch - $15.99
- Rii i8+ 2.4GHz Mini Wireless Keyboard with Touchpad - $22
- LYNEC C120Pro Mini Wireless Gyro Remote Keyboard Mouse - $13
How to install Plex on Ubuntu server?
Open your web browser, and head to the following URL: https://plex.tv/downloads. From the available options, click on computer. A dialog will pop up. You should click on the Linux tab. You will see several versions available for download. Let's focus on how to install Plex if your OS is Ubuntu.
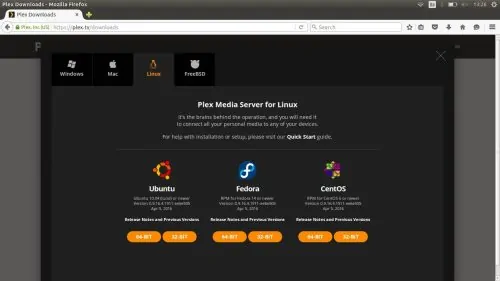
To set up Plex Ubuntu server you need to know if your Ubuntu installation is 32-bit or 64-bit. If you don't know this information, open a terminal with Ctrl + Alt + T, and type the command uname -i. If it returns x86_64, your OS is 64-bit, and if it returns i386, your OS is 32-bits. Click on the appropriate link and prepare to get Plex on Ubuntu. [Read: What Plex Client Hardware is Right for You?]
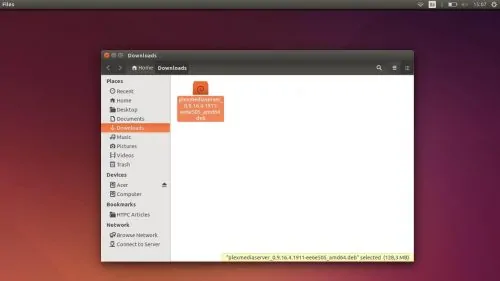
If you are asked about saving the file to your computer, click on Save File, and wait for the download to complete. After it's downloaded, head to your browser download folder, and you will see the .deb package there. Double click it.
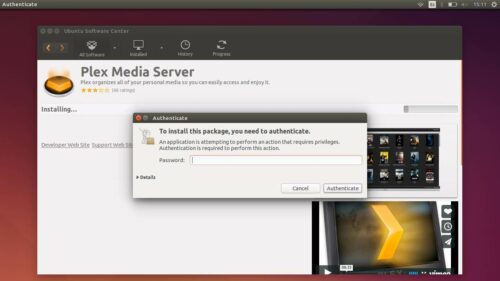
When you double click the file, the Ubuntu Software Center will open. It will show you the Plex Media Server application, and a warning to only install it if you trust the origin of the file. Click on the Install button, and, if you have Ubuntu configured with a password, it will ask you to input that password now. Write it, and then click Authenticate.
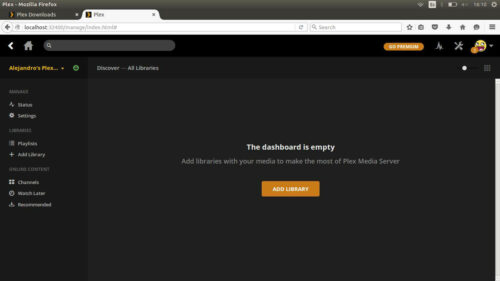
Once you successfully install Plex on Ubuntu, you will be able to see its icon on the sidebar. Click it. This will start your Plex server, and enable you to access the dashboard via your web browser. Do so by heading to the Plex media server URL http://localhost:32400/manage/index.html. You will see Plex terms of service. Read them if you want, and then click Agree. Congratulations! Now you are on the Plex dashboard and you're ready to use Plex on Ubuntu. If you want to add more features to your Plex server, check out how to install Plex Web Tools 2.0, to make it easier for you to get channels on your Plex server. You can also take a look at the best Plex client devices, to ensure you always get a smooth experience while streaming from your home server. Stay tuned for our tutorials and make the most out of your Plex installation!



![10 Best Plex Client Devices [2022] - STUTTER-free Streaming Best Plex Client Devices](https://www.smarthomebeginner.com/images/2022/02/best-nas-for-plex-server-featured-images-from-pexels-photography-maghradze-ph-3764958-e1648542743772.jpg)

![10 Best Emby Client Devices [2023] - 4k, Hardware Transcoding, etc. setup emby server with raspberry pi](https://www.smarthomebeginner.com/images/2017/02/setup-emby-server-with-raspberry-pi.jpg)
![10 Best Jellyfin Client Devices [2022] - 4k, Hardware Transcoding, etc. Jellyfin Roku App](https://www.smarthomebeginner.com/images/2021/02/jellyfin-roku-client-app-ft.jpg)