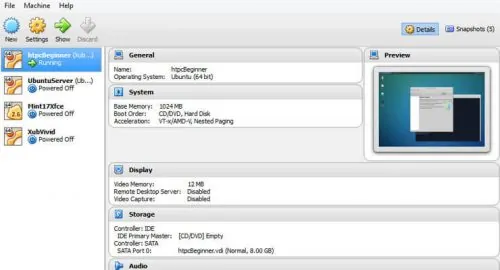
In this post, we will see how to install VirtualBox on Windows operating system including Windows 7, Windows 8.X, and Windows 10. VirtualBox, originally developed by Sun MicroSystems and now owned by Oracle, can simulate a standalone computer.
VirtualBox is a Type 2 hypervisor. Unlike a Type 1 hypervisor such as Proxmox or ESXi, VirtualBox installs as an app on top of the operating system.
Each standalone computer (aka virtual appliance) can run its own operating system (guest OS) and is self-contained (delete the appliance and your host system is back to its original state). The appliances can interact with each other and be a part of your home network and will be treated as a separate system. Because of these features and more, VirtualBox allows you to test various operating systems, without making permanent changes to your host OS.
We recently presented some of the best home server operating systems. VirtualBox would allow you to test these operating systems before you select one. Alternatively, you may actually run your server operating system or media server from your VirtualBox instance 24/7: for example you may run a 24/7 Ubuntu Home, media, or file server guest OS from within your Windows laptop. Sounds exciting? How to run your server from VirtualBox is a topic for another post. For now, let us look at how to install VirtualBox on Windows 8.1. This guide should also work on Windows 7 and Windows 10.
Recommended HTPC / Home Server Builds:
- Best Home Theater PC Build 2017 to do it all (Plex, Kodi, NAS, Gaming)
- Best Emby Server builds 2018 – Pre-built and DIY options
- Medium Budget 4K HTPC Build 2017 for Kodi, Plex and Gaming
- Cheap 4K HTPC Build for Kodi, OpenELEC, and LibreELEC 2017
- Low Power Home Server Build 2017 for Network File and Media Storage
- Best HTPC for Kodi with 4K on a Medium Budget 2017 (~$400)
- Energy efficient budget HTPC-NAS combo build 2016
Before you begin, enable Intel VT-x hardware virtualization in BIOS or UEFI firmware. This is required for VirtualBox to run.
Install VirtualBox on Windows
Recently, we published Ubuntu VirtualBox installation guide. Windows VirtualBox installation is much simpler when compared to Linux.
First, head over the VirtualBox download page, scroll down and find the latest version (currently 4.3.28). Click on the latest version number and then in the following page, scroll down, find the .exe file, and download it to a known location on your Windows computer.

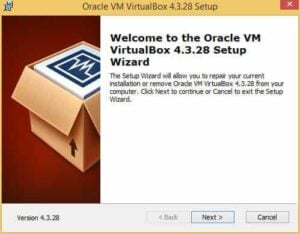
Once VirtualBox Windows installer is downloaded, run the executable file and follow through onscreen instructions to install VirtualBox on Windows. VirtualBox installs virtual network adapters and therefore you may lose network connectivity temporarily during installation.
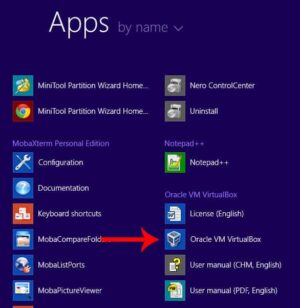
After VirtualBox installation finishes you will have to restart your computer. After reboot, VirtualBox should be available in your apps as shown below. You can now run VirtualBox and create Windows virtual machine with almost any OS you can think of. In a separate guide, we will show you how to install OS on VirtualBox.
There you have it, Virtual Machine for Windows. You may also use this guide to install VBox on all editions of Windows. Using Windows VirtualBox Extension pack or VirtualBox Guest Additions, you can add several more features to VirtualBox. VMware is another major virtualization software, but VirtualBox has always been my favorite, even-though it has its quirks. Go ahead install VirtualBox on Windows play with almost any OS.
Complete Guide to Setting Up a Home Server on VirtualBox Virtual Machine:
- Install VirtualBox - Windows 7/8/10 / Ubuntu/Debian
- Install VirtualBox Extension Pack - Linux and Windows Host
- Install Guest OS on Virtual Box - Ubuntu Server
- Install VirtualBox Guest Additions - Windows Guest / Linux Guest
- Update VirtualBox Guest Additions - Windows Guest / Linux Guest
- Setup VirtualBox Shared Folder - Windows and Linux
- Mount VirtualBox Shared Folder - Windows Guest / Ubuntu Guest
- Access USB Drive on VM - Windows and Linux Guest
- Configure Home Server on VirtualBox - Ubuntu Server

![5 Best Mini PC for Proxmox Home Server [2024] Best Mini PC for Proxmox](https://www.smarthomebeginner.com/images/2024/04/Best-Mini-PC-for-Proxmox.png)
